
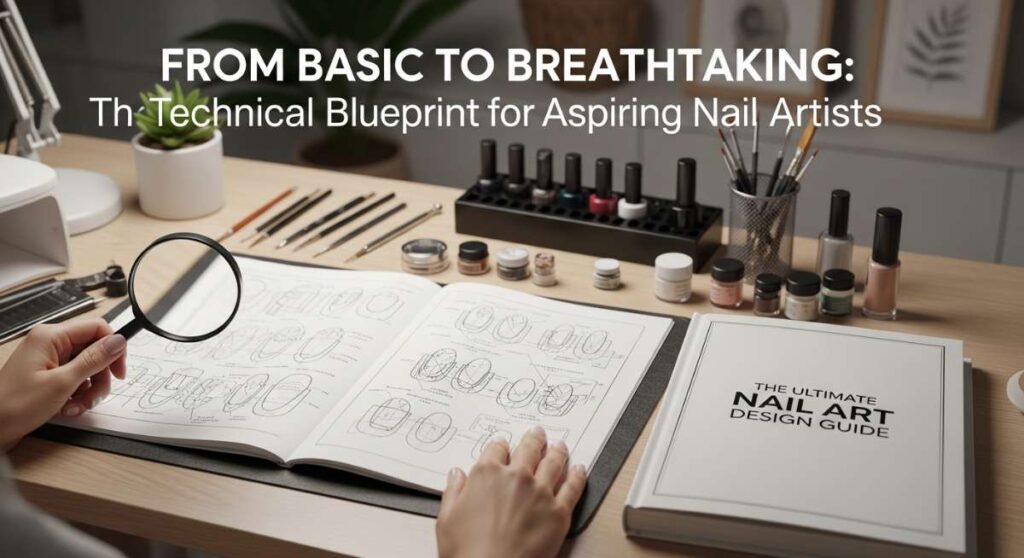
From Basic to Breathtaking: The Technical Blueprint for Aspiring Nail Artists
Hello, my loves! Welcome back to our little corner of the internet where we turn the everyday into something magical. There is something so incredibly therapeutic about the ritual of painting your nails, isn’t there? It’s like a cloud-soft embrace for your soul, a quiet moment where the only thing that matters is the stroke of a brush and the beauty blooming at your fingertips. I truly believe that our hands tell our stories, and giving them a little extra love is the ultimate act of self-care.
Lately, I’ve been diving deep into the technical side of nail artistry, and I wanted to share my personal blueprint with you. Whether you’re sitting at your kitchen table with a single bottle of polish or you have a dedicated studio, remember that every masterpiece starts with a single, gentle stroke. We aren’t just painting nails today; we are crafting tiny canvases of joy. Let’s get cozy, grab a cup of tea, and transform those basic tips into breathtaking art together.
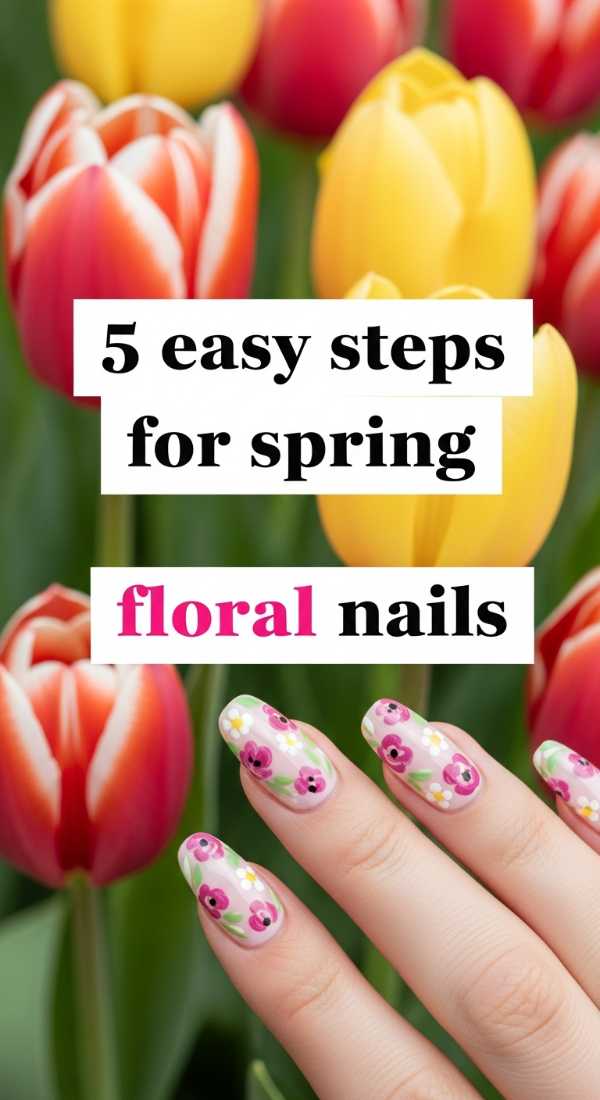
5 Easy Steps for Spring Floral Nails
Why to love these Nails:
Oh, darlings, these are like carrying a secret garden right on your hands. They are soft, whimsical, and perfectly capture that feeling of the first warm breeze of the season. Whenever I wear these, I feel like I’m walking through a field of wildflowers, even if I’m just typing away at my desk.
Essential Items:
- Pastel base polish (soft pink or lavender)
- White and yellow acrylic paint or polish
- A fine detailing brush or dotting tool
- Clear top coat
How to Prepare:
- Apply two thin layers of your pastel base and let dry completely.
- Use a dotting tool to create five small white dots in a circle for the petals.
- Place a tiny yellow dot in the center of each circle.
- Add small green leaves if you’re feeling adventurous.
- Seal the bloom with a glossy top coat.
Budget Range
- Essie ‘Soothe Hole’ Polish ($10)
- Nail Art Brushes Set ($6)
- Sally Hansen Top Coat ($7)
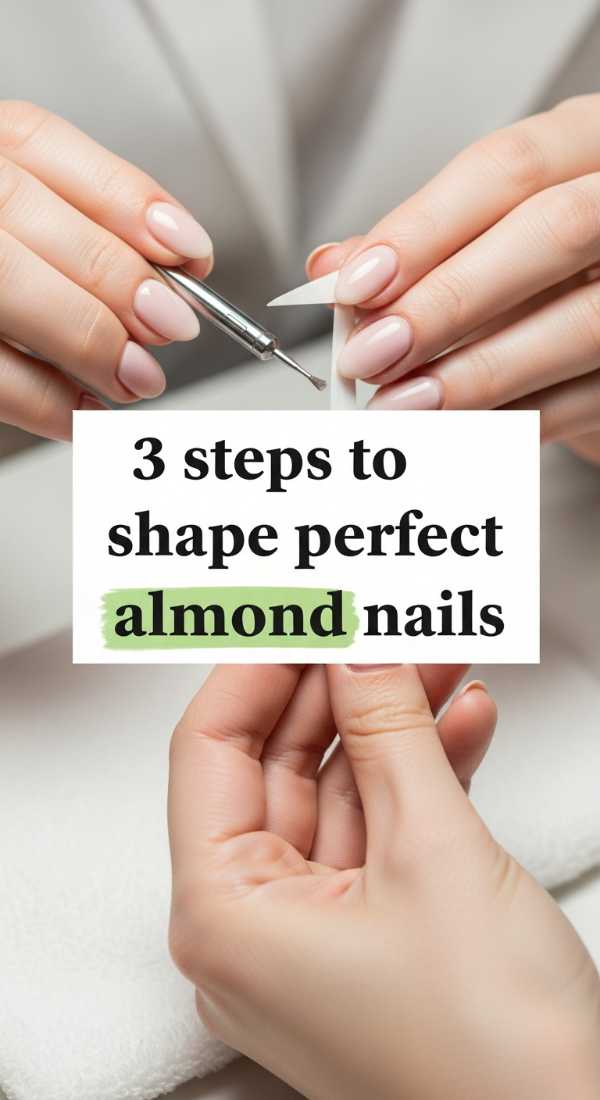
3 Steps to Shape Perfect Almond Nails
Why to love these Nails:
Almond nails are the epitome of elegance, my loves. They elongate your fingers and provide such a sophisticated, soft silhouette. It’s a shape that feels both modern and timeless, giving you that ‘effortlessly put-together’ vibe we all adore.
Essential Items:
- High-quality nail file (180/240 grit)
- Nail clippers
- Buffing block
How to Prepare:
- Find the exact center of your nail tip and mark it mentally.
- File the sides at a slant toward that center point, keeping the movement fluid.
- Round off the peak to ensure it’s a soft curve rather than a sharp point.
Budget Range
- Revlon Emery Boards ($4)
- Flowery Blue Buffer ($3)
- Tweezerman Clippers ($12)
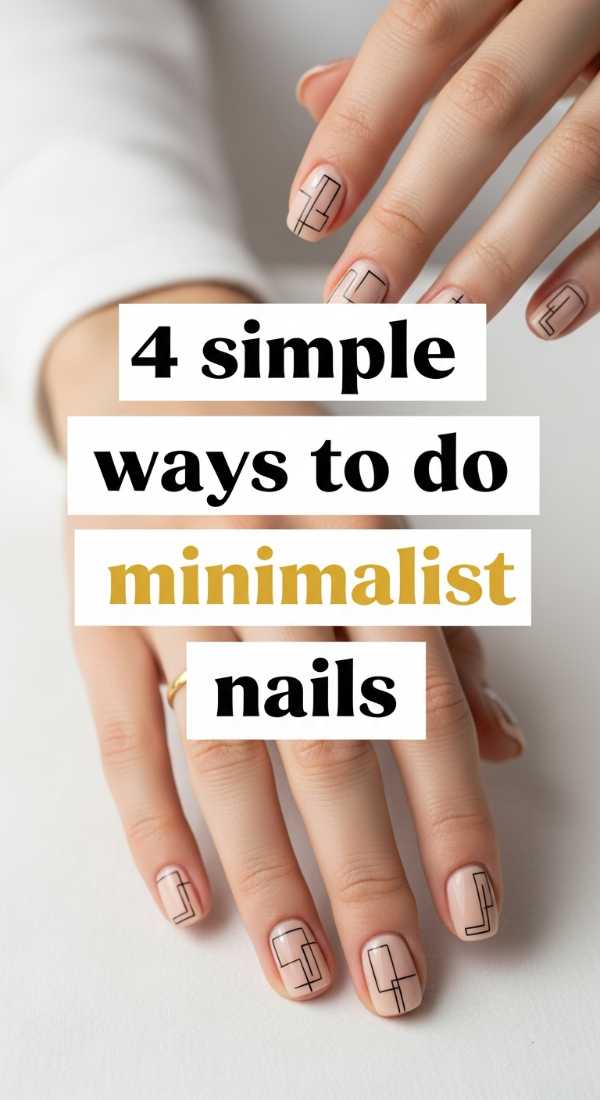
4 Simple Ways to Do Minimalist Nails
Why to love these Nails:
There is such a quiet power in simplicity. Minimalist nails are for those days when you want to feel clean, grounded, and chic without the noise. They whisper elegance rather than shouting it, and they pair perfectly with every single outfit in your closet.
Essential Items:
- Sheer nude polish
- Black or gold striping tape
- Tiny nail studs
- Matte or glossy top coat
How to Prepare:
- Apply a single coat of sheer nude for a ‘your nails but better’ look.
- Place a single vertical gold stripe down the center of the ring finger.
- Or, add a single tiny black dot at the base of each nail.
- Finish with a high-shine top coat to lock in the ‘glass’ effect.
Budget Range
- Zoya ‘Naked Nails’ System ($15)
- Gold Striping Tape ($5)
- Orly Bonder Base ($10)
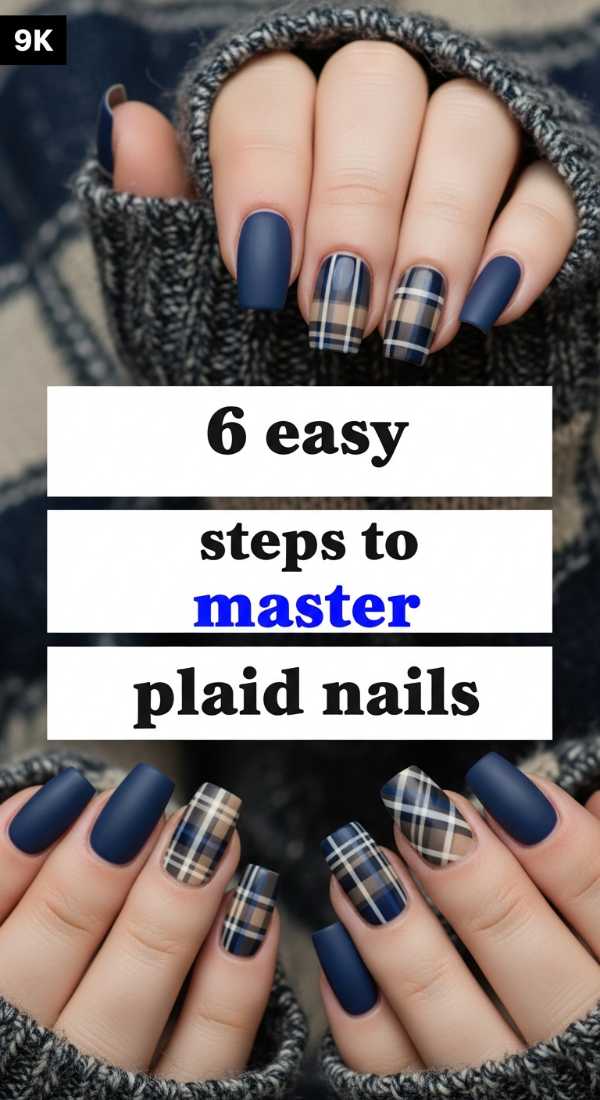
6 Easy Steps to Master Plaid Nails
Why to love these Nails:
Plaid is like a warm hug in nail form! It’s cozy, intellectual, and surprisingly easy once you find your rhythm. These nails make me want to curl up with a leather-bound book and a cashmere blanket. It’s all about the intersection of lines and love.
Essential Items:
- Opaque base color (like cream or navy)
- Two contrasting liner polishes
- Steady hand or striping tape
- Thin liner brush
How to Prepare:
- Paint your base color and let it dry entirely.
- Draw two horizontal lines with your first contrasting color.
- Draw two vertical lines crossing over the horizontal ones.
- Use your second contrasting color to draw thinner lines inside the grid.
- Fill in the tiny squares where the lines meet for depth.
- Apply a thick top coat to level out the texture.
Budget Range
- Holt Copenhagen Liner Set ($18)
- OPI ‘Infinite Shine’ ($13)
- Seche Vite Top Coat ($9)
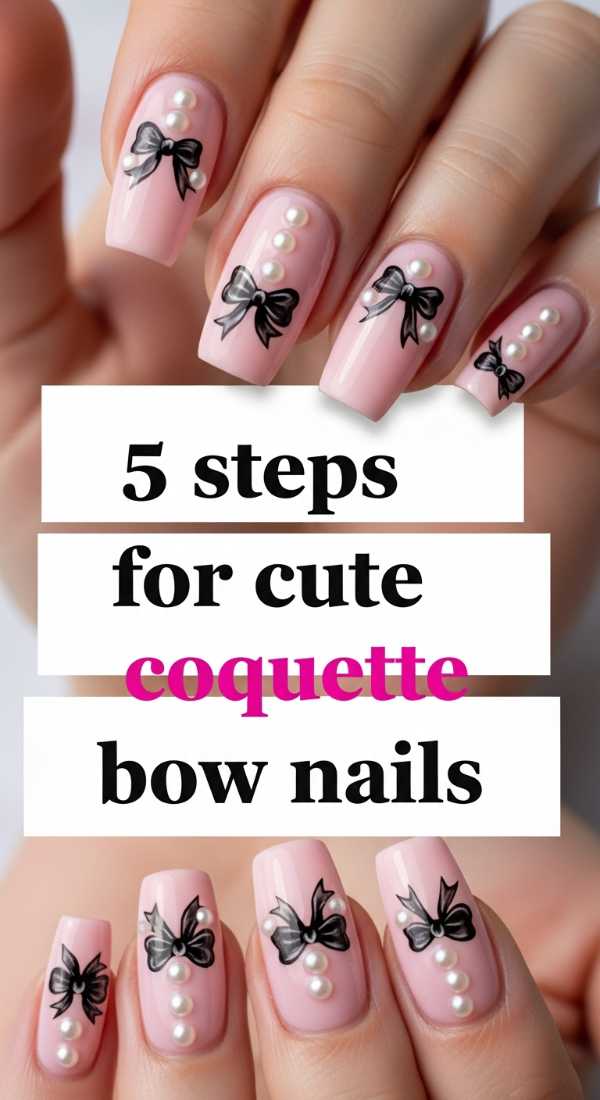
5 Steps for Cute Coquette Bow Nails
Why to love these Nails:
The coquette aesthetic is just pure, unadulterated joy. These little bows are so dainty and feminine; they make every movement of your hands feel like a dance. It’s about embracing your inner girlhood and finding beauty in the most delicate details.
Essential Items:
- Pale pink polish
- White liner gel or polish
- Small dotting tool
- Fine detail brush
How to Prepare:
- Paint your nails a soft, milky pink.
- Place two dots side-by-side where you want the center of the bow.
- Draw two small triangles pointing inward toward the dots.
- Add two little ‘ribbon’ tails flowing downward.
- Place a tiny pearl or dot in the center of the bow.
Budget Range
- DND Gel Polish ($9)
- Nail Art Pearls ($4)
- Beetles Liner Brushes ($8)
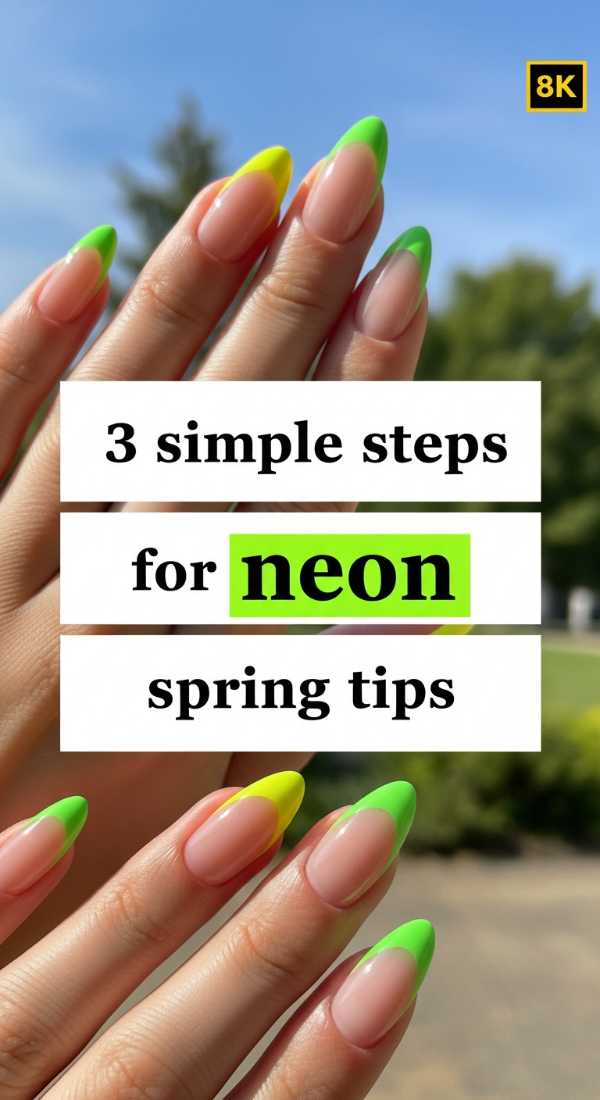
3 Simple Steps for Neon Spring Tips
Why to love these Nails:
When the sun finally breaks through the winter clouds, these neon tips are my go-to! They are high-energy and so fun. It’s a modern twist on the classic French that says you’re ready to embrace the vibrant energy of the new season.
Essential Items:
- Neon green or pink polish
- French manicure guides or a sponge
- Clear base
How to Prepare:
- Apply a clear or sheer nude base coat.
- Swipe the neon color across the very tip of your nail in a soft arc.
- Clean up the edges with a brush dipped in acetone for a sharp finish.
Budget Range
- China Glaze Neon Collection ($8)
- Clean-up Brush ($5)
- Pure Acetone ($3)
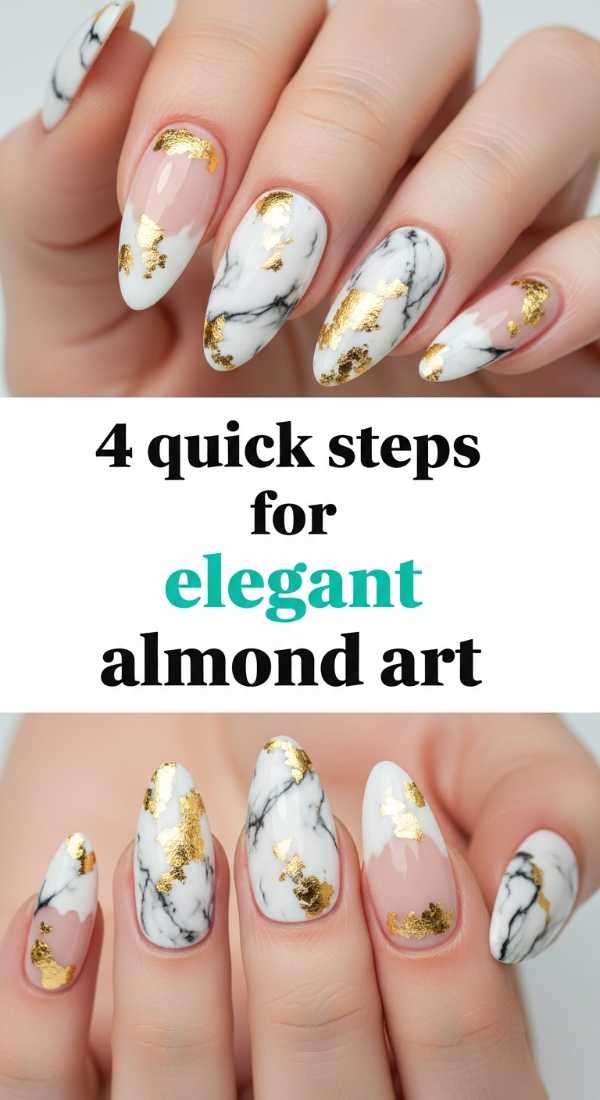
4 Quick Steps for Elegant Almond Art
Why to love these Nails:
This is where technical skill meets soft-focus beauty. Elegant almond art focuses on negative space and soft swirls. It’s the kind of manicure that makes you feel like a goddess of old, graceful and completely in tune with your own light.
Essential Items:
- White polish
- Gold leaf or gold flakes
- Nude base
- Tweezers
How to Prepare:
- Prep your almond shape and apply a nude base.
- Use a brush to paint a soft, organic white wave across one side of the nail.
- Apply tiny flecks of gold leaf onto the wet white polish.
- Finish with a double layer of top coat for a smooth, marble-like finish.
Budget Range
- Gold Leaf Sheets ($7)
- Bio Seaweed Gel ($12)
- Kupa Top Coat ($15)
5 Steps to Design Trendy Heart Nails
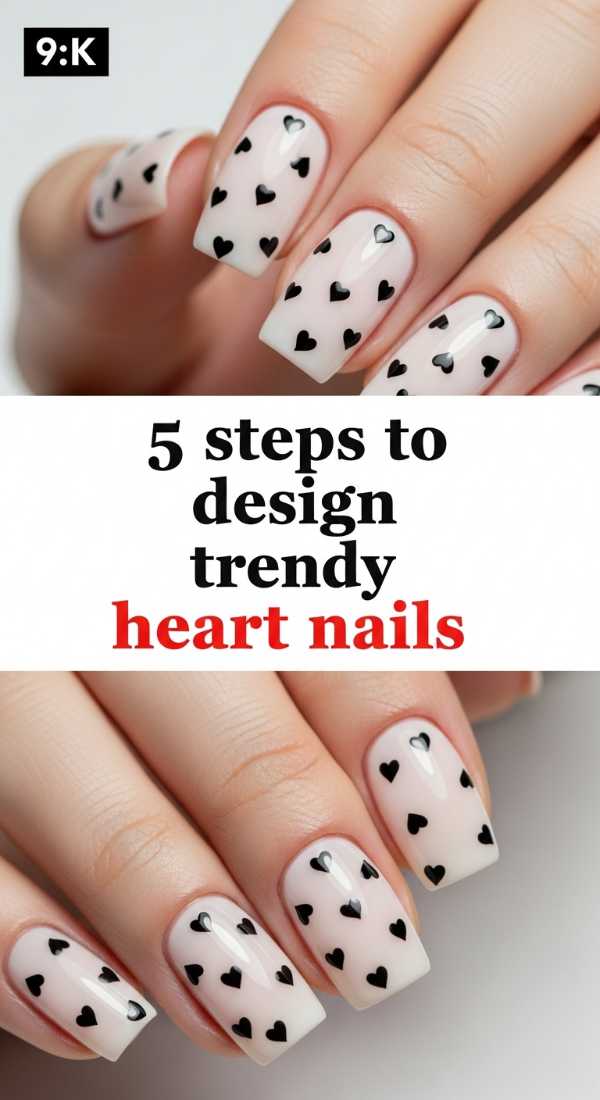
Why to love these Nails:
Wearing your heart on your sleeves is one thing, but wearing them on your nails? That’s pure magic. These are sweet, trendy, and remind us to lead with love in everything we do. They are surprisingly versatile and always bring a smile to my face.
Essential Items:
- Red or deep pink polish
- Large dotting tool
- Toothpick or fine brush
How to Prepare:
- Apply your favorite base color.
- Place two dots of red polish side-by-side with your dotting tool.
- Use a toothpick to drag the bottom of each dot downward to a point.
- Connect the two paths to form the perfect heart shape.
- Let dry completely before sealing.
Budget Range
- Essie ‘Really Red’ ($10)
- Dotting Tool Set ($5)
- OPI Base Coat ($11)
6 Steps to Achieve Matte Spring Nails

Why to love these Nails:
There is something so velvety and luxurious about a matte finish. It transforms bright spring colors into something soft and muted, like a dried flower petal. It feels modern, sophisticated, and incredibly touchable.
Essential Items:
- Pastel polishes
- Matte top coat
- Cuticle oil (apply after!)
How to Prepare:
- Clean and buff the nail surface thoroughly.
- Apply two coats of your chosen pastel shade.
- Ensure the color is 100% dry to avoid streaking.
- Apply a generous layer of matte top coat.
- Wait for the ‘magic’ to happen as it dries from glossy to flat.
- Finish with cuticle oil around the edges for a professional look.
Budget Range
- OPI Matte Top Coat ($11)
- CND Vinylux Pastels ($10)
- SolarOil Cuticle Care ($9)
4 Steps for Simple Geometric Nail Art

Why to love these Nails:
Geometric art is for my loves who find beauty in structure. It’s balanced, clean, and looks incredibly technical even though it’s quite simple to achieve. It’s like a little architecture for your hands!
Essential Items:
- Two contrasting colors
- Washi tape or nail tape
- Angled brush
How to Prepare:
- Paint a base color and let it dry fully (this is vital!).
- Place a piece of tape diagonally across half the nail.
- Paint the exposed half with your second color.
- Peel the tape away immediately while the polish is still wet for a crisp line.
Budget Range
- Washi Tape ($3)
- Sally Hansen Insta-Dri ($6)
- Manicure Cleanup Pen ($5)
Embracing Your Inner Artist
My darlings, I hope this guide feels like a warm invitation to play and create. Nail art isn’t about perfection; it’s about the joy of the process and the little spark of happiness you feel every time you catch a glimpse of your hands throughout the day. You are the artist of your own life, and these ten designs are just the beginning of your breathtaking journey. Wear your art with pride, stay soft, and keep shining!