
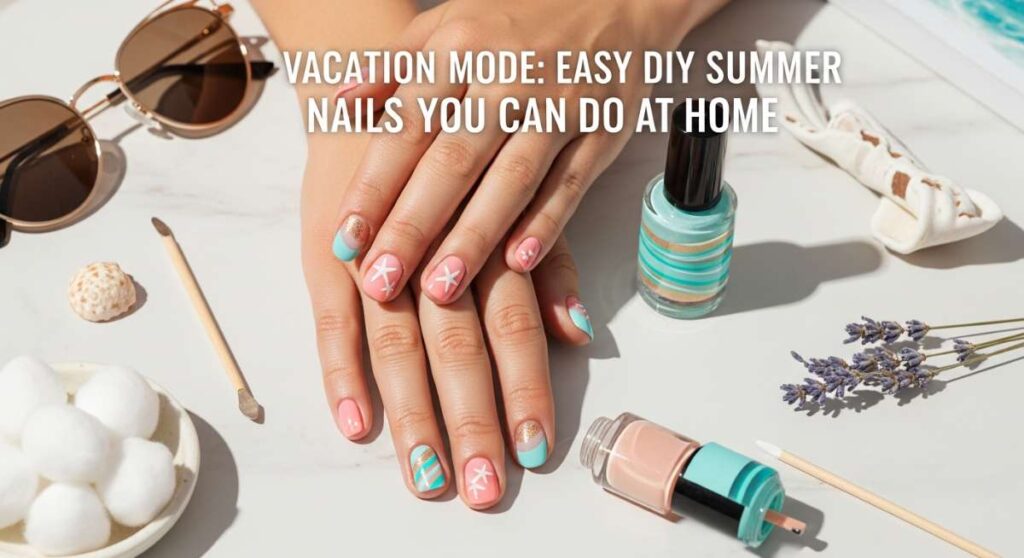
Vacation Mode: Easy DIY Summer Nails You Can Do at Home
Hi, my sweet loves! Can you feel it? That soft, golden warmth stretching across your skin, the scent of sea salt in the air, and that blissful realization that vacation is finally here. There is something so magical about those quiet moments before a trip—the humming excitement as you pack your bags and the tiny rituals of self-care that make us feel like our most radiant selves. I’ve always found that a fresh, vibrant manicure is the ultimate mood-setter, like a little love letter to the adventures waiting just around the corner.
Today, I’m bringing you into my sun-drenched little corner of the world to share my favorite summer nail secrets. Whether you’re lounging by a crystal-clear pool or dancing under the stars, these designs are meant to be a cloud-soft embrace of color and joy. Grab your favorite iced matcha, find a cozy spot with plenty of light, and let’s create something beautiful together. You don’t need a professional studio to look like a vacation queen—just a little time for yourself and a whole lot of heart.
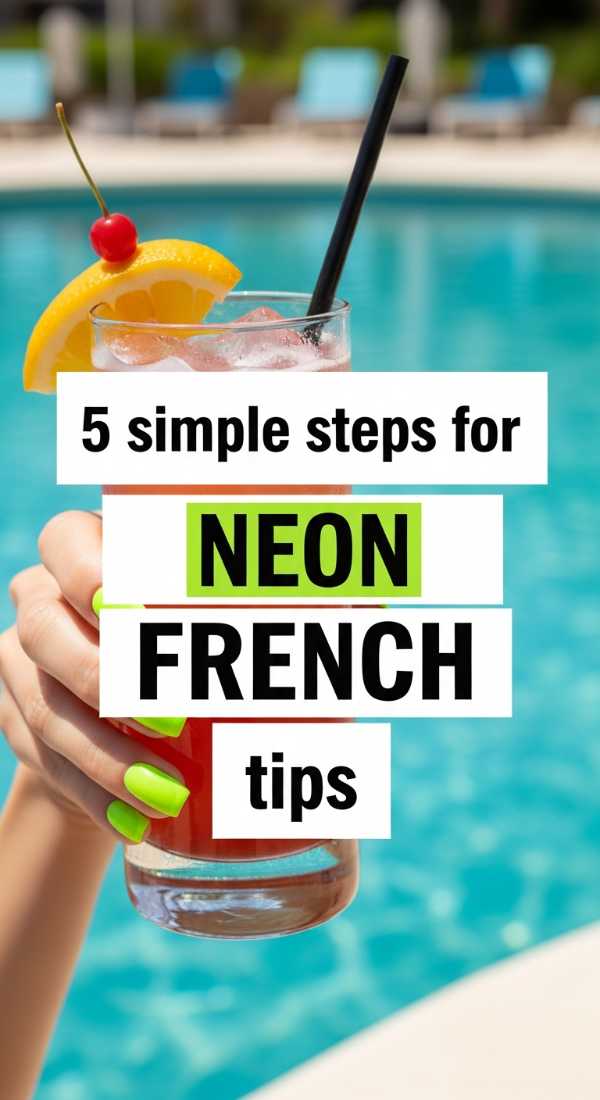
The Electric Twist: 5 Steps for Neon French Tips
Why to love this Design:
Oh, loves, this is the ultimate ‘cool girl’ summer look! It takes that timeless, sophisticated French tip and douses it in a splash of neon energy. It’s subtle enough for the office but pops like crazy against a beach towel.
Essential Elements:
- Nude or sheer pink base coat
- Electric lime or hot pink neon polish
- Fine liner brush
- Nail guide stickers (optional)
- High-gloss top coat
How to Prepare:
- Apply two coats of your favorite sheer nude base and let dry completely.
- Place a guide sticker just below the tip of your nail for a clean curve.
- Swipe your neon polish across the tip, ensuring even coverage.
- Carefully peel the sticker while the polish is still slightly tacky.
- Seal the look with a thick layer of gloss to make that neon shine.
Budget Range
- Essie Skinny Dip (Base) – $10
- Orly Neon Heat – $12
- Nail Guide Stickers – $5
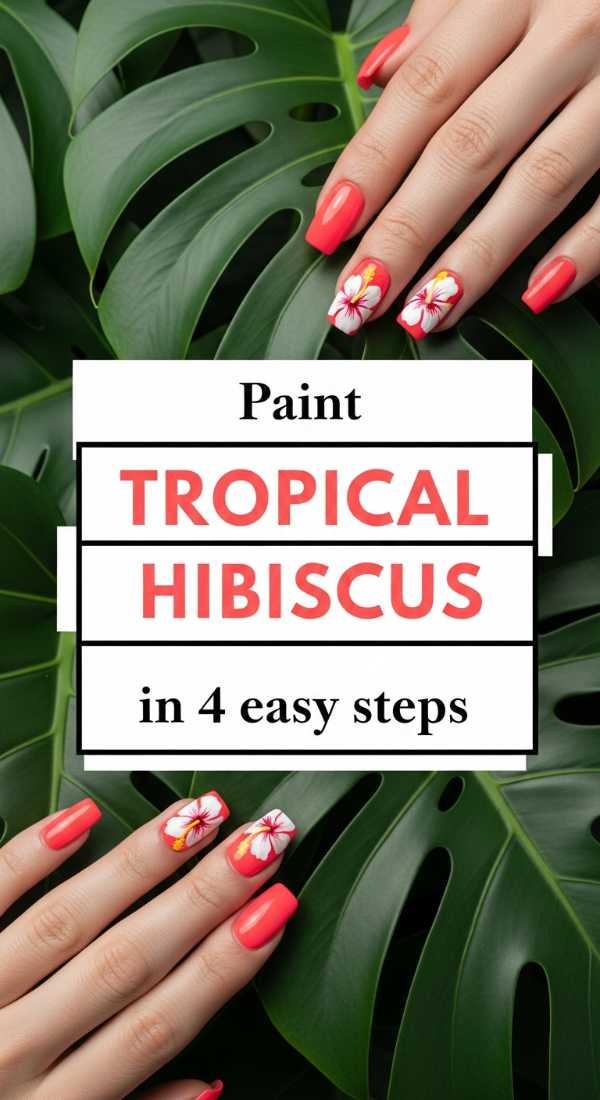
Island Petals: Paint Tropical Hibiscus in 4 Easy Steps
Why to love this Design:
This design feels like a soft breeze through palm trees. Painting a delicate hibiscus on your ring finger is the perfect way to carry the spirit of the islands with you, no matter where your toes are planted.
Essential Elements:
- Bright white polish
- Coral or red polish
- Yellow polish for the center
- Dotting tool or toothpick
How to Prepare:
- Paint five teardrop shapes in a circle using your coral polish to create the petals.
- While wet, drag a bit of white from the outer edge of each petal toward the center.
- Place a tiny yellow dot in the very middle of the flower.
- Add a few tiny white dots around the center for a realistic pollen look.
Budget Range
- OPI Alpine Snow – $11
- Zoya Wendy (Coral) – $12
- Nail Dotting Tool Set – $6
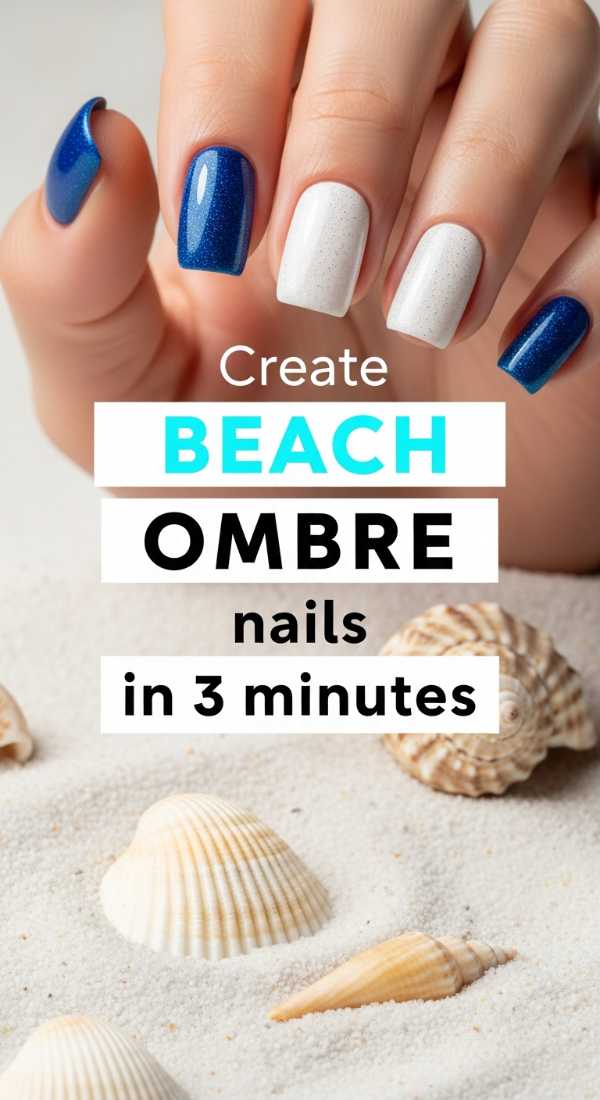
Ocean Breeze: Create Beach Ombre Nails in 3 Minutes
Why to love this Design:
If you close your eyes, you can almost hear the waves crashing. This ombre transition from sandy beige to deep turquoise is a dream come true for my beach-loving souls who want a professional look in record time.
Essential Elements:
- Sand-colored polish
- Turquoise or teal polish
- Cosmetic makeup sponge
- Liquid latex (for easy cleanup)
How to Prepare:
- Paint your nails with the sandy beige color and apply liquid latex to the skin around the nail.
- Paint a stripe of beige and a stripe of turquoise side-by-side on your makeup sponge.
- Dab the sponge onto your nail repeatedly until the colors blend softly, then finish with top coat.
Budget Range
- Sally Hansen Sand Storm – $7
- China Glaze Too Much Of A Good Fling – $8
- Makeup Sponges (Bulk) – $4
The Pro Glow: 6 Secrets for Bright Vacation Acrylics
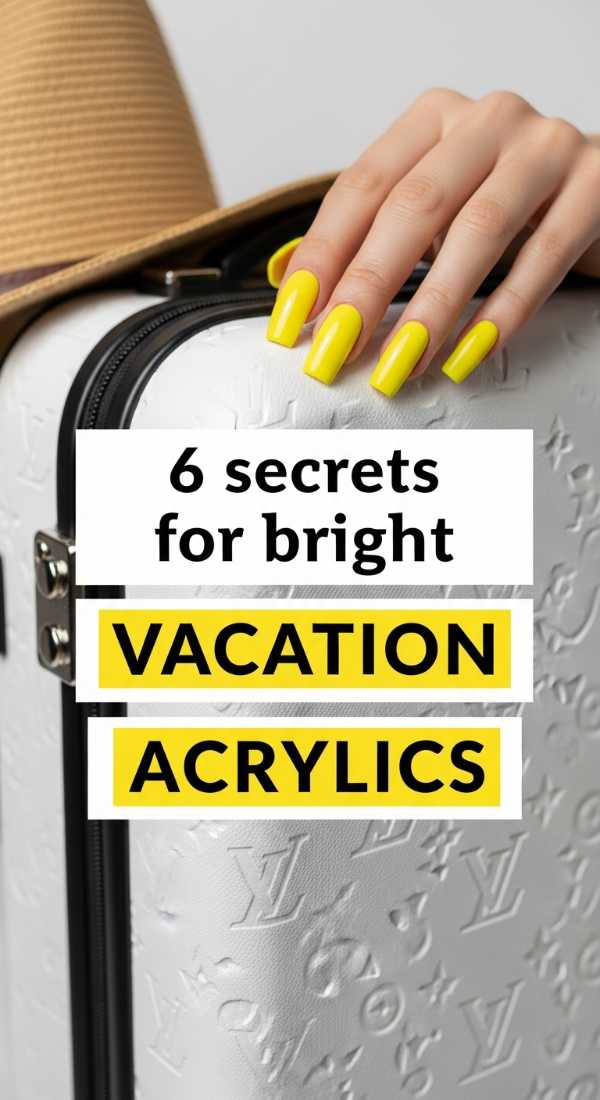
Why to love this Design:
For my loves who adore the extra length and durability of acrylics, keeping them bright during a sun-soaked trip can be a challenge. These secrets ensure your vacation set stays as vibrant as your first day out.
Essential Elements:
- UV-resistant top coat
- Cuticle oil (coconut scented!)
- Alcohol-free sanitizer
- Buffing block
How to Prepare:
- Secret 1: Always apply a UV-protective top coat to prevent sun-fading on neon shades.
- Secret 2: Avoid suntan lotions with heavy oils touching the acrylic surface to prevent lifting.
- Secret 3: Use a non-acetone polish remover if you need to fix a small smudge.
- Secret 4: Hydrate your cuticles twice a day to keep the set looking fresh and integrated.
- Secret 5: Gently buff the surface if they lose their shine from chlorine exposure.
- Secret 6: Choose a semi-transparent ‘jelly’ neon for a modern, airy vacation feel.
Budget Range
- Kiara Sky UV 60 Top Coat – $15
- Cuccio Milk & Honey Cuticle Oil – $13
- Professional Buffing Block – $3
The Glazed Pop: Apply Neon Chrome in 2 Simple Steps
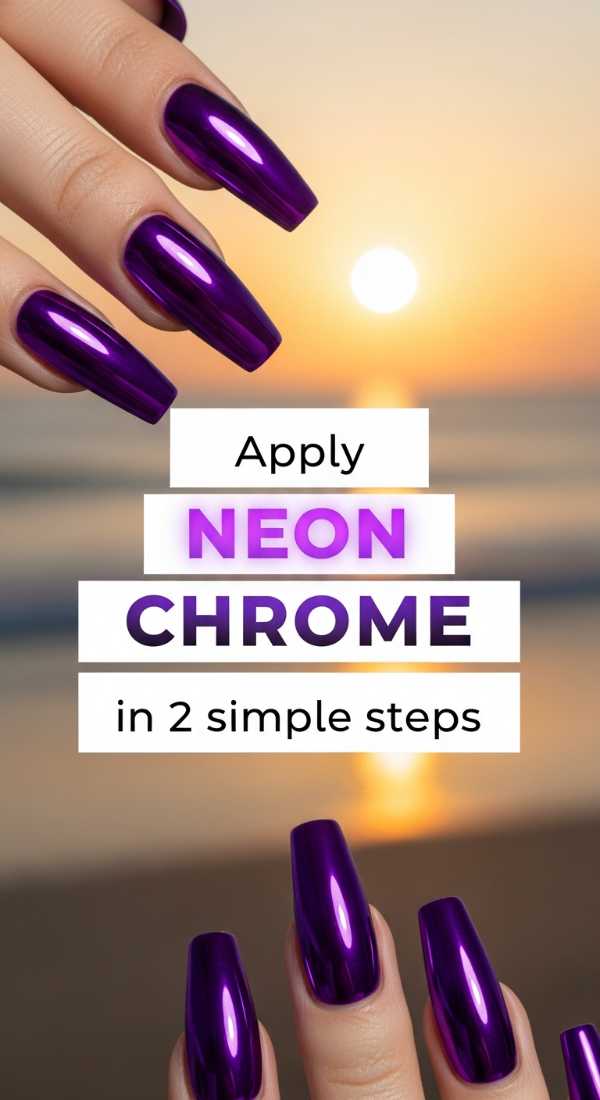
Why to love this Design:
It’s the Hailey Bieber aesthetic but with a summer party twist! This finish catches the light beautifully under the sun, giving your hands a magical, ethereal glow that is simply irresistible.
Essential Elements:
- Neon gel polish (base)
- No-wipe top coat
- Neon chrome powder
- Eyeshadow applicator
How to Prepare:
- Apply and cure your neon gel color and a no-wipe top coat.
- Use an applicator to rub the chrome powder onto the nail until it’s mirrored, then seal with one final top coat.
Budget Range
- Born Pretty Chrome Powder – $9
- Gelish No-Wipe Top Coat – $14
- MelodySusie LED Nail Lamp – $20
Retro Vibes: Master Summer Swirls in 5 Quick Tips
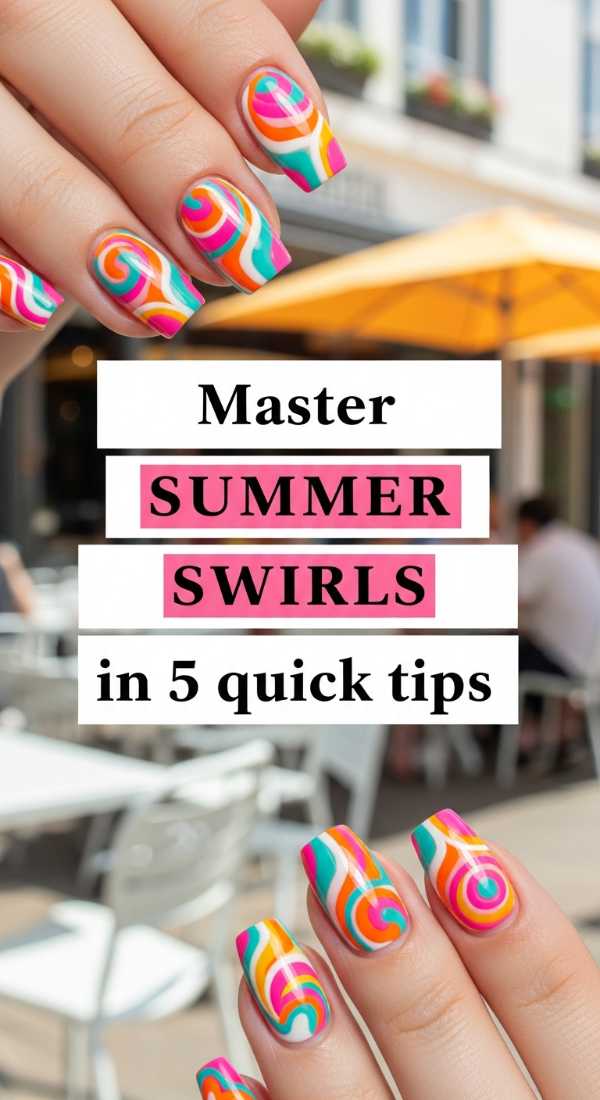
Why to love this Design:
Swirls are so whimsical and fun! They remind me of 70s poolside glamour and melting sorbet. It’s a design that doesn’t have to be perfect to look absolutely stunning, which is why I adore it.
Essential Elements:
- 3 contrasting summer shades
- Extra-long striping brush
- Acetone for cleaning the brush
How to Prepare:
- Tip 1: Start with the lightest color as your base so the swirls pop.
- Tip 2: Use a very thin, long brush to get those long, fluid curves without stopping.
- Tip 3: Work with one color at a time across all nails to keep the flow consistent.
- Tip 4: Don’t overthink the pattern; asymmetrical swirls look more organic and chic.
- Tip 5: If a line is too thick, use a clean brush dipped in acetone to ‘carve’ it thinner.
Budget Range
- Beetles Summer Gel Polish Set – $20
- Winstonia Long Striping Brush – $8
- Pure Acetone – $5
Garden Party: Design 4 Cute Fruity Summer Patterns
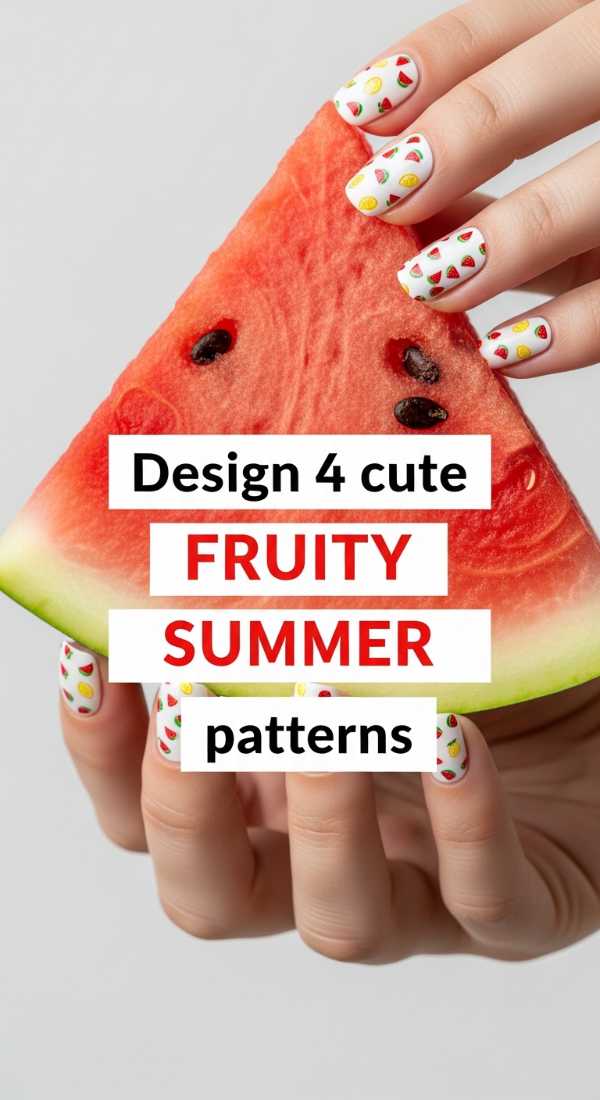
Why to love this Design:
Sweetheart, is there anything cuter than tiny fruits on your nails? It’s playful, youthful, and guaranteed to spark a conversation at the lemonade stand or the beach bar. It’s pure happiness in a bottle.
Essential Elements:
- Green, red, yellow, and black polish
- Small dotting tool
- Steady hand!
How to Prepare:
- Pattern 1 (Watermelon): Pink base, green tip, and tiny black dots for seeds.
- Pattern 2 (Lemon): Yellow half-circles with white ‘segments’ painted inside.
- Pattern 3 (Cherries): Two red dots side-by-side with a tiny green ‘V’ for stems.
- Pattern 4 (Strawberry): Red oval base, green jagged top, and tiny yellow dots for seeds.
Budget Range
- Holt Taco Red Licorice – $13
- Essie Grass Never Greener – $10
- Nail Art Detail Brushes – $7
The Bold Statement: 3 Ways to Style Neon Orange Nails
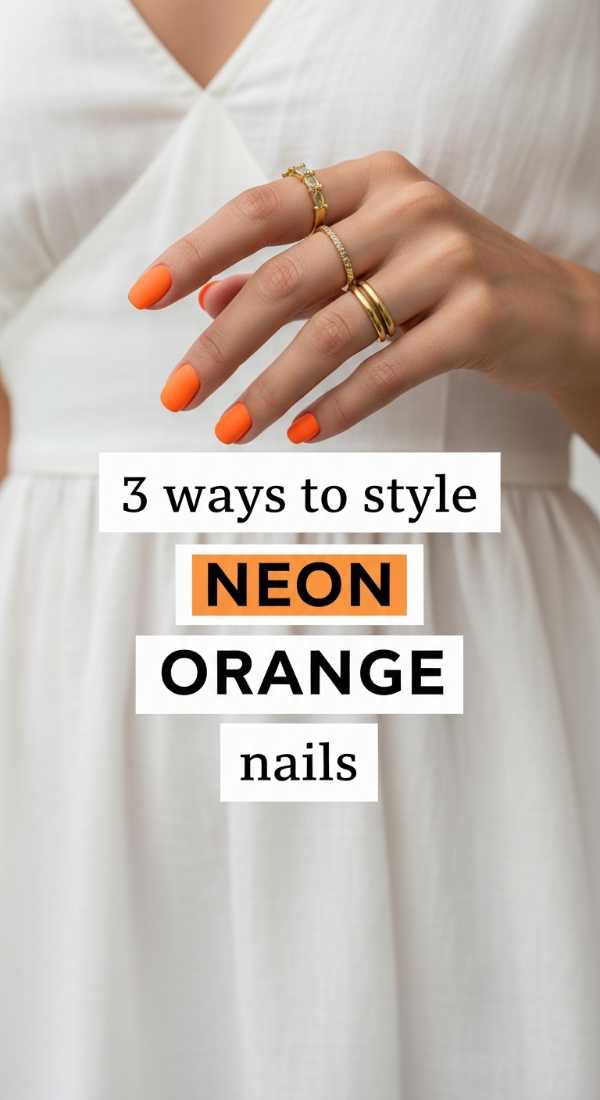
Why to love this Design:
Neon orange is the color of sunset and fire. It’s the ultimate confidence booster! If you want your hands to stand out against your summer tan, this is the shade that will do all the talking for you.
Essential Elements:
- The brightest orange you can find
- Matte top coat
- Gold jewelry (for styling)
How to Prepare:
- Way 1 (The Matte Look): Apply a matte top coat over the orange for a sophisticated, velvet ‘citrus’ finish.
- Way 2 (Gold Accents): Pair your orange nails with gold rings and a gold foil accent nail for a goddess vibe.
- Way 3 (Negative Space): Paint only half the nail orange, leaving the other half bare for a modern architectural look.
Budget Range
- Lights Lacquer Tangerine Queen – $13
- OPI Matte Top Coat – $11
- Gold Nail Foil Sheets – $6
Dusk Til Dawn: Get Sunset Gradient Nails in 4 Steps
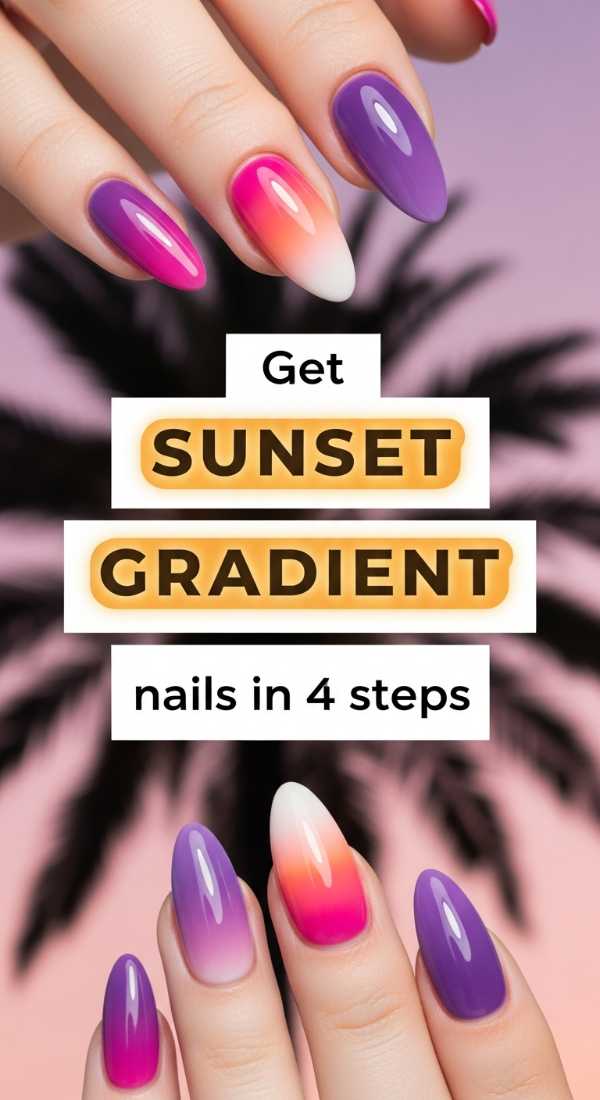
Why to love this Design:
There is nothing more romantic than a summer sunset. This gradient captures that transition from purple twilight to golden hour, making your fingertips look like a painting. It’s soft, soulful, and so dreamy.
Essential Elements:
- Deep purple polish
- Bright pink polish
- Golden yellow polish
- Sponge
How to Prepare:
- Paint your nail with the yellow polish as a base.
- On a sponge, paint horizontal stripes of purple, pink, and yellow.
- Dab the sponge onto your nail, overlapping the colors slightly to blend.
- Repeat until the saturation is deep, then finish with a glitter top coat for ‘stars’.
Budget Range
- Morgan Taylor Electric Remix – $10
- ILNP My Private Rainbow (Glitter) – $13
- Cosmetic Wedges – $5
Shell Collector: Prepare Tropical 3D Art in 6 Steps
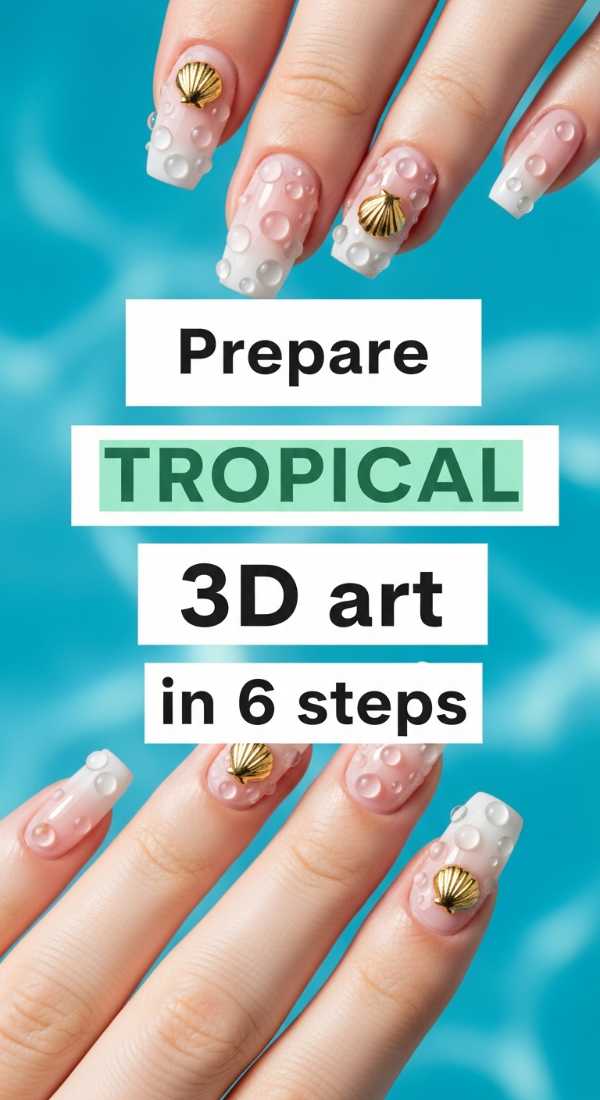
Why to love this Design:
For my loves who want to feel the texture of the ocean, 3D art is such a treat! Adding a little ‘seashell’ texture or a tiny ‘pearl’ makes your manicure feel like a piece of jewelry found on the shore.
Essential Elements:
- Thick building gel or 3D ‘sculpting’ gel
- Iridescent white polish
- Tiny faux pearls
- UV Lamp
How to Prepare:
- Apply your base iridescent color and cure.
- Take a small bead of builder gel and place it at the base of the nail.
- Use a thin tool to drag the gel upward in lines to mimic a seashell’s ridges.
- Cure the ridges immediately so they don’t flatten.
- Add a tiny drop of nail glue and place a pearl near the cuticle.
- Seal the whole look with a non-wipe top coat to protect the 3D texture.
Budget Range
- Saviland 5-in-1 Builder Gel – $12
- Nail Art Pearl Mix – $8
- Modelones Iridescent Polish – $9
Your Most Beautiful Summer Awaits
As you finish your nails and look down at your beautiful handiwork, I hope you feel a surge of joy. You are so deserving of this time, these colors, and this upcoming adventure. Remember, it’s not about perfection; it’s about the feeling of being alive, vibrant, and ready to embrace every sunny moment. Wear your designs with pride, take too many photos, and let your inner light shine as bright as your neon tips. I can’t wait to hear which of these you try first! Safe travels, my loves.