
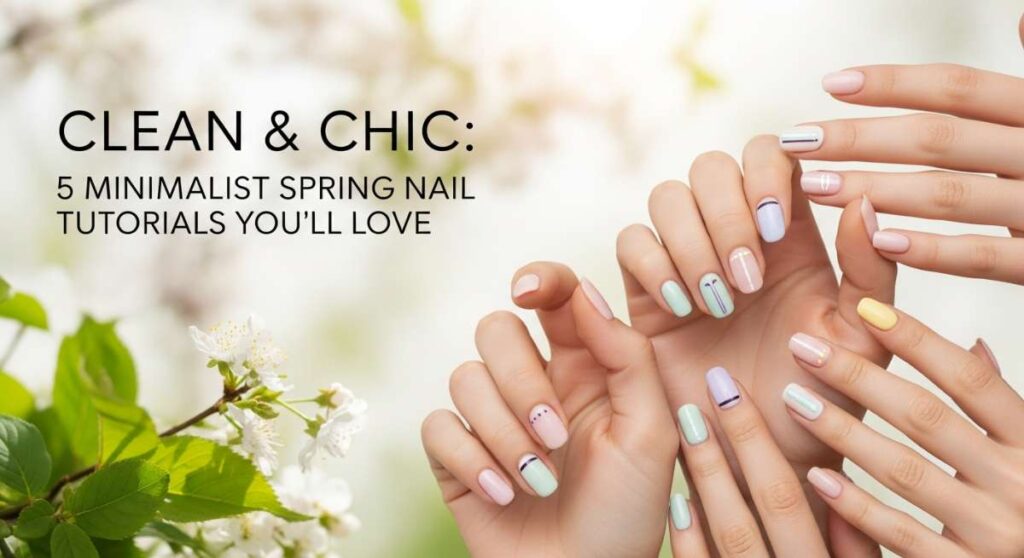
Clean & Chic: 5 Minimalist Spring Nail Tutorials You’ll Love
Oh, my loves, can you feel it? The air is finally softening, carrying that sweet, earthy scent of new life. Spring always feels like a deep, refreshing exhale for the soul. It’s the time when we shed our heavy layers and embrace everything light, airy, and intentional. For me, that transition starts with the smallest detail: my hands. There is something so incredibly grounding about taking a slow afternoon to care for your nails, turning a simple ritual into a moment of pure, cloud-soft self-love.
I’ve always believed that beauty shouldn’t be loud to be noticed. This season, I’m leaning into the ‘clean girl’ aesthetic—those minimalist designs that make your hands look polished, healthy, and effortlessly chic. Whether you’re sipping a lavender latte or picking up fresh tulips at the market, these five tutorials are designed to bring a touch of serene spring magic to your fingertips. Let’s dive into these little moments of art together, shall we?
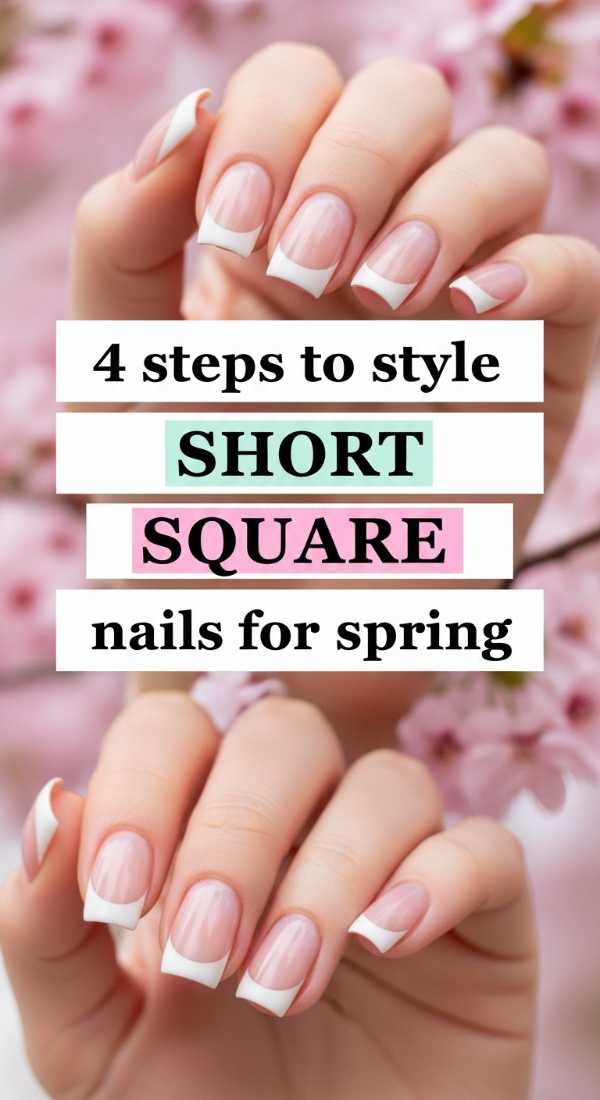
4 steps to style short square nails for spring
Why to love this Design:
The short square nail is the ultimate ‘quiet luxury’ statement. It’s incredibly practical for our busy lives but looks so intentionally styled. It gives your hands a modern, architectural clean look that pairs perfectly with oversized linen shirts and gold rings.
Essential Elements:
- High-quality glass nail file
- Nude-to-pink sheer polish
- Glossy top coat
- Conditioning cuticle oil
How to Prepare:
- Clip nails straight across to ensure a level edge.
- Use a glass file to smooth the corners into a soft ‘squoval’ to prevent snagging.
- Apply a ridge-filling base coat for a smooth canvas.
- Swipe on two thin layers of your favorite sheer nude.
Budget Range
- Essie ‘Sugar Daddy’ ($9.00)
- Mont Bleu Glass Nail File ($12.00)
- Olive & June Top Coat ($9.00)
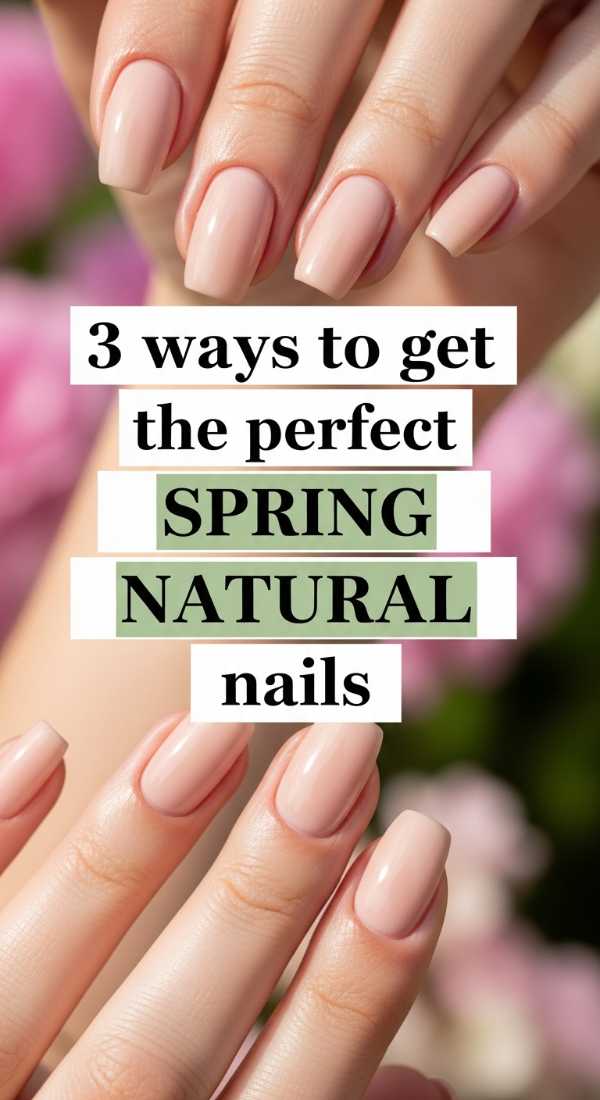
3 ways to get the perfect spring natural nails
Why to love this Design:
Sometimes the most beautiful thing we can wear is our own health. Natural nails are about highlighting the rosy glow of your nail beds and the crispness of the tips. It’s a breathable, low-maintenance look that feels as fresh as a spring breeze.
Essential Elements:
- Buffing block
- Cuticle remover gel
- Strengthening clear treatment
How to Prepare:
- Apply cuticle remover and gently push back edges with a wooden stick.
- Buff the nail surface lightly to create a high-shine natural gloss.
- Finish with a vitamin-infused clear strengthener to protect and shine.
Budget Range
- Sally Hansen Hard as Nails ($4.00)
- Burt’s Bees Lemon Butter Cuticle Cream ($6.00)
- Flowery Scented Buffing Block ($3.00)
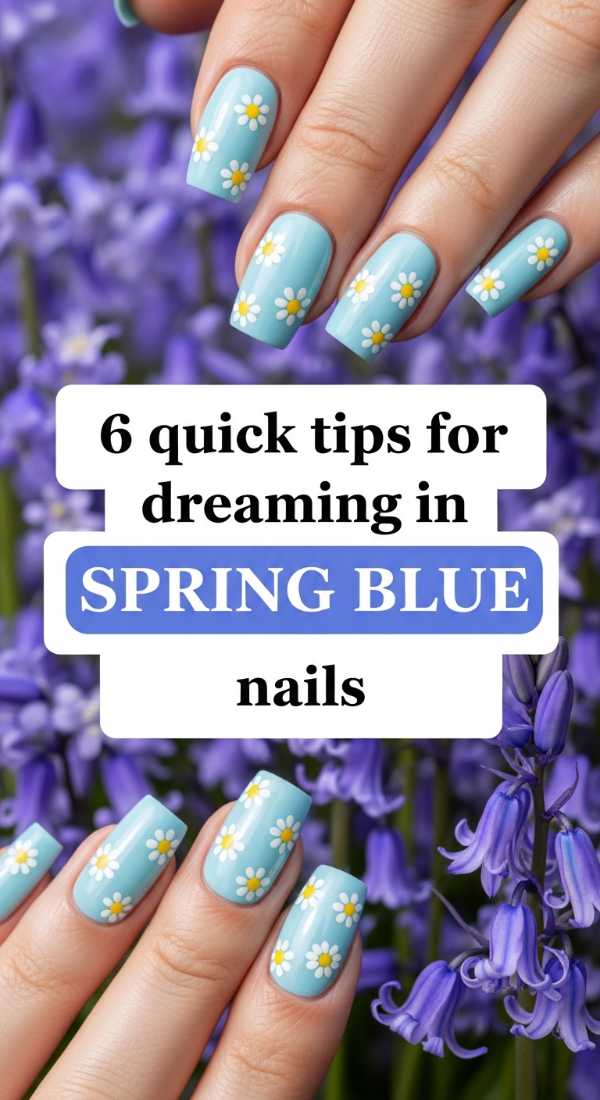
6 quick tips for dreaming in spring blue nails
Why to love this Design:
Spring blue is like wearing a piece of the April sky on your fingers. It’s a dreamy, whimsical choice that still feels grounded when you choose a muted, dusty pastel. It’s the perfect pop of color for those who usually stick to neutrals.
Essential Elements:
- Dusty cornflower blue polish
- Matte or glossy top coat
- Precision cleanup brush
How to Prepare:
- Ensure nails are completely dehydrated with an alcohol wipe for better grip.
- Apply a thin base coat to prevent any blue pigment staining.
- Paint two thin coats, allowing 3 minutes of drying time between each.
- Clean the edges with a brush dipped in acetone for a sharp finish.
- Seal with a high-shine gloss.
- Apply a drop of quick-dry oil.
Budget Range
- OPI ‘It’s a Boy!’ ($11.50)
- Zoya ‘Blu’ ($12.00)
- Ella + Mila Soy Polish Remover ($11.00)
7 secrets to the cleanest white spring nails
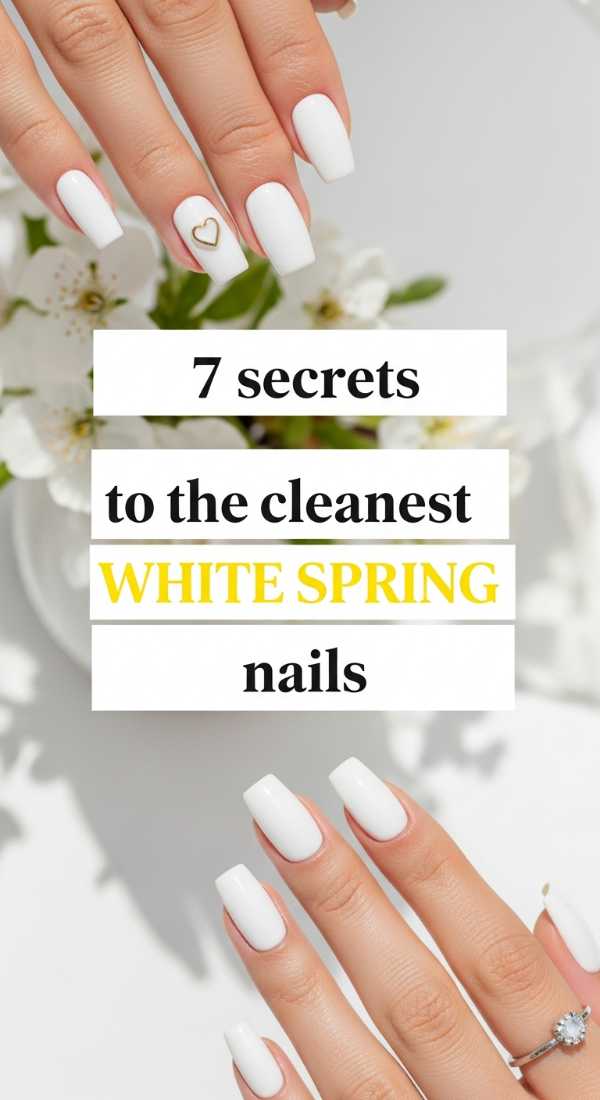
Why to love this Design:
White nails are the ultimate palate cleanser. They are crisp, bright, and make any skin tone look sun-kissed. The secret is making them look like soft cream rather than correction fluid—it’s all about the depth and the finish.
Essential Elements:
- Opaque marshmallow white polish
- Smoothing base coat
- UV-protection top coat (to prevent yellowing)
How to Prepare:
- Start with a clean, buffed surface.
- Apply a milky base coat to neutralize nail discoloration.
- Work in three very thin layers rather than two thick ones.
- Keep the polish away from the cuticle line by a hair’s breadth.
- Use a steady hand for the ‘three-swipe’ method.
- Seal edges (the ‘free edge’) to prevent chipping.
- Finish with a cold-water dip to set the pigment.
Budget Range
- Funny Bunny by OPI ($11.50)
- Chanel Le Vernis in ‘White Silk’ ($32.00)
- Orly Bonder Base Coat ($10.00)
5 minutes to create spring simple nails
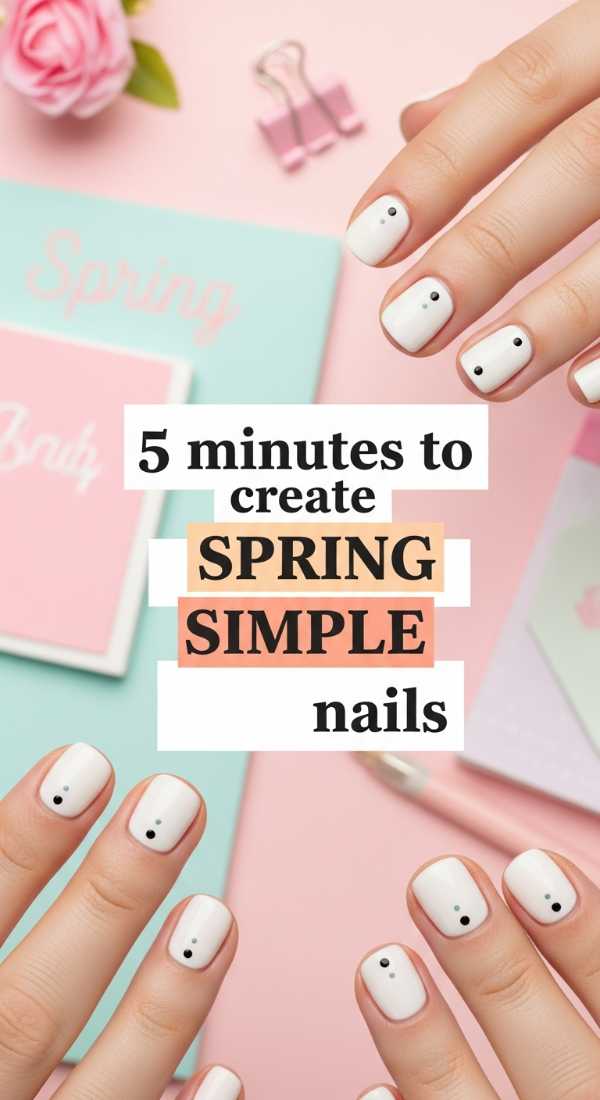
Why to love this Design:
For my loves who are always on the go, this 5-minute ritual is a lifesaver. It’s about looking put-together without the stress. It’s a ‘your nails but better’ approach that focuses on hydration and a hint of tint.
Essential Elements:
- Tinted nail glow or ‘Perfector’
- Quick-dry top coat
- Hand cream with SPF
How to Prepare:
- Quickly file any uneven edges.
- Apply one generous coat of a tinted nail ‘glow’ (pink-toned).
- Finish with a quick-dry top coat.
- Massage in a floral-scented hand cream.
- Oil the cuticles while in the car or at your desk.
Budget Range
- Dior Nail Glow ($30.00)
- Active Glow by Manucurist ($16.00)
- L’Occitane Cherry Blossom Hand Cream ($13.00)
Embracing the Season of Growth
As we wrap up our little nail session, remember that these moments of self-care are never wasted. Whether you chose the crisp white or the dreamy blue, I hope every time you look down at your hands today, you’re reminded of your own beauty and the fresh beginnings spring brings. You deserve to feel polished, peaceful, and entirely yourself. Stay soft, my loves, and enjoy the sunshine!