
Star-Spangled Style: A Step-by-Step Guide to DIY Patriotic Nails
Hello, my loves! There is something so magical about the air as we approach the Fourth of July, isn’t there? It’s that soft, golden hour glow, the smell of backyard BBQs, and the anticipation of fireworks painting the night sky. I’ve always felt that the best way to carry that celebration with us—besides a heart full of gratitude—is through the little details of our self-care rituals. Painting our nails isn’t just a chore; it’s a quiet moment of creativity and a warm hug for our hands.
Today, I want to walk you through some of my favorite ways to wear the red, white, and blue. Whether you’re a seasoned pro or just picking up a brush for the first time, these designs are meant to make you feel beautiful and festive. So, grab a glass of iced lemonade, find a cozy spot by the window, and let’s create some holiday magic together on our fingertips!
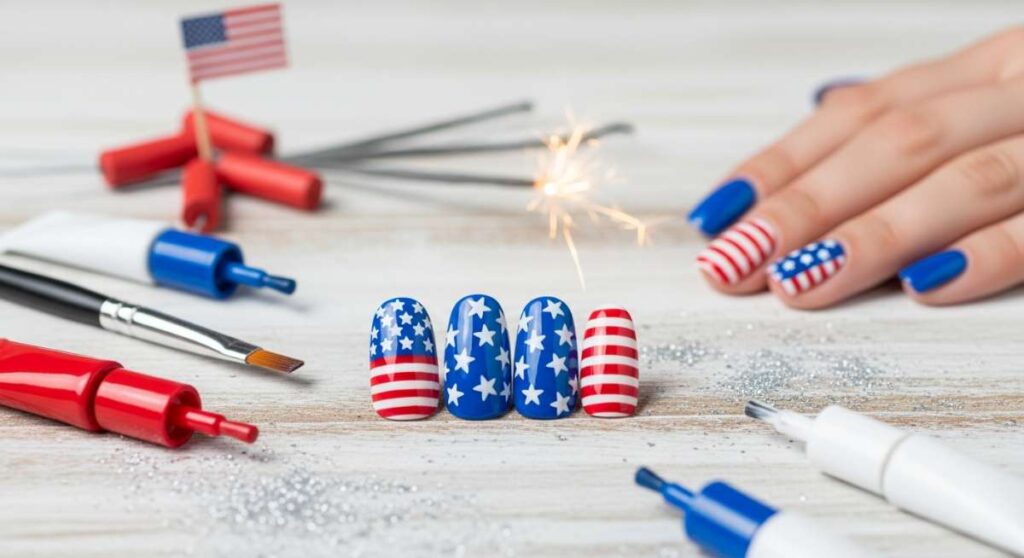
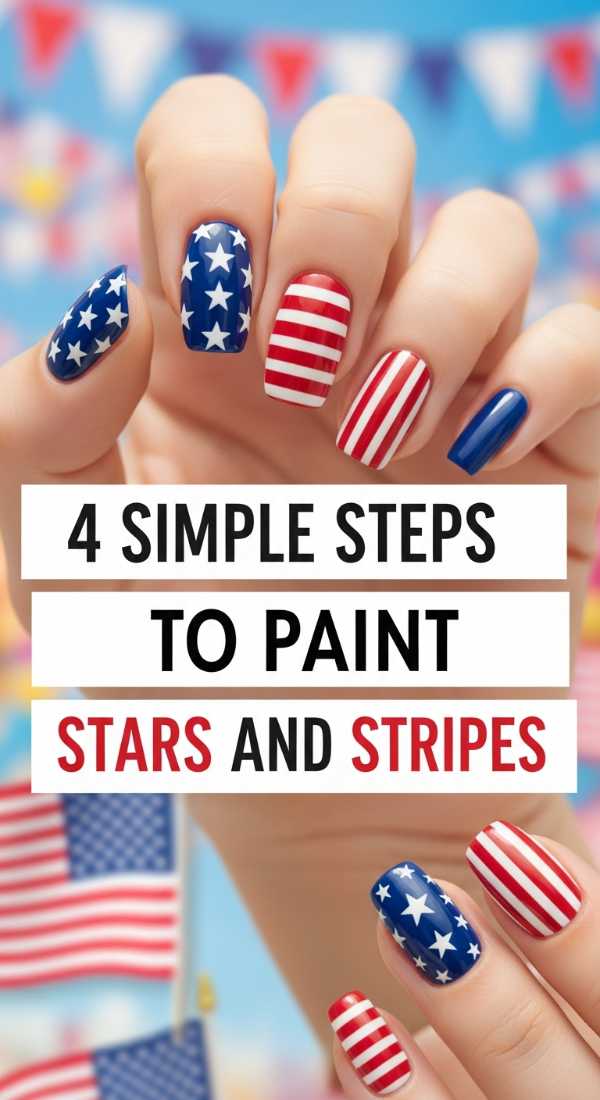
Classic Stars and Stripes
Why to love this Design:
This design is like a classic vintage postcard—timeless, bold, and full of spirit. It makes you feel like the star of the show every time you catch a glimpse of your hands while holding a sparkler.
Essential Elements:
- Navy blue cream polish
- Pure white striper polish
- Fire-engine red lacquer
- Small star-shaped decals or a dotting tool
How to Prepare:
- Apply a clear base coat to protect your natural nails.
- Paint your thumb and ring finger with the navy blue polish.
- On your other fingers, use a thin brush to paint horizontal white and red stripes.
- Apply the stars onto the blue accent nails and seal everything with a glossy top coat.
Budget Range
- Sally Hansen Xtreme Wear in ‘Blue Me Away’ ($4.00)
- OPI ‘Big Apple Red’ ($11.50)
- Nail Art Striper Brush ($5.00)
Red, White, and Blue French Tips

Why to love this Design:
For my loves who prefer a whisper of celebration rather than a shout, these patriotic tips are the definition of chic. They are subtle enough for the office but festive enough for the fireworks display.
Essential Elements:
- Sheer nude or pink base coat
- Red, white, and blue polish trio
- French tip guide stickers
How to Prepare:
- Start with two coats of your favorite sheer nude base.
- Place a guide sticker just below the free edge of your nail.
- Paint each tip a different color—alternating red, white, and blue.
- Carefully peel the sticker while the polish is still slightly tacky for a crisp line.
- Finish with a high-shine top coat.
Budget Range
- Essie ‘Mademoiselle’ Sheer Pink ($10.00)
- French Tip Guides ($3.00)
- Mini Patriotic Polish Set ($12.00)
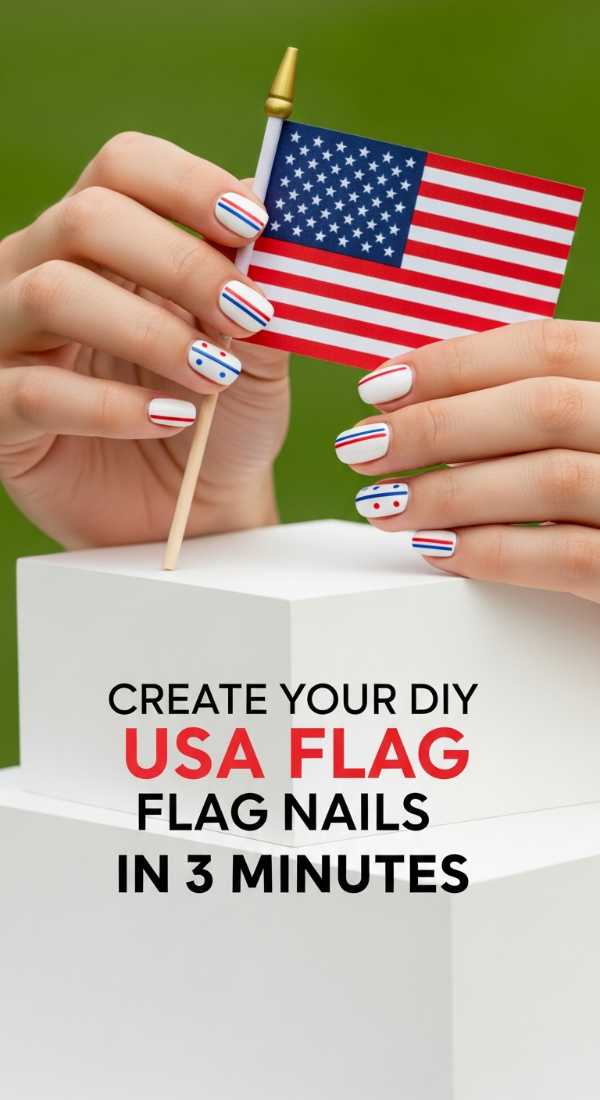
3-Minute Flag Accent Nail
Why to love this Design:
We lead busy lives, don’t we? This design is perfect for the girl on the go who wants to show her spirit without spending an hour at her vanity. It’s quick, punchy, and looks professionally done.
Essential Elements:
- Royal blue polish
- Red and white nail art pens
- Silver glitter for ‘stars’
How to Prepare:
- Paint all nails red except for your ring finger.
- Paint the ring finger white as your canvas.
- Draw a small blue square in the top left corner of the white nail.
- Add two red lines and a few silver glitter dots for stars.
Budget Range
- Wet n Wild ‘Red Red’ ($2.00)
- Nail Art Pens ($8.00/set)
- Silver Glitter Topper ($5.00)
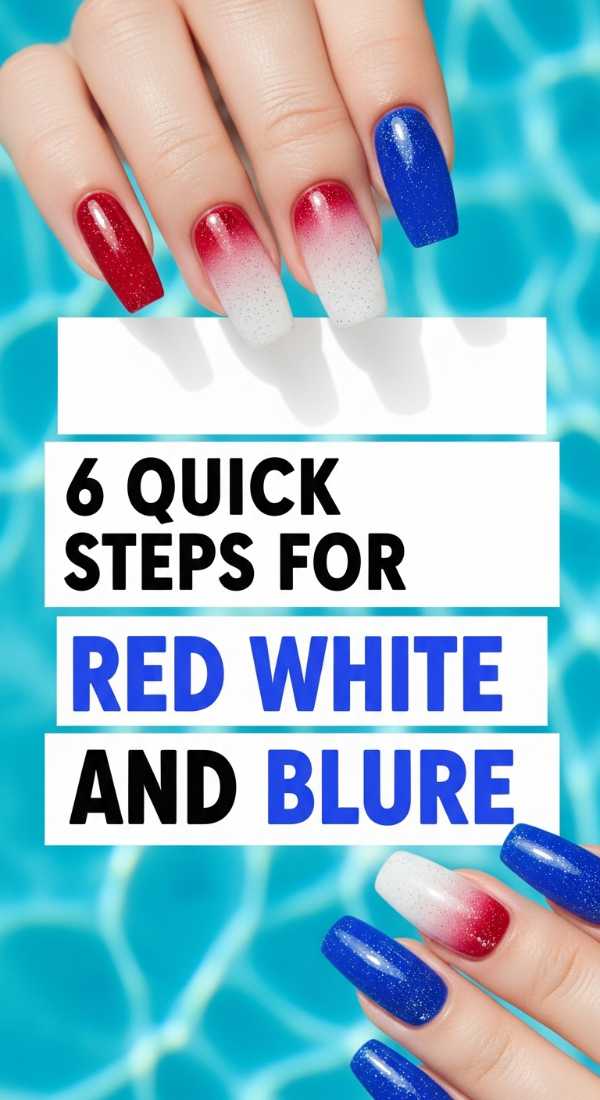
Dreamy Red, White, and Blue Ombre
Why to love this Design:
This ombre reminds me of a summer sunset melting into the evening sky. It’s soft, diffused, and looks incredibly expensive despite being so simple to achieve at home.
Essential Elements:
- Makeup sponge wedges
- Liquid latex or tape (for skin protection)
- Opaque red, white, and blue polishes
How to Prepare:
- Apply liquid latex around your cuticles to make cleanup a breeze.
- Paint stripes of red, white, and blue directly onto the makeup sponge.
- Gently dab the sponge onto your nails, repeating until the colors blend beautifully.
- Peel off the latex and add a top coat to smooth out the texture.
- Clean up edges with a small brush dipped in acetone.
- Admire your sunset-inspired masterpiece!
Budget Range
- Disposable Makeup Sponges ($3.00)
- Liquid Latex Barrier ($7.00)
- Revlon Enamel Polish ($6.00)
Elegant Independence Patterns
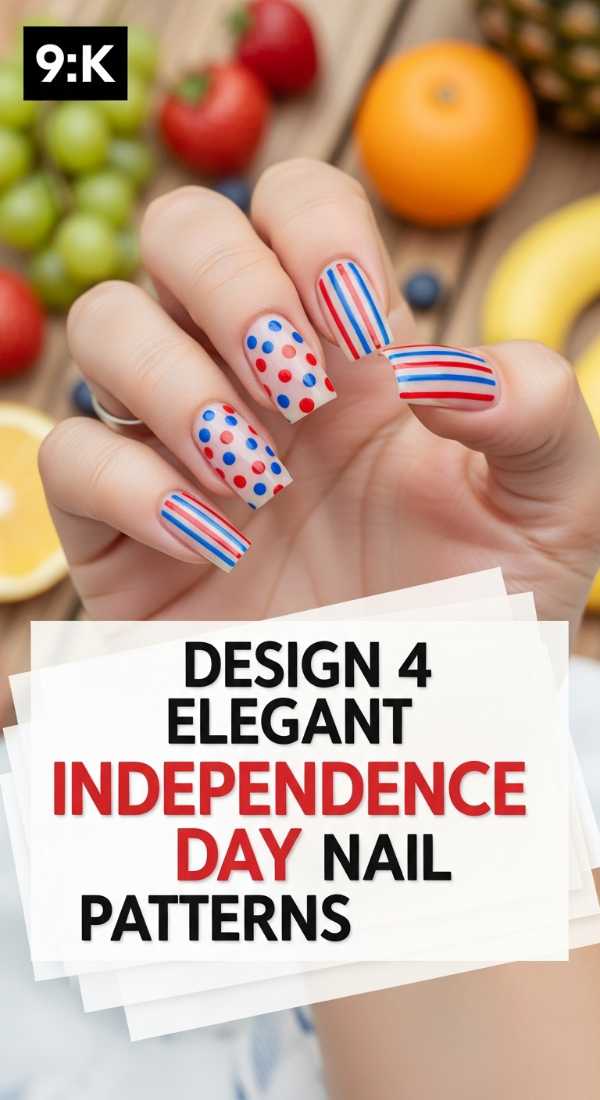
Why to love this Design:
This is for the sophisticated soul who loves a bit of luxury. By incorporating gold accents and intricate lines, your nails become a piece of holiday jewelry.
Essential Elements:
- Gold foil or gold metallic polish
- Navy blue lacquer
- Ultra-fine detailing brush
How to Prepare:
- Paint nails a deep, velvety navy blue.
- Using the fine brush, paint delicate white stars or thin ‘firework’ bursts.
- Add tiny flecks of gold foil to the center of each pattern for a touch of elegance.
- Finish with a matte top coat for a modern, velvet-like look.
Budget Range
- Zoya ‘Sailor’ Navy Polish ($12.00)
- Gold Nail Foil Flakes ($6.00)
- Matte Top Coat ($9.00)
Pro Tips for Patriotic Nail Stickers
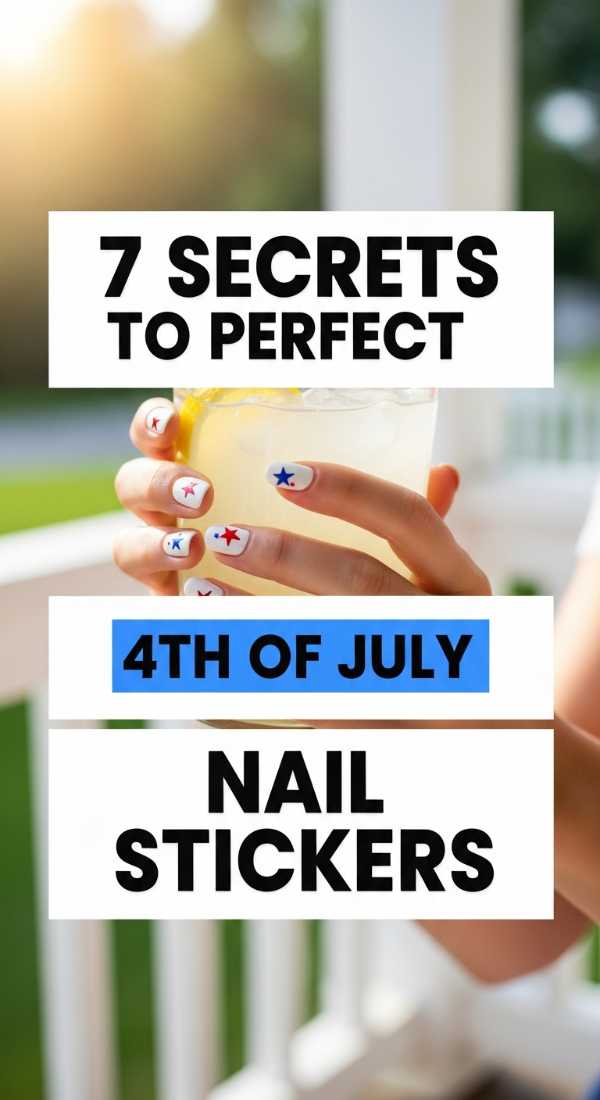
Why to love this Design:
Nail stickers are my secret weapon for those days when my hands are a little shaky or I’m running low on patience. They provide instant perfection and a huge variety of patterns.
Essential Elements:
- Sheet of patriotic nail decals
- Precision tweezers
- Clear smoothing top coat
How to Prepare:
- Start with a clean, dry nail (no oils!).
- Paint a solid base color like white or light blue.
- Use tweezers to carefully lift the sticker from the backing.
- Press firmly onto the nail, smoothing out any air bubbles.
- Apply two layers of top coat to ‘encapsulate’ the sticker.
- Make sure to seal the very tip of the nail.
- Wait for them to dry completely before any activity.
Budget Range
- 4th of July Nail Decal Sheets ($5.00)
- Revlon Top Coat ($6.00)
- Tweezers (usually found at home!)
Shimmering Summer Holiday Glitter
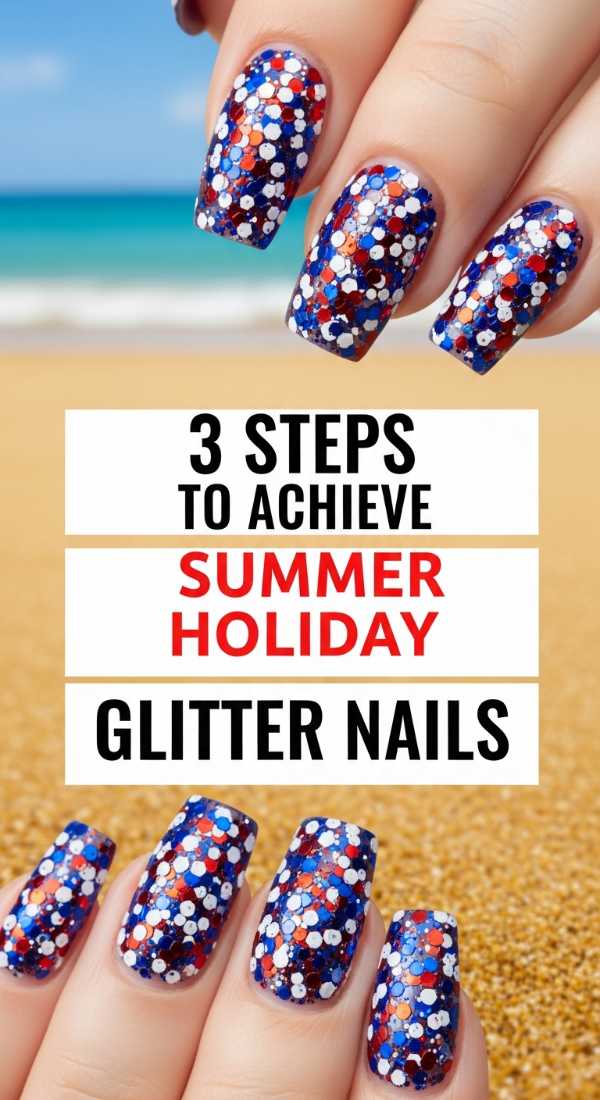
Why to love this Design:
Every holiday deserves a little sparkle, don’t you think? This glitter design catches the light of the sun by day and the glow of the bonfire by night. It’s pure joy in a bottle.
Essential Elements:
- Chunky red, white, and blue glitter mix
- Sponge applicator
- Peel-off base coat (for easy removal later)
How to Prepare:
- Apply a peel-off base coat so you don’t have to scrub the glitter off later.
- Dab the glitter polish onto a sponge to remove excess clear liquid.
- Press the concentrated glitter onto the nail for maximum density.
Budget Range
- ILNP ‘Glitter Topper’ ($10.00)
- Unt Ready for Takeoff Peel-Off Base ($12.00)
Sweet Patriotic Heart Motifs

Why to love this Design:
I love this because it’s a reminder that at the heart of every celebration is love—love for our friends, family, and home. It’s sweet, feminine, and utterly charming.
Essential Elements:
- Large dotting tool
- Red and blue polish
- White base color
How to Prepare:
- Paint your nails a crisp, clean white.
- Use the dotting tool to place two dots of red side-by-side.
- Drag the dots down into a ‘V’ shape to form a heart.
- Repeat with blue polish on alternating fingers or in different sizes.
- Seal with a high-gloss top coat.
Budget Range
- Dotting Tool Set ($5.00)
- Orly ‘White Tips’ ($12.00)
Bursting Fireworks Art

Why to love this Design:
There is nothing quite like the ‘oohs’ and ‘aahs’ of a firework show. Bringing that excitement to your nails is such a fun way to embrace the holiday spirit.
Essential Elements:
- Black or dark navy base
- Neon or metallic red and silver polishes
- Fan brush or thin striper
How to Prepare:
- Paint a dark base coat to represent the night sky.
- Dip a fan brush lightly into silver polish and flick it from a center point.
- Repeat with red polish to create a multi-dimensional ‘burst.’
- Add a tiny dot of silver glitter in the center of the firework.
Budget Range
- Nail Art Fan Brush ($4.00)
- Sinful Colors ‘Black on Black’ ($2.00)
- Silver Metallic Polish ($7.00)
Chic Red and White Stripes
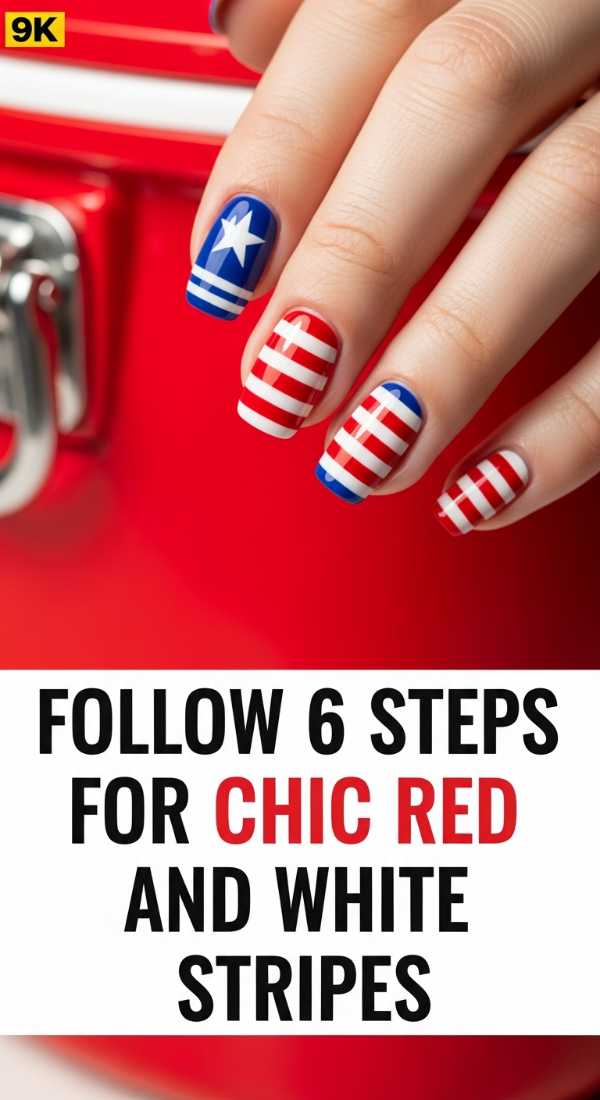
Why to love this Design:
This is the ‘nautical chic’ of patriotic nails. It’s clean, precise, and looks stunning when paired with a simple white linen dress or a denim jacket.
Essential Elements:
- White cream polish
- Red striper or thin tape
- Steady hand!
How to Prepare:
- Apply two coats of opaque white polish and let it dry completely.
- Use thin striping tape to mask off horizontal sections.
- Paint over the tape with red polish.
- Remove the tape immediately while the red is wet.
- Cleanup any bleed with a brush and acetone.
- Apply a fast-drying top coat once fully set.
Budget Range
- Striping Tape ($3.00)
- Fast Dry Top Coat ($9.00)
- CoverGirl Outlast Red ($6.00)
A Celebration on Your Fingertips
I hope these designs inspire you to take a little ‘me time’ this holiday season. Whether you go for the bold stripes or the subtle shimmer, remember that the most beautiful thing you can wear is your own happiness. There is so much joy in creating something with your own two hands, and I can’t wait to see how you all put your own unique spin on these patriotic looks. Have a safe, beautiful, and stylish Independence Day, my loves!