

We’ve all been there—the frantic rush of a Tuesday night, staring at a fridge full of ingredients but having zero energy to turn them into a masterpiece. Then, I stumbled upon the secret that has completely transformed my kitchen: the Viral Simple Food Board. It’s not just a meal; it’s a lifestyle shift that brings the art of grazing and the comfort of home cooking together on one stunning, rustic platter.
There is an emotional magic in seeing a board overflowing with textures and colors. It invites everyone to lean in, share stories, and pick at their favorite bits without the formality of a plated dinner. It feels human, cozy, and unexpectedly intentional. Today, I’m sharing the exact techniques to master every element of this board so you can bring that internet-breaking aesthetic into your own home.
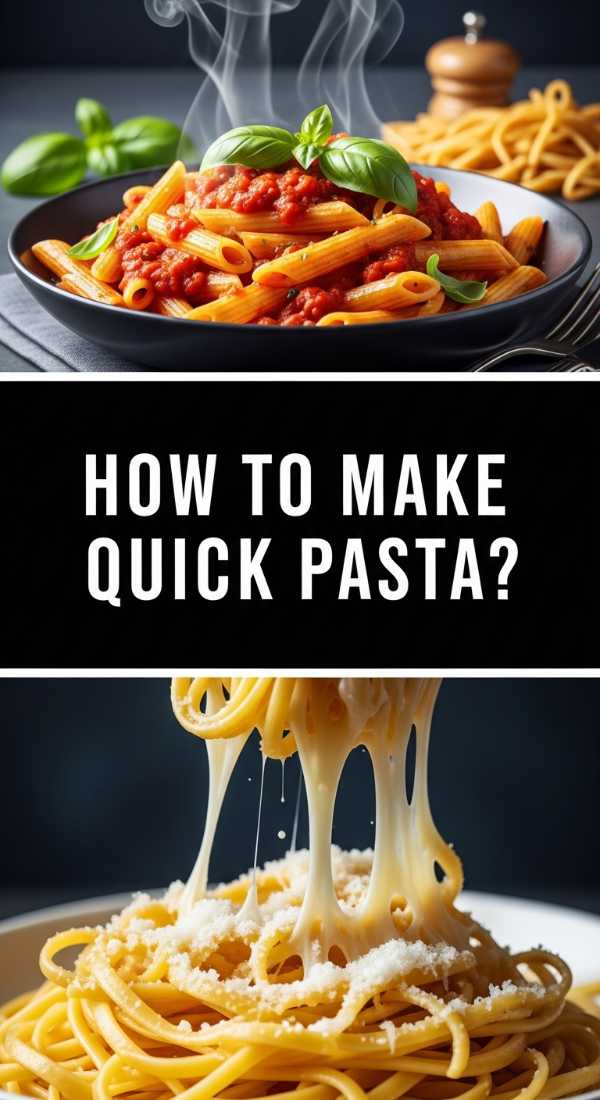
How to make quick pasta?
Why we love this
This quick pasta is the heartbeat of our food board, offering a silky, buttery mouthfeel that feels like a warm embrace after a long day. The aroma of toasted garlic and fresh parsley wafts through the air, promising a dish that is both light and deeply satisfying. Each strand of pasta is perfectly coated in a glistening, emulsified sauce that catches the light, making it look as beautiful as it tastes. It provides that essential carb-heavy comfort that anchors the lighter elements of the board, ensuring no one leaves the table hungry.
Ingredients
- 200g Spaghetti or Linguine
- 3 cloves of garlic, thinly sliced
- 1/4 cup extra virgin olive oil
- 1 tsp red pepper flakes
- Freshly grated Parmesan cheese
- Handful of chopped flat-leaf parsley
- Sea salt and black pepper
How to make it
- Bring a large pot of heavily salted water to a rolling boil; the water should taste like the sea to properly season the pasta from within.
- Add the pasta and cook for approximately 8-9 minutes, or until it reaches a perfect ‘al dente’ texture—firm to the bite but without a crunchy center.
- While the pasta cooks, heat olive oil in a wide skillet over medium-low heat. Add the sliced garlic and red pepper flakes, swirling constantly until the garlic turns a pale golden brown; do not let it turn dark brown or it will become bitter.
- Reserve 1/2 cup of the starchy pasta water before draining the noodles. This liquid is the secret to a glossy, restaurant-quality sauce.
- Add the drained pasta and the reserved water to the skillet, cranking the heat to medium-high. Toss vigorously for 2 minutes until the liquid reduces and forms a creamy emulsion that clings to the pasta.
- Remove from heat, fold in the parsley and Parmesan, and serve immediately in a nest on your board.
How to slow cook chicken?

Why we love this
There is nothing quite like the tender, fall-apart texture of chicken that has been bathed in its own juices for hours on end. This slow-cooked element adds a rich, savory depth to the board, with meat so succulent it practically melts on the tongue. The scent of onions, thyme, and bay leaves infuses every fiber of the chicken, creating a nostalgic aroma that reminds us of Sunday afternoons at grandma’s house. It’s the ultimate low-effort, high-reward component that provides a hearty protein base for guests to pile onto bread or mix with pasta.
Ingredients
- 1.5 lbs boneless skinless chicken thighs
- 1 cup chicken bone broth
- 1 yellow onion, diced
- 2 cloves garlic, smashed
- 2 sprigs of fresh thyme
- 1 tsp smoked paprika
- Salt and pepper to taste
How to make it
- Season the chicken thighs generously on all sides with salt, pepper, and smoked paprika to build a foundation of flavor.
- Place the diced onions and smashed garlic at the bottom of the slow cooker to create a fragrant bed for the meat.
- Lay the chicken thighs over the vegetables and pour the chicken bone broth around the sides, ensuring you don’t wash off the seasoning on top of the meat.
- Add the thyme sprigs and cover the pot tightly. Set the slow cooker to ‘Low’ for 6-7 hours or ‘High’ for 3-4 hours. Slow and low is preferred for the most tender results.
- Check the chicken with a fork; it should easily pull apart with zero resistance. If it feels tough, give it another 30 minutes.
- Transfer the chicken to a bowl, shred it using two forks, and add a splash of the cooking liquid back in to keep it incredibly moist before placing it on your food board.
How to bake cheesy bread?

Why we love this
Cheesy bread is the ultimate crowd-pleaser, boasting a golden-brown crust that crackles slightly before giving way to a soft, pillowy center filled with molten cheese. The scent of toasted yeast and melted mozzarella is intoxicating, drawing everyone toward the board the moment it hits the table. Every bite offers a perfect balance of salty, gooey cheese and a crisp, buttery exterior that makes it impossible to stop at just one piece. It serves as the perfect edible vessel, designed for dipping into stews or topping with seared salmon and spreads.
Ingredients
- 1 loaf of sourdough or French bread
- 2 cups shredded mozzarella cheese
- 1/2 cup sharp cheddar cheese
- 4 tbsp salted butter, melted
- 1 tsp garlic powder
- 1 tsp dried oregano
How to make it
- Preheat your oven to 375°F (190°C) and line a baking sheet with parchment paper to prevent sticking.
- Slice the bread loaf horizontally, then cut it into a grid pattern without cutting all the way through the bottom crust; this creates ‘pockets’ for the cheese.
- Mix the melted butter with garlic powder and oregano, then use a pastry brush to liberally coat the inside of the bread crevices.
- Stuff the mozzarella and cheddar deep into the cuts of the bread, ensuring every section is packed with cheesy goodness.
- Wrap the entire loaf loosely in aluminum foil and bake for 10 minutes to melt the cheese thoroughly.
- Remove the foil and bake for an additional 5-7 minutes until the top is golden brown and the edges of the bread are delightfully crunchy.
How to sear fresh salmon?

Why we love this
The contrast between a crisp, salty skin and a tender, buttery interior makes seared salmon a sophisticated addition to any food board. As the fish hits the hot pan, it releases a delicate, savory aroma that signals a fresh and healthy treat is on its way. The vibrant pink hue of the salmon adds a pop of color that makes the entire board look professional and curated. It feels light and elegant, providing a clean protein option that pairs beautifully with the roasted potatoes and fresh greens.
Ingredients
- 2 fresh salmon fillets (skin-on)
- 2 tbsp high-smoke point oil (like avocado oil)
- 1 tbsp unsalted butter
- 1/2 lemon
- Sea salt and cracked black pepper
How to make it
- Pat the salmon fillets completely dry with paper towels; moisture is the enemy of a crispy skin.
- Season the skin side and the flesh side generously with salt and pepper just before you are ready to cook.
- Heat the oil in a heavy-bottomed stainless steel or cast iron skillet over medium-high heat until the oil is shimmering and just starting to smoke.
- Place the salmon fillets skin-side down in the pan, pressing down gently with a spatula for 10 seconds to ensure full contact with the heat.
- Cook undisturbed for 4-5 minutes until the skin is golden and crispy and the flesh has cooked about three-quarters of the way up the side.
- Flip carefully, add the butter and a squeeze of lemon to the pan, and cook for only 1 more minute for a perfect medium-rare center.
How to prep healthy meals?

Why we love this
Adding a healthy, vibrant component to the board provides a refreshing crunch that cleanses the palate between richer bites. We love the bright, earthy scents of fresh cucumbers, radishes, and bell peppers that bring a garden-fresh energy to the display. These elements add a necessary crispness and a burst of hydration, making the meal feel balanced rather than overly heavy. It’s the part of the board where you can truly play with color, creating a rainbow of nutrients that is as pleasing to the eye as it is to the body.
Ingredients
- 2 cups tri-color quinoa, cooked
- 1 English cucumber, sliced
- 1 cup cherry tomatoes, halved
- 1/2 red onion, finely diced
- Lemon-tahini dressing
- Fresh mint and parsley
How to make it
- Cook the quinoa in vegetable broth instead of water to infuse it with extra savory notes, then fluff it with a fork and let it cool to room temperature.
- Prepare your vegetables by slicing them into uniform, bite-sized pieces; this ensures every forkful has a perfect distribution of flavor.
- In a small bowl, whisk together tahini, lemon juice, a splash of water, and a pinch of salt until the consistency is smooth and pourable.
- Toss the cooled quinoa with the diced onions, tomatoes, and cucumbers in a large mixing bowl.
- Fold in the fresh herbs at the very last second to prevent them from bruising or wilting.
- Drizzle the dressing over the top and portion the salad into small bowls or mounds directly onto the board for easy grabbing.
How to fry crispy wings?

Why we love this
There is a primitive joy in a perfectly fried chicken wing, characterized by a skin that shatters with a satisfying crunch and meat that stays incredibly juicy. The scent of hot oil and savory spices is the ultimate appetizer call, bringing a fun, casual energy to the food board. These wings add a layer of texture that is deeply addictive, especially when paired with a tangy dipping sauce. They turn the board into a celebration, making it feel like a party regardless of the day of the week.
Ingredients
- 1 lb chicken wings (flats and drums)
- 1 cup cornstarch
- 1 tsp garlic powder
- 1 tsp onion powder
- Oil for frying (peanut or canola)
- Salt and pepper
How to make it
- Dry the wings thoroughly and season with salt, pepper, garlic powder, and onion powder.
- Dredge each wing in cornstarch, shaking off the excess; cornstarch creates a thinner, crispier crust than flour.
- Heat 2 inches of oil in a heavy pot to exactly 350°F (175°C) using a candy thermometer to monitor the temperature.
- Fry the wings in small batches to avoid crowding the pan, which would drop the oil temperature and lead to greasy wings.
- Cook for 8-10 minutes, turning occasionally, until they reach a deep golden brown and have an internal temperature of 165°F.
- Drain on a wire rack (not paper towels!) to keep the air circulating and ensure the bottom stays just as crispy as the top.
How to whip sweet desserts?

Why we love this
Every board needs a sweet finish, and a whipped dessert provides a cloud-like, decadent texture that feels incredibly sophisticated yet light. The aroma of vanilla bean and high-quality chocolate creates an irresistible invitation to indulge just a little bit more. It offers a smooth, creamy contrast to the crunchy and savory elements found elsewhere on the platter. A dollop of something sweet makes the board feel like a complete culinary journey, ending the meal on a high, celebratory note.
Ingredients
- 1 cup heavy whipping cream, chilled
- 1/2 cup powdered sugar
- 1 tsp vanilla bean paste
- 4 oz softened cream cheese
- Fresh berries for garnish
How to make it
- In a large chilled bowl, beat the softened cream cheese with powdered sugar and vanilla bean paste until completely smooth and free of lumps.
- In a separate bowl, whip the heavy cream until it reaches stiff peaks; be careful not to over-whip, or it will turn into butter.
- Gently fold one-third of the whipped cream into the cream cheese mixture to lighten it up.
- Fold the remaining whipped cream in using a slow, circular motion to maintain as much air and volume as possible.
- Chill the mixture for at least 30 minutes to allow the flavors to meld and the texture to set.
- Pipe or spoon the mixture into small ramekins on the board and top with fresh, tart berries to balance the sweetness.
How to simmer savory stew?

Why we love this
A simmering stew is the soul of a meal, offering a deep, complex flavor profile that only time can create. The earthy scent of rosemary, red wine, and slow-cooked beef fills the home with a sense of security and warmth. Its texture is thick and velvety, coating the back of a spoon and providing a rich sauce that begs to be mopped up with cheesy bread. It adds a rustic, hearth-side feel to the board that grounds the more modern elements in tradition and comfort.
Ingredients
- 1 lb beef chuck, cubed
- 2 carrots, sliced
- 2 stalks celery, chopped
- 1 cup dry red wine
- 2 cups beef stock
- 1 tbsp tomato paste
- Fresh rosemary and thyme
How to make it
- Sear the beef cubes in a hot pot with oil until a dark brown crust forms on all sides; this ‘Maillard reaction’ is where all the deep flavor lives.
- Remove the beef and sauté the carrots and celery in the same pot until they begin to soften.
- Stir in the tomato paste and cook for 2 minutes until it turns a rusty brick color.
- Deglaze the pan with the red wine, scraping up all the brown bits (the fond) from the bottom of the pot.
- Return the beef to the pot, add the stock and herbs, and bring to a very gentle simmer.
- Cover and cook on low heat for 2-3 hours until the beef is fork-tender and the liquid has reduced into a thick, glossy gravy.
How to roast golden potatoes?

Why we love this
Roasted potatoes are the ultimate sidekick, offering a satisfying crunch on the outside and a fluffy, steaming center that tastes like pure comfort. The aroma of roasting starch and rosemary is a classic kitchen staple that signals a hearty meal is ready. These golden gems catch the salt and oil perfectly, creating little flavor bombs that pair with everything from steak to salmon. Their rugged, golden appearance adds a beautiful rustic texture to the board’s layout.
Ingredients
- 1 lb baby gold potatoes, halved
- 3 tbsp olive oil
- 1 tsp sea salt
- 1/2 tsp garlic powder
- 2 sprigs fresh rosemary, chopped
How to make it
- Preheat your oven to 425°F (220°C); a high temperature is crucial for achieving that signature golden crunch.
- Toss the halved potatoes in a large bowl with olive oil, salt, garlic powder, and rosemary until every piece is thoroughly coated.
- Place the potatoes cut-side down on a preheated baking sheet; the direct contact with the hot metal ensures a perfectly flat, crispy surface.
- Roast for 20-25 minutes without moving them to allow the crust to develop properly.
- Flip the potatoes and roast for an additional 10 minutes until the skins are wrinkled and the insides are creamy.
- Sprinkle with an extra pinch of flaky sea salt immediately after removing them from the oven for maximum flavor impact.
How to grill tender steak?

Why we love this
There is a bold, smoky allure to a perfectly grilled steak that makes it the undisputed king of the food board. The scent of charred fat and sea salt is primal and enticing, promising a rich, savory experience with every slice. When cooked correctly, the meat is incredibly juicy, with a deep mahogany crust that yields to a tender, pink center. It adds a level of luxury and celebration to the board, making even a casual weeknight feel like an event at a high-end steakhouse.
Ingredients
- 1 lb Ribeye or New York Strip steak
- 2 tbsp high-heat oil
- 2 tbsp butter
- 2 cloves garlic
- Fresh thyme
- Coarse sea salt and cracked pepper
How to make it
- Take the steak out of the fridge 30-45 minutes before cooking to bring it to room temperature; this ensures even cooking throughout.
- Season heavily with coarse salt and pepper; much of the seasoning will fall off in the pan, so don’t be shy.
- Heat a cast-iron skillet over high heat until it is screaming hot and the oil is just starting to smoke.
- Lay the steak in the pan (laying it away from you to avoid oil splashes) and sear for 3-4 minutes without moving it to build a thick crust.
- Flip the steak and immediately add the butter, garlic, and thyme to the pan.
- Use a large spoon to continuously baste the steak with the foaming, aromatic butter for the final 3 minutes of cooking until it reaches an internal temperature of 135°F (for medium-rare). Rest the meat for at least 10 minutes before slicing to keep the juices inside.
Conclusion: Your Board, Your Rules
Building a viral food board isn’t about perfection; it’s about the joy of variety and the warmth of sharing a meal. Whether you’re slow-cooking chicken to tender perfection or searing salmon with a crisp finish, these techniques ensure every bite is a winner. So, grab your largest wooden board, invite some friends over, and start assembling your own internet-breaking masterpiece tonight.