
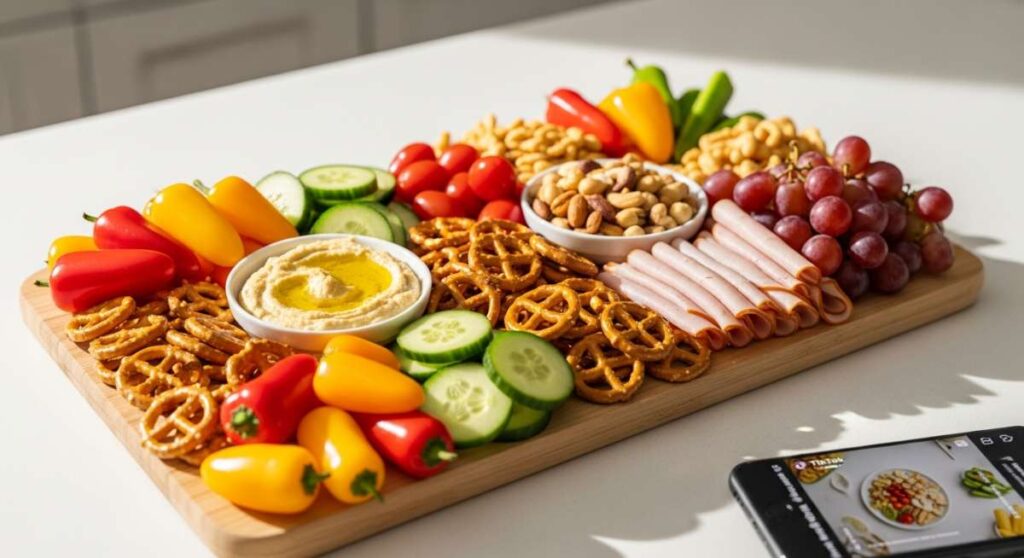
The Easy Snack Board Taking Over TikTok: How to Make It in 5 Minutes
There is something almost magical about the way a simple snack board can turn a regular Tuesday evening into a celebration. We’ve all seen them scrolling through our feeds—those perfectly curated, colorful spreads that look like they belong in a gallery but feel like home. Between the rush of the workday and the chaos of evening routines, the ‘Viral Simple Food Board’ has become my go-to secret weapon for effortless hosting and personal indulgence.
It’s not just about the food; it’s about the intention. When we gather around a board, the barriers come down. There is a tactile joy in reaching for a crisp cracker or a slice of tart fruit, a shared experience that connects us in a way a plated meal often doesn’t. This trend isn’t about perfection; it’s about the beauty of variety and the ease of assembly, proving that you don’t need hours in the kitchen to create something that feels truly special.
How to decorate graduation cakes?
Why we love this
A graduation cake is more than just dessert; it is a sugary monument to years of hard work, late-night study sessions, and the bright promise of the future. We love this process because it allows for a tactile expression of pride, using shimmering gold leaf that catches the light and smooth, velvety buttercream that provides the perfect canvas for celebratory messages. The contrast between the soft sponge and the crisp, clean lines of the decor creates a sensory experience that feels both sophisticated and deeply sentimental.
Ingredients
- Standard round or rectangular pre-baked cake
- Vanilla or chocolate buttercream frosting
- Edible gold leaf or gold sprinkles
- Black fondant for a mini graduation cap
- Royal icing for lettering
- Fresh berries for a pop of color
How to make it
- Begin by applying a ‘crumb coat,’ which is a very thin layer of frosting that seals in the crumbs. Use an offset spatula to smooth it out, then refrigerate the cake for at least 30 minutes until the surface is firm to the touch.
- Apply the final layer of buttercream, using a bench scraper held at a 45-degree angle against the side of the cake while spinning a turntable to achieve a professional, glass-smooth finish.
- Roll out your black fondant to about 1/4 inch thickness; cut a square for the mortarboard and a small circle for the base, joining them with a drop of water to create a miniature graduation cap topper.
- Carefully apply edible gold leaf using a dry, soft-bristled brush. Touch the leaf lightly and press it onto the frosting in organic, abstract clusters for a modern, high-end aesthetic.
- Finish by piping the graduate’s name using a small round tip and royal icing. Keep your hand steady and apply consistent pressure to ensure the lettering is legible and elegant.
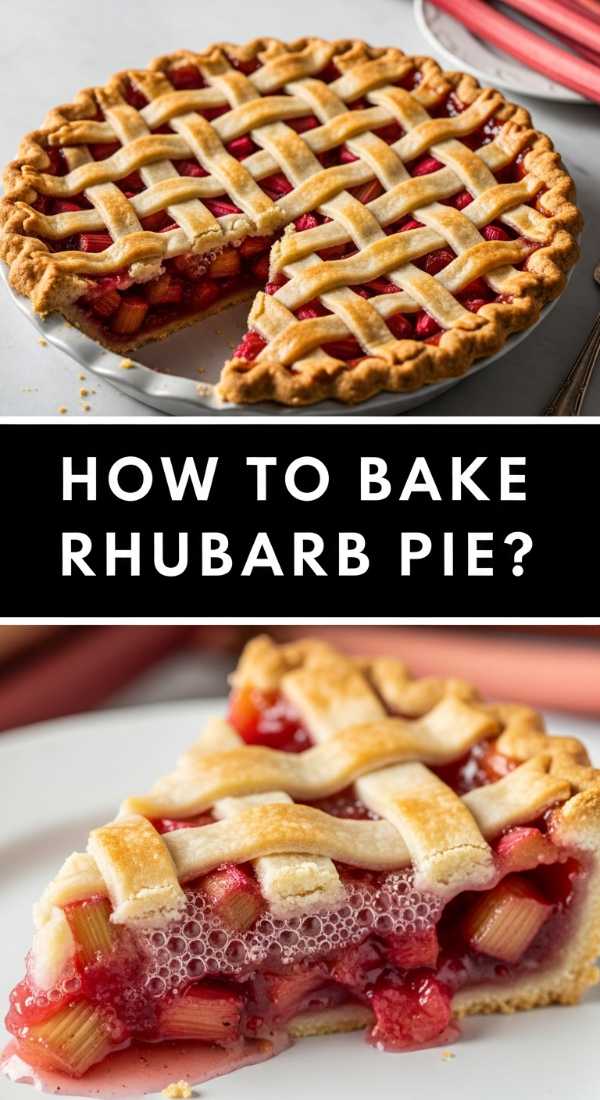
How to bake rhubarb pie?
Why we love this
Rhubarb pie is the ultimate herald of spring, offering a sophisticated tartness that cuts through the buttery richness of a flaky, golden crust. There is something incredibly nostalgic about the aroma of bubbling rhubarb and sugar wafting through the house, signaling the transition from winter’s chill to the warmth of the sun. The texture is a delightful play of contrasts: the crisp, shattering layers of the pastry give way to a soft, jammy interior that dances between sour and sweet on the tongue.
Ingredients
- 2 1/2 cups all-purpose flour
- 1 cup cold unsalted butter, cubed
- 5 cups fresh rhubarb, sliced into 1-inch pieces
- 1 1/4 cups granulated sugar
- 1/4 cup cornstarch
- 1 tablespoon lemon juice
- 1 egg (for egg wash)
How to make it
- Combine flour and cold butter in a food processor, pulsing until the mixture resembles coarse meal with pea-sized lumps of butter remaining. Gradually add ice water until the dough just holds together.
- Divide the dough in half, wrap in plastic, and chill for at least one hour. This allows the gluten to relax and ensures a tender, non-shrinking crust when baked.
- In a large bowl, toss the sliced rhubarb with sugar, cornstarch, and lemon juice. The cornstarch is vital here; it reacts with the heat to thicken the juices, preventing a soggy bottom.
- Roll out one disk of dough and line your pie dish. Pour in the rhubarb mixture. Roll out the second disk, cut into strips, and weave a lattice pattern over the top to allow steam to escape during cooking.
- Brush the lattice with a beaten egg wash and bake at 400°F (200°C) for 20 minutes, then reduce heat to 375°F (190°C) and bake for another 35-40 minutes until the crust is deep golden and the filling is visibly bubbling.
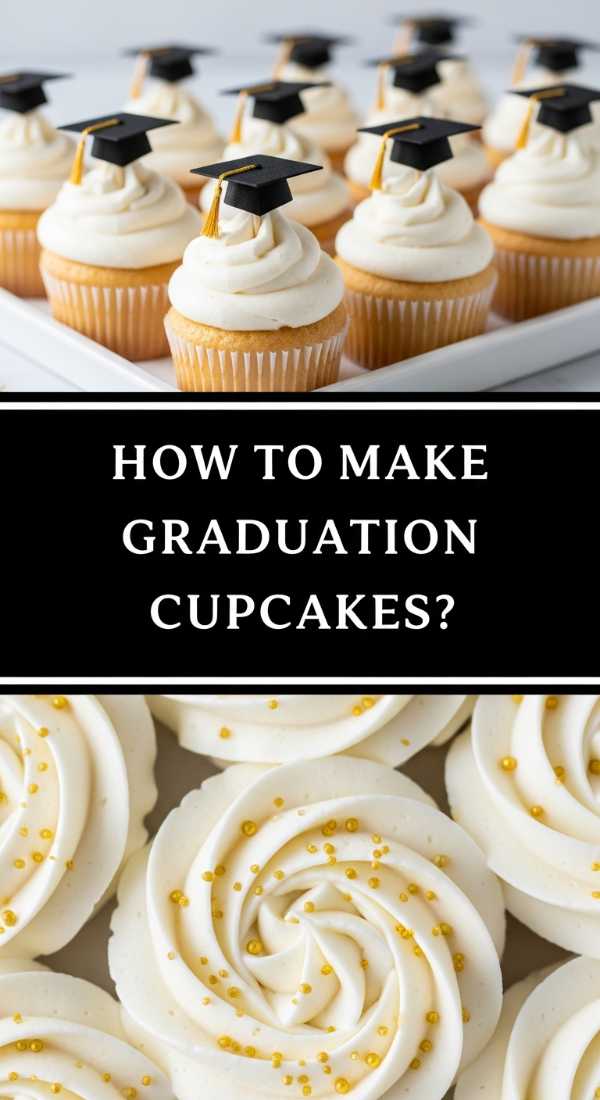
How to make graduation cupcakes?
Why we love this
Graduation cupcakes are the unsung heroes of large parties, offering a handheld, customizable treat that eliminates the need for messy cake cutting. We love the whimsical charm of turning tiny treats into miniature graduates, complete with chocolate mortarboards and sour-candy tassels that add a playful pop of color. Each bite is a perfect ratio of moist cake to creamy frosting, making them an approachable yet impressive addition to any celebratory spread.
Ingredients
- 12 pre-baked chocolate or vanilla cupcakes
- Chocolate ganache or stiff buttercream
- Ghirardelli chocolate squares (the caps)
- Miniature peanut butter cups (the base of the cap)
- Sour belt candy or pull-apart licorice (for tassels)
- M&Ms or small candies (for the button on top)
How to make it
- Frost each cupcake with a flat, even layer of buttercream to create a stable foundation for the graduation cap assembly.
- Unwrap the miniature peanut butter cups and place them upside down in the center of each cupcake, pressing down slightly so they stick to the frosting.
- Apply a small dot of melted chocolate or frosting to the bottom of a Ghirardelli chocolate square and press it onto the peanut butter cup to form the mortarboard.
- Cut your sour candy or licorice into 1-inch thin strips. Use a tiny dab of frosting to attach one end of the ‘tassel’ to the center of the chocolate square, letting the other end hang over the edge.
- Finish by placing a small M&M or candy bead directly over the spot where the tassel is attached to hide the seam and complete the professional look.
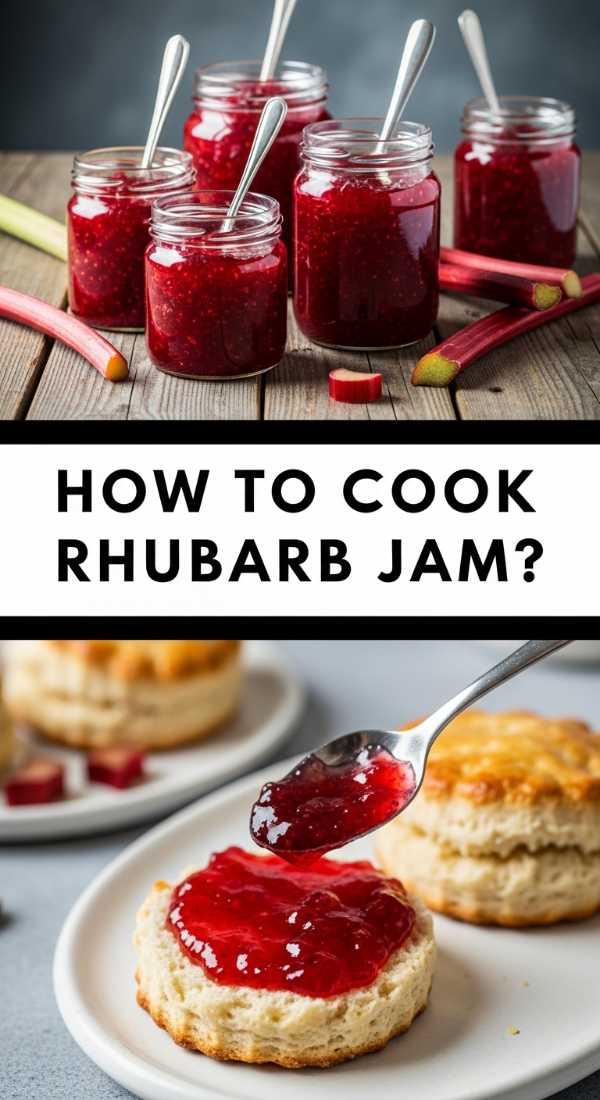
How to cook rhubarb jam?

Why we love this
Rhubarb jam is like capturing the essence of a spring morning in a jar, with its vibrant ruby hue and its sharp, invigorating flavor profile. We love how the tough, fibrous stalks transform under heat into a shimmering, translucent spread that glows when held up to the light. It is a sensory delight to spread this jam over a warm, buttered croissant, feeling the heat of the pastry release the floral notes of the rhubarb and the bright acidity of the lemon.
Ingredients
- 2 lbs fresh rhubarb, chopped into small pieces
- 4 cups granulated sugar
- 1/4 cup fresh lemon juice
- 1 teaspoon vanilla bean paste (optional)
- 1 packet liquid pectin (optional for a firmer set)
How to make it
- In a heavy-bottomed Dutch oven, combine the rhubarb, sugar, and lemon juice. Let the mixture sit for about 30 minutes to allow the sugar to draw out the natural juices from the fruit.
- Bring the mixture to a boil over medium-high heat, stirring constantly with a wooden spoon to prevent the sugar from scorching on the bottom of the pot.
- Once boiling, reduce the heat to medium and simmer. Use a potato masher to lightly break down any large chunks of rhubarb as they soften, creating a thick, rustic texture.
- Cook for 15-20 minutes. To test for doneness, place a small spoonful of jam on a chilled plate; if it wrinkles when pushed with your finger, it has reached the setting point.
- Stir in the vanilla bean paste for depth, then ladle the hot jam into sterilized jars, leaving a 1/4 inch headspace before sealing and processing in a water bath.
How to design funny cakes?
Why we love this
Funny cakes are the ultimate icebreaker, turning a standard dessert into a medium for laughter and personal connection. We love the creative freedom they offer, where ‘imperfections’ like messy writing or exaggerated fondant characters are part of the charm rather than a mistake. It’s about the joy of an inside joke rendered in sugar, where the bright, bold colors and quirky designs evoke a sense of playfulness that reminds us not to take life too seriously.
Ingredients
- A sturdy baked cake (round or square)
- Vibrantly colored buttercream frosting (neon pinks, greens, blues)
- Fondant in various colors
- Edible markers
- Googly eye candies or oversized sprinkles
How to make it
- Start with a smooth base layer of frosting in a contrasting color to your planned design. A bright yellow or electric blue background often makes ‘funny’ elements pop more effectively.
- Sketch your design on a piece of parchment paper first to get the proportions right, whether it’s a ‘clumsy’ animal or a sarcastic quote.
- Use fondant to sculpt 3D elements. For example, if making a ‘lazy’ cake, sculpt a fondant character that appears to be melting into the side of the cake.
- For lettering, use a piping bag with a very small round tip. Intentionally slightly ‘wobbly’ or ‘comic sans’ style writing can enhance the humor of a sarcastic message.
- Add the final ‘chaos’ elements, such as oversized sprinkles or edible glitter, to give the cake an energetic, fun-loving personality that feels spontaneous.
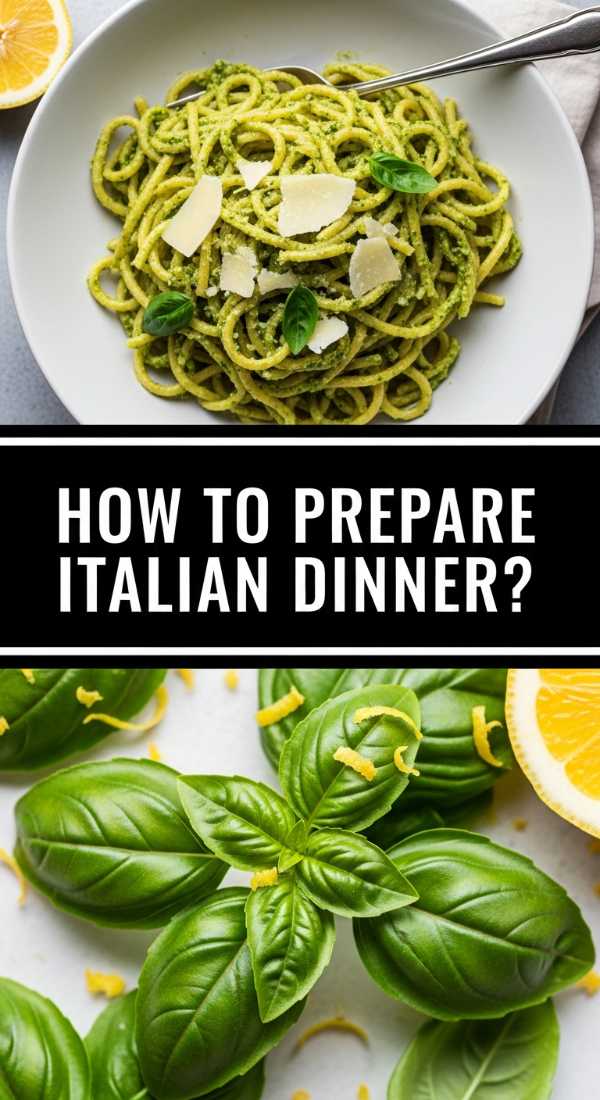
How to prepare italian dinner?

Why we love this
An Italian dinner is a masterclass in the beauty of simplicity, where high-quality ingredients are allowed to sing without being masked by over-complication. We love the ritual of it—the sound of garlic sizzling in golden olive oil, the earthy aroma of fresh basil being torn by hand, and the steam rising from a pot of perfectly salted water. It’s a meal that engages all the senses, culminating in a rich, savory experience that feels like a warm embrace from a Mediterranean kitchen.
Ingredients
- 1 lb high-quality dried pasta (like bronze-cut spaghetti)
- 2 cans San Marzano tomatoes, crushed by hand
- 4 cloves garlic, thinly sliced
- 1/2 cup extra virgin olive oil
- Handful of fresh basil leaves
- Freshly grated Pecorino Romano or Parmesan
How to make it
- Heat the olive oil in a wide skillet over medium-low heat. Add the sliced garlic and cook slowly until it is fragrant and translucent, but not browned, to avoid bitterness.
- Add the crushed tomatoes and a pinch of salt. Increase the heat to medium and simmer for about 20 minutes, allowing the sauce to thicken and the flavors to concentrate into a rich red hue.
- While the sauce simmers, bring a large pot of water to a rolling boil. Add enough salt so the water ‘tastes like the sea’—this is the only chance to season the pasta itself.
- Cook the pasta until it is ‘al dente’ (firm to the bite). Reserve one cup of the starchy pasta water before draining; this liquid gold is the secret to a silky sauce.
- Toss the pasta directly into the skillet with the sauce, adding splashes of the reserved water and tossing vigorously. Finish with fresh basil and a generous rain of cheese.
How to make rhubarb crumble?

Why we love this
Rhubarb crumble is the cozy, effortless cousin of the pie, offering a rustic charm that is perfect for casual Sunday afternoons. We love the textural symphony of the topping—toasted oats and brown sugar forming a crunchy, buttery blanket over the tart, bubbling fruit beneath. As it bakes, the rhubarb softens into a luscious, tangy sauce that seeps into the bottom of the crumble, creating a dish that is best served warm with a melting scoop of cold vanilla bean ice cream.
Ingredients
- 6 cups rhubarb, cut into 1/2 inch pieces
- 3/4 cup granulated sugar
- 1 cup old-fashioned rolled oats
- 1 cup all-purpose flour
- 1 cup brown sugar, packed
- 1/2 cup cold unsalted butter, cubed
- 1 teaspoon cinnamon
How to make it
- Preheat your oven to 375°F (190°C). In a 9×13 inch baking dish, toss the chopped rhubarb with the granulated sugar until evenly coated, then spread it out in an even layer.
- In a separate bowl, combine the oats, flour, brown sugar, and cinnamon. Stir to ensure the spices are evenly distributed throughout the dry ingredients.
- Add the cold, cubed butter to the oat mixture. Use your fingertips or a pastry cutter to work the butter in until the mixture looks like wet sand with some larger, pea-sized clumps.
- Sprinkle the crumble mixture evenly over the rhubarb. Do not pack it down; keeping it loose allows the heat to circulate and creates a crunchier texture.
- Bake for 35-45 minutes. You are looking for the fruit juices to be thick and bubbling around the edges, and the oat topping to be a deep, toasted golden brown.
How to decorate graduation cookies?

Why we love this
Graduation cookies are tiny works of art that offer a satisfying precision for those who love detail-oriented decorating. There is a meditative quality to flooding a sugar cookie with smooth royal icing, watching the surface tension hold the liquid in place before it dries to a porcelain-like finish. We love how these cookies can be customized with school colors and personalized dates, making them a thoughtful, edible keepsake that guests are always hesitant to eat because they look so beautiful.
Ingredients
- Batch of firm sugar cookies (cut into caps, diplomas, and stars)
- Royal icing in multiple colors (piping and flooding consistencies)
- Fine-tip piping bags
- Scribe tool or toothpick
- Edible silver or gold dust
How to make it
- Start with ‘piping consistency’ icing (thick like toothpaste) to outline the edge of the cookie. This creates a dam that will prevent the thinner icing from spilling over.
- Use ‘flooding consistency’ icing (thinner, like honey) to fill in the center of the outline. Use a scribe tool or toothpick to pop any tiny air bubbles and move the icing into the corners.
- Allow the base layer to dry completely for at least 4-6 hours. This is crucial to prevent the next layer of colors from bleeding into the base.
- Once dry, use the piping consistency icing to add details like the tassel on the cap, the ribbon on the diploma, or the year of graduation.
- For an extra flair, mix a drop of vodka with edible gold dust to create a ‘paint’ and use a small brush to highlight the tassels or the edges of the stars for a metallic shine.
How to mix coffee drinks?
Why we love this
Mixing coffee drinks at home is a morning ritual that transforms a caffeine fix into a moment of pure culinary alchemy. We love the visual drama of pouring cold cream into dark espresso, watching the swirls of white and brown dance together like storm clouds in a glass. The ability to customize the sweetness, the temperature, and the foam density means every cup is a tailored experience that caters perfectly to your mood, whether you need a sharp, icy jolt or a warm, frothy hug.
Ingredients
- 2 shots of hot espresso or 1/2 cup cold brew concentrate
- 1 cup milk or oat milk
- 1-2 tablespoons flavored syrup (vanilla, caramel, or lavender)
- Ice cubes (for iced versions)
- Cinnamon or cocoa powder for dusting
How to make it
- For an iced latte, fill a tall glass with large ice cubes. Pour your syrup of choice over the ice first to ensure it integrates well when the liquid is added.
- Pour the milk over the ice, filling the glass about 3/4 of the way. If you want a layered look, pour the milk slowly over the back of a spoon.
- Carefully pour the espresso or cold brew concentrate over the top. The temperature difference and density will cause the coffee to slowly bleed down through the milk in beautiful streaks.
- If making a hot drink, use a milk frother to aerate the milk until it doubles in volume. Hold the pitcher about 6 inches above the cup to start the pour, then bring it close to create ‘latte art.’
- Finish with a light dusting of cinnamon or cocoa powder. Use a stencil for a professional look, ensuring the powder settles only on the thickest part of the foam.
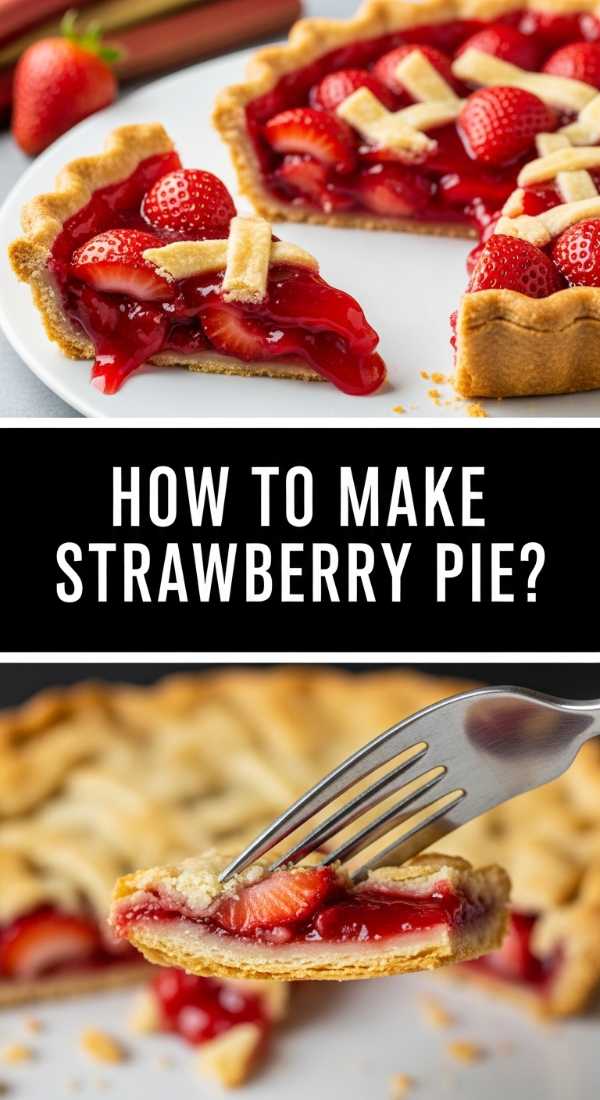
How to make strawberry pie?
[IMAGE_10]
Why we love this
Strawberry pie is the quintessential taste of summer, bursting with the bright, sun-ripened flavor of fresh berries held together by a glossy, ruby-red glaze. We love this pie for its freshness; unlike many baked fruit pies, the berries often remain whole and vibrant, offering a juicy ‘snap’ with every bite. The combination of the buttery, salty crust and the sweet, slightly floral strawberries creates a balanced dessert that feels incredibly light and refreshing on a hot afternoon.
Ingredients
- 1 pre-baked 9-inch pie crust
- 6 cups fresh strawberries, hulled (keep small ones whole, halve large ones)
- 1 cup sugar
- 3 tablespoons cornstarch
- 1 cup crushed strawberries (for the glaze)
- 1 tablespoon lemon juice
How to make it
- In a medium saucepan, combine the 1 cup of crushed strawberries, sugar, cornstarch, and lemon juice. Whisk until smooth to ensure there are no cornstarch clumps.
- Cook the mixture over medium heat, stirring constantly, until it reaches a boil. Continue to cook for 1-2 minutes until the glaze becomes thick, clear, and translucent.
- Let the glaze cool slightly so it doesn’t wilt the fresh berries. While cooling, arrange the whole or halved fresh strawberries tightly into the pre-baked pie shell.
- Pour the warm glaze evenly over the strawberries, using a spatula to ensure every berry is coated and the gaps between the fruit are filled.
- Refrigerate the pie for at least 3-4 hours. This chilling time is essential for the glaze to set firmly, allowing you to cut clean, beautiful slices that hold their shape.
Wrapping Up the Viral Vibe
Whether you’re assembling a snack board for a TikTok-worthy Friday night or diving into the tart world of rhubarb, the goal is always the same: to find joy in the process. These recipes and tips aren’t just about the final product; they are about the five minutes of calm you find while decorating a cupcake or the pride of pulling a golden pie from the oven. So, grab your board, pick a recipe, and start creating your own viral-worthy moments in the kitchen!
Frequently Asked Questions
Q: Can I make the rhubarb jam without pectin?
A: Absolutely! Rhubarb has natural fibers that help it thicken, but you will need to simmer it a bit longer to reach the desired consistency. Adding a little extra lemon juice can also help the natural setting process.
Q: What is the best way to store a graduation cake before the party?
A: It’s best to keep the cake in a cool, dry place. If you have a buttercream frosting, the refrigerator is safest, but be sure to take it out about an hour before serving so the frosting softens to a creamy texture.
Q: How do I prevent my strawberry pie crust from getting soggy?
A: The key is to let the glaze cool significantly before pouring it over the berries, and to ensure your pre-baked crust is completely cold. Some bakers also brush a thin layer of melted white chocolate on the crust to create a moisture barrier!