
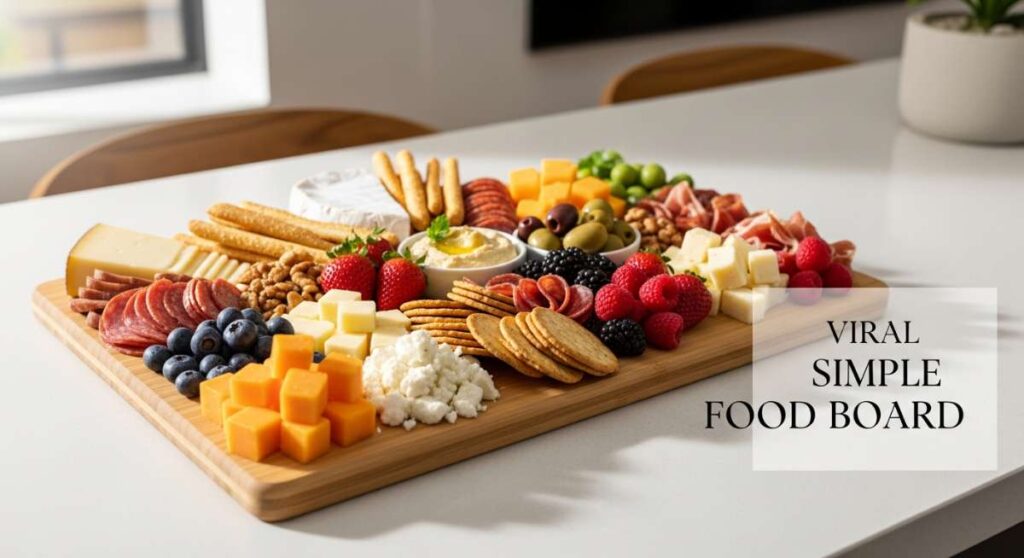
Why Everyone Is Obsessed With This Easy Viral Food Board Hack
We’ve all seen them—those stunning, colorful spreads that seem to dominate our social media feeds, promising the ultimate hosting experience with zero stress. But lately, the ‘board’ trend has evolved into something much deeper than just cheese and crackers. It’s a philosophy of curation, a way to take the ‘hack’ of visual organization and apply it to every corner of our lives, from our front yards to our digital screens. There is a specific kind of magic in seeing disparate elements come together to create a cohesive, beautiful whole that feels both effortless and intentionally designed.
I remember the first time I tried to recreate that viral aesthetic; I was overwhelmed by the choices until I realized the secret isn’t in the complexity, but in the layers. Whether you are arranging a platter of artisanal treats or layering textures in your home office, the principles of ‘the board’ remain the same: balance, contrast, and a touch of personal flair. Today, we are diving into how to master this lifestyle board hack across your entire world, making every moment feel like a curated masterpiece.
How to Master Simple Landscaping for a Stunning Front Yard

Why we love this
There is something inherently grounding about walking up to a home that feels like a living, breathing canvas of greenery and intentional design. We love this approach because it transforms the chore of gardening into a sensory ritual; the smell of damp, nutrient-rich mulch after a morning rain, the satisfying crunch of decorative gravel underfoot, and the vibrant, velvety texture of hosta leaves against a crisp, white exterior. It creates an immediate sense of peace and pride, turning a simple patch of grass into a curated sanctuary that welcomes you home with a fragrant, visual hug every single day.
Essential Elements:
- Native perennial plants (for longevity).
- Dark hardwood mulch (for color contrast).
- Natural stone edging or pavers.
- Solar-powered accent lighting.
- A central statement plant or small ornamental tree.
How to make it
- Survey and Prep: Begin by clearing your ‘canvas’—remove all weeds, dead grass, and debris. This is the prep phase where you ensure the ‘heat’ of the soil is right by testing for moisture and drainage.
- Layout Design: Place your potted plants in their intended spots before digging. Visual cues here are key; look for a balance of heights, placing taller shrubs in the back and smaller florals toward the edge for a tiered effect.
- Excavation and Planting: Dig holes twice as wide as the root ball. Ensure the ‘doneness’ of your planting by keeping the crown of the plant level with the soil surface. This prevents root rot and ensures the plant can breathe.
- Layering the Texture: Apply a thick, three-inch layer of mulch. The professional tip here is to leave a small gap around the base of the plants to allow for airflow and to prevent trapping too much heat at the stem.
- The Final Garnish: Add your stone borders and solar lights. This is like the final seasoning on a dish; it brings out the highlights and ensures the yard looks stunning even after the sun goes down.
How to Arrange a Productive Office Desk for a Dream Work Cubicle
Why we love this
Your workspace is the cockpit of your creativity, and arranging it correctly feels like a deep breath for your brain. We are obsessed with this setup because it balances the clinical efficiency of modern tech with the tactile warmth of personal touches—the smooth, cool feel of a leather desk mat, the gentle hum of a silent mechanical keyboard, and the faint, energizing scent of a citrus-based candle. When your desk is organized as a ‘productivity board,’ every tool has its place, reducing visual noise and allowing your focus to flow as smoothly as ink on premium paper.
Essential Elements:
- Ergonomic monitor stand.
- A large, high-quality desk mat.
- Adjustable desk lamp with warm/cool settings.
- Minimalist cable management clips.
- A small, low-maintenance succulent or air plant.
How to make it
- The Foundation: Clear the entire surface and wipe it down with a light, non-greasy cleaner. This ‘clean pan’ approach allows you to see the true space you have to work with.
- Ergonomic Zoning: Place your monitor at eye level. The timing is critical here—if you feel neck strain after 20 minutes, your ‘heat’ (monitor height) is too low. Adjust until your gaze is naturally neutral.
- Lighting Calibration: Position your task lamp on the opposite side of your dominant hand to eliminate shadows. Professional tip: Use a warm white light (around 3000K) to keep the atmosphere cozy yet alert.
- Peripheral Placement: Arrange your keyboard and mouse so your elbows form a 90-degree angle. This is the visual cue for a ‘done’ ergonomic setup; your body should feel relaxed, not stretched.
- Sensory Finishing: Add one personal item and your plant. The plant provides oxygen and a touch of organic texture that breaks up the hard lines of the technology.
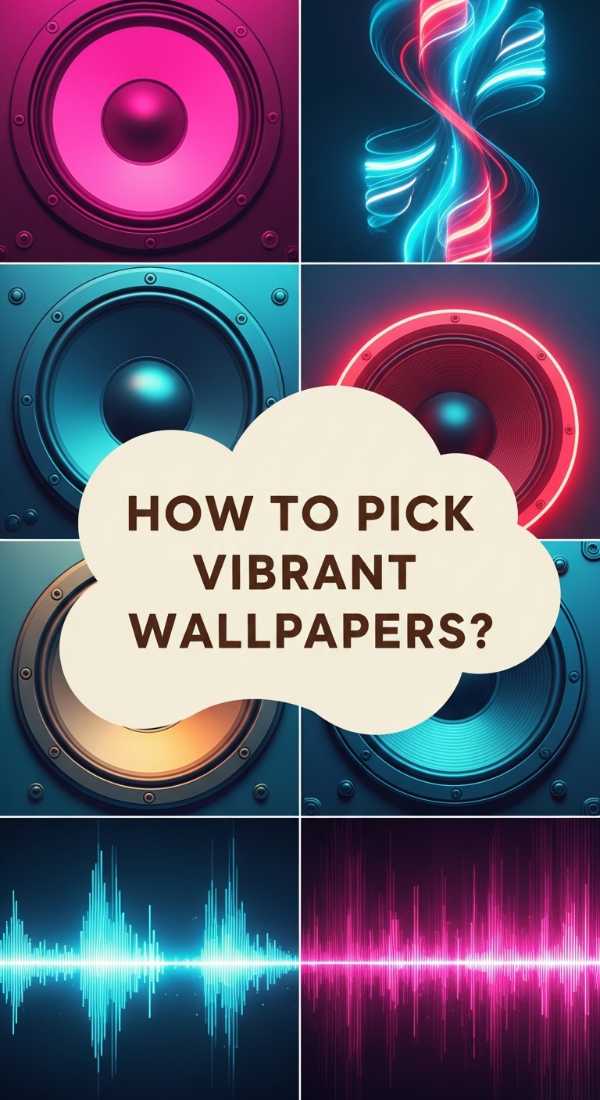
How to Pick Vibrant JBL Speakers Wallpapers for an Aesthetic Home Screen
Why we love this
Our phones are the most used ‘boards’ in our lives, and personalizing them with high-energy JBL-inspired wallpapers brings a sense of rhythmic vitality to our digital day. The appeal lies in the sharp, neon-infused colors and the sleek, industrial textures of the speaker mesh captured in high definition. Looking at a vibrant wallpaper feels like hearing the first bass drop of your favorite song; it is crisp, electric, and full of life, turning a mundane screen-unlock into a moment of pure aesthetic satisfaction and musical inspiration.
Essential Elements:
- High-resolution (4K) JBL brand imagery.
- Neon color palettes (Electric Blue, Sunset Orange).
- Abstract soundwave patterns.
- Texture-focused macro shots of speaker grills.
- Minimalist app icon packs to match.
How to make it
- Source Quality Content: Search for official JBL assets or high-end photography sites. The visual cue for quality is the absence of ‘noise’ or pixelation in the darker areas of the image.
- Color Coordination: Pick a wallpaper that matches your phone’s physical case color. This ‘plating’ technique ensures a seamless transition from hardware to software.
- Depth Effect Prep: On modern smartphones, select images with a clear subject in the foreground. This allows the OS to apply a ‘bokeh’ or depth effect, making the JBL logo or speaker pop off the screen.
- Scale and Crop: Use the pinch-to-zoom feature during the setting phase. Ensure no critical part of the speaker is blocked by the clock or system widgets.
- Filter Tuning: If the colors are too ‘hot’ (too bright for night use), slightly lower the saturation or apply a subtle blue-light filter to keep the aesthetic vibrant but easy on the eyes.
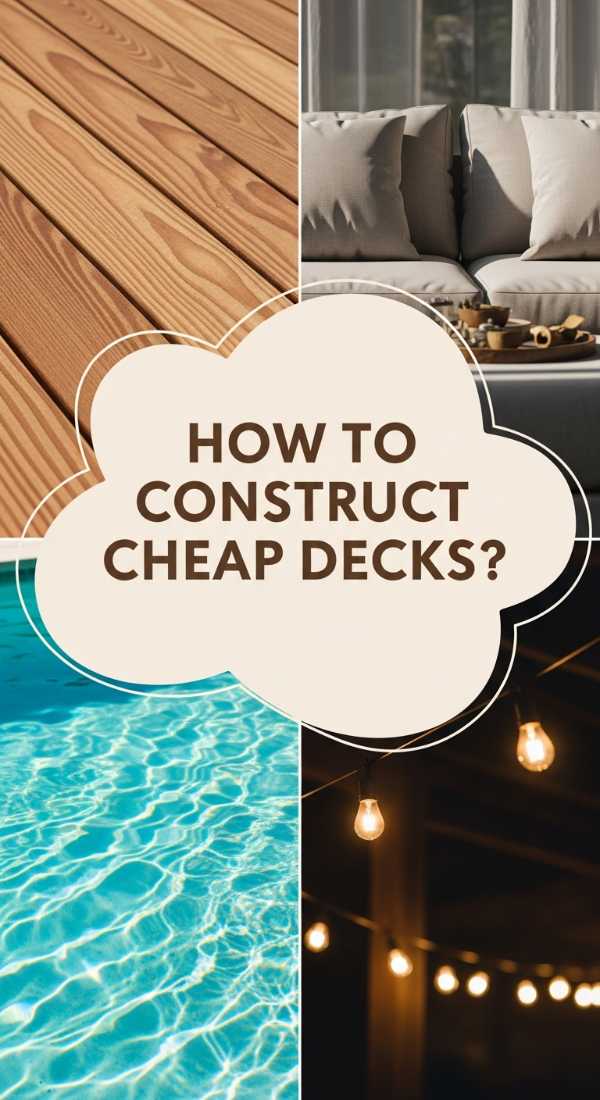
How to Construct a Cheap Pool Deck for an Oasis Experience
Why we love this
There is nothing quite like the feeling of sun-drenched wood under your bare feet as you prepare to dip into cool, shimmering water. Building a budget-friendly pool deck is about capturing that luxury resort feeling without the high-end price tag; it’s the smell of cedar wood sealer, the sound of water lapping against the edge, and the sight of shadows dancing across a smooth, level platform. This DIY board hack turns a basic above-ground pool into an integrated backyard destination where the air feels lighter and the summer afternoons feel infinite.
Essential Elements:
- Pressure-treated 2×4 and 2×6 lumber.
- Decking screws (weather-resistant).
- Concrete deck blocks (no digging required).
- Exterior wood stain or sealant.
- Outdoor rugs and lounge chairs.
How to make it
- Leveling the Ground: This is the most critical prep phase. Use a transit level or a long string level to ensure your blocks are perfectly flat. If the foundation is ‘off-heat,’ the entire deck will wobble.
- Setting the Blocks: Lay your concrete blocks in a grid pattern. Professional tip: Add a layer of crushed gravel under each block to facilitate drainage and prevent the wood from ‘overcooking’ in moisture.
- Framing the Structure: Connect the outer rim joists first. Use a framing square to check the ‘doneness’ of your corners; they must be exactly 90 degrees for the decking boards to lay straight.
- Laying the Decking: Space your boards using a 16-penny nail as a spacer. This ensures that as the wood expands in the heat, it won’t buckle or warp.
- Sealing the Deal: Apply a high-quality UV-resistant stain. The visual cue for a perfect finish is a uniform sheen where water beads up on the surface rather than soaking in.
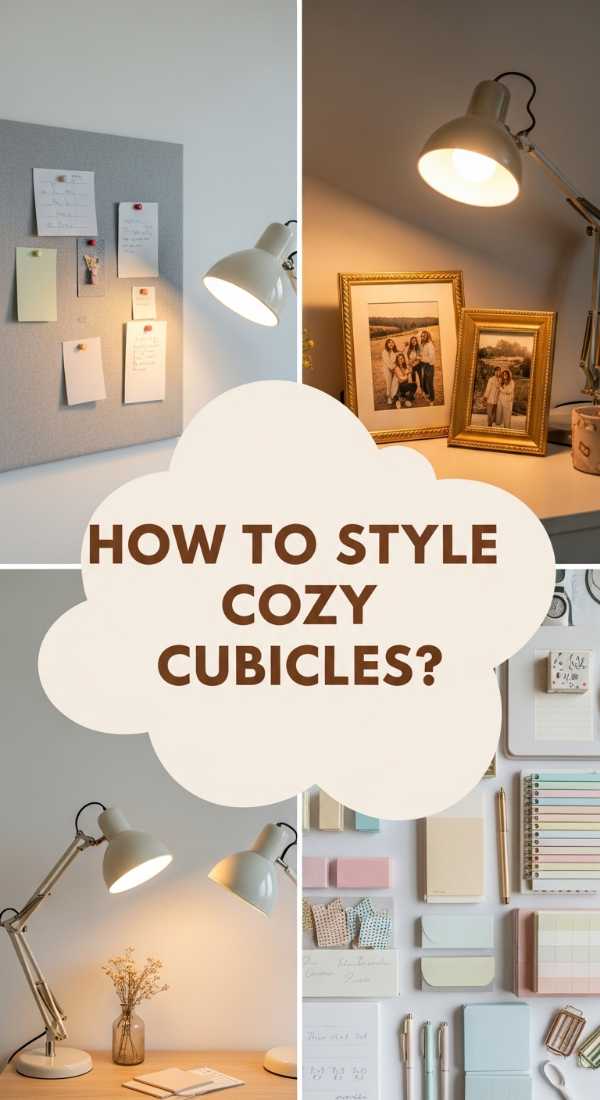
How to Style Your Work Cubicle for a Joyful Workspace
Why we love this
Styling a cubicle is the ultimate exercise in making a small space sing with personality. We love this hack because it breaks the monotony of beige walls with bursts of color and soft textures—think of a plush velvet pillow on your chair, a gold-toned wire grid for photos, and the delicate shimmer of fairy lights. It transforms a standard corporate box into a joyful cocoon that smells of your favorite hand cream and looks like a curated gallery, making the nine-to-five grind feel like a creative retreat rather than a chore.
Essential Elements:
- Peel-and-stick wallpaper (fabric or textured).
- Personal framed photos and art prints.
- Soft-glow desk accessories.
- Decorative organizational bins.
- A small, plush area rug for under the desk.
How to make it
- Wall Preparation: Clean the fabric or plastic walls of your cubicle. If using peel-and-stick, apply it from top to bottom, smoothing out air bubbles as you go to ensure a ‘medium-rare’ soft finish.
- Vertical Layering: Use cubicle hooks or magnetic strips to hang items. The ‘plating’ tip here is to group items in odd numbers (groups of 3 or 5) for a more natural, professional aesthetic.
- Textural Additions: Place a throw or a lumbar pillow on your chair. This adds immediate visual ‘flavor’ and provides much-needed ergonomic support for long sessions.
- Lighting the Mood: Avoid the ‘harsh heat’ of overhead fluorescent lights. Add a small lamp or a string of LEDs. The visual cue for success is a warm, diffused glow that fills the cubicle corners.
- Final Curation: Rotate your desk accessories seasonally. This keeps the ‘menu’ of your workspace fresh and prevents the design from becoming stale.
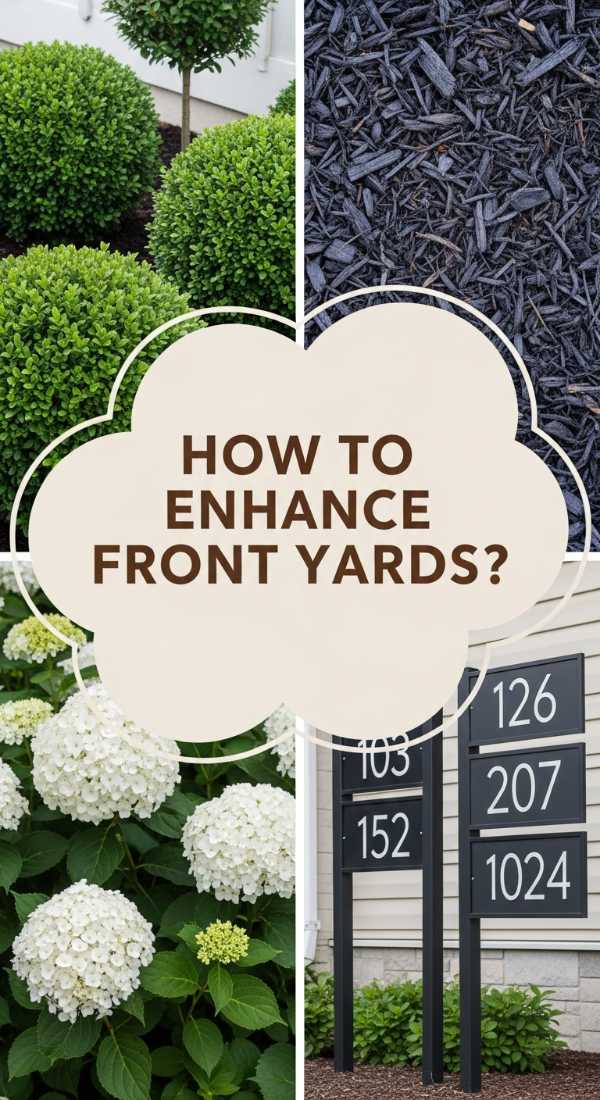
How to Enhance Your Front Yard Landscaping for Curb Appeal Excellence
Why we love this
Enhancing your curb appeal is like putting the perfect finishing glaze on a gourmet cake—it’s the first thing everyone sees and sets the tone for everything inside. We love the way a well-sculpted flower bed contrasts against a freshly edged lawn, creating a sharp, professional look that radiates ‘luxury.’ The sensory experience of a manicured front yard involves the sweet perfume of blooming jasmine, the deep green hue of healthy turf, and the clean lines of a freshly swept walkway, all of which scream excellence and attention to detail.
Essential Elements:
- Steel or stone garden edging.
- Symmetrical foundation plantings (boxwoods or yews).
- High-contrast house numbers.
- Potted plants for the entryway.
- Fresh black or dark brown mulch.
How to make it
- Edge Definition: Use a power edger or a manual spade to create a deep ‘V’ trench between the grass and the beds. This sharp line is the visual cue of professional landscaping ‘doneness.’
- Symmetry Check: Place identical planters on either side of the door. Symmetrical balance is the ‘secret sauce’ that makes a home look expensive and well-thought-out.
- Foundation Layering: Plant evergreens closest to the house and seasonal flowers in front. This ensures your ‘base flavor’ (the evergreens) stays all year while the ‘garnish’ (flowers) changes.
- Moisture Management: Water your plants deeply at the root level early in the morning. Timing is everything; watering in the high heat of the day can ‘scorch’ the leaves.
- Grooming and Polishing: Deadhead spent flowers and sweep the porch daily. This final touch keeps the ‘curb appeal’ at peak freshness for every guest.
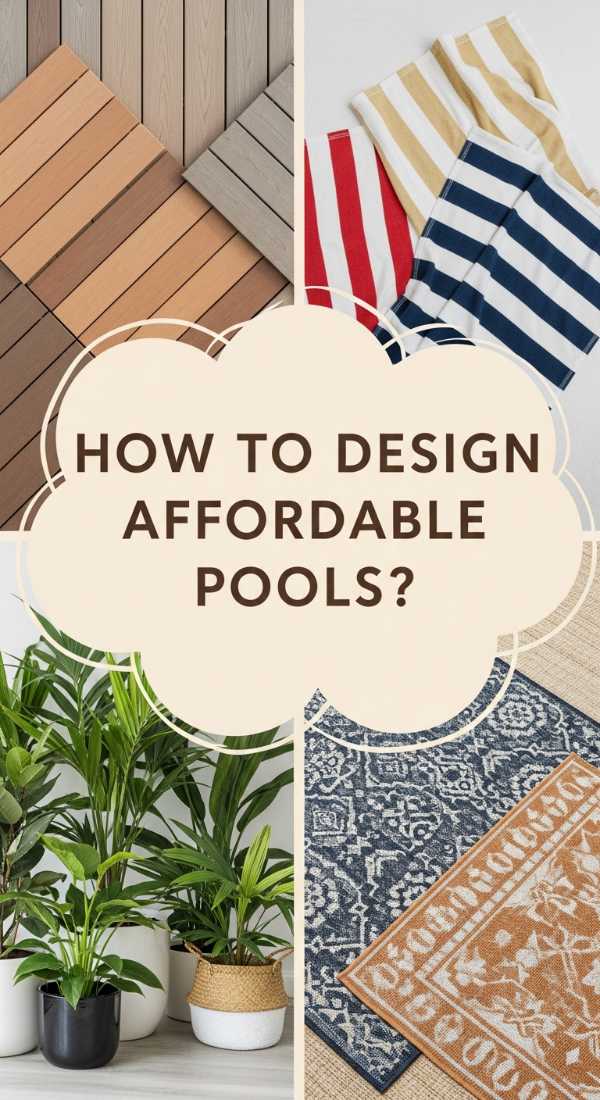
How to Design an Affordable Pool Deck for Summer Entertaining

Why we love this
Designing for entertaining means focusing on flow and social ‘flavor.’ We love an affordable pool deck that prioritizes space for lounging and conversation, featuring built-in benches and wide, inviting walkways. The aroma of a nearby grill, the cool mist of a poolside fan, and the soft, weathered texture of a gray-stained deck create a sensory paradise that beckons friends and family. It’s about creating a ‘board’ of experiences—a place to dry off, a place to eat, and a place to simply soak in the summer sun.
Essential Elements:
- Modular decking tiles or pallets.
- Outdoor-rated string lights (Edison style).
- Built-in seating or benches.
- Oversized outdoor cushions.
- Large umbrella or shade sail.
How to make it
- Space Planning: Mark out your ‘zones’ using painter’s tape on the grass. You need a ‘prep area’ for food and a ‘cool down’ area for lounging.
- Platform Assembly: If using pallets, sand them thoroughly to avoid splinters. The ‘doneness’ visual here is a smooth, satiny feel to the wood before any stain is applied.
- Structural Reinforcement: Use heavy-duty brackets to secure your seating. This prevents any ‘heat’ or stress on the joints when multiple people are sitting together.
- Atmosphere Installation: String your lights in a zigzag pattern across the deck. Professional tip: Hang them at least 8 feet high to ensure they are out of the way but provide an even, warm wash of light.
- Hydration Station: Add a small, weather-resistant side table for drinks. A well-placed table is the final step in ensuring your ‘entertaining board’ is functional and stylish.
How to Personalize Your Phone with JBL Speakers Wallpapers for Unique Style
Why we love this
There is a specific thrill in having a phone screen that looks as powerful as your favorite speaker sounds. Personalizing with JBL-themed wallpapers is about more than just a brand; it’s about the aesthetic of bass and the industrial beauty of audio engineering. We love the way the deep blacks and saturated oranges of the JBL logo look on an OLED screen, creating a high-contrast visual that feels premium and bespoke. It turns your device into a style statement that reflects a love for music, clarity, and bold, modern design.
Essential Elements:
- Graphic design apps (like Canva or Adobe Express).
- Icon masking tools.
- JBL signature orange (#FF6600) color codes.
- High-contrast photography of speakers in nature.
- Customized widgets for music players.
How to make it
- Base Image Selection: Find a photo of a JBL speaker in a unique environment (like a beach or a studio). The visual cue for a great wallpaper is a ‘rule of thirds’ composition.
- Color Grading: Use a photo editor to bump up the ‘vibrance’ and ‘clarity.’ This makes the speaker mesh and the logo look sharp and ‘well-cooked’ in terms of color depth.
- Widget Harmonization: Customize your Spotify or Apple Music widget to match the wallpaper’s colors. This ‘pairing’ creates a unified digital board that looks professionally designed.
- Lock Screen vs. Home Screen: Use a busy, detailed image for the lock screen and a more ‘minimalist’ version of the same theme for the home screen. This prevents the ‘heat’ of the wallpaper from making your icons hard to read.
- Final Preview: Check the wallpaper in different brightness levels. The ‘perfect doneness’ is when the JBL logo is visible even at 20% screen brightness.
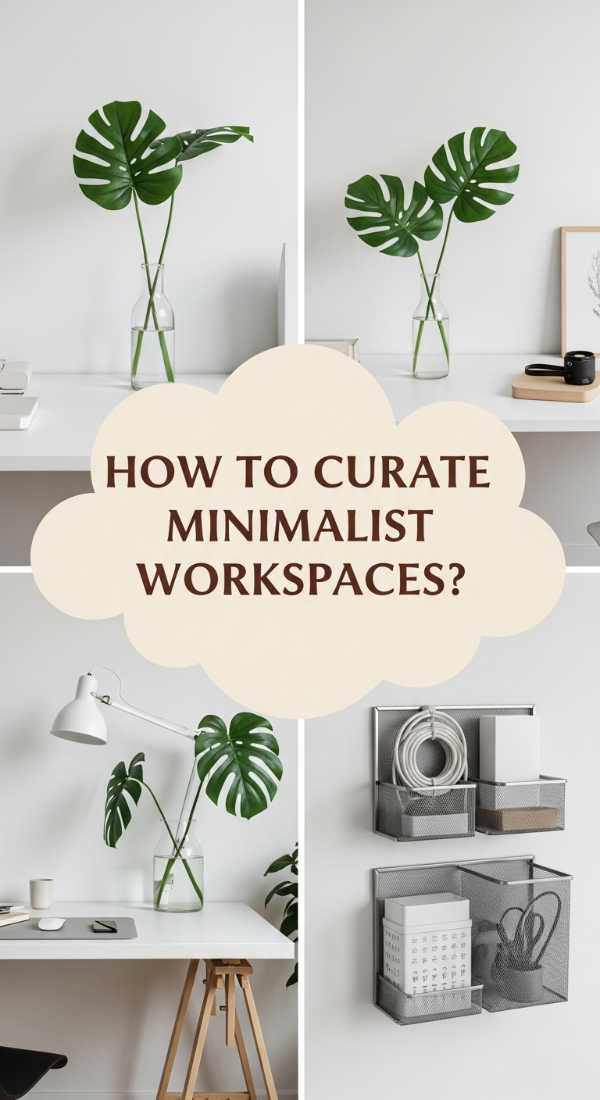
How to Curate a Minimalist Work Cubicle for Focused Creativity
Why we love this
Minimalism in a cubicle is like a palate cleanser for the soul. We love this look because it strips away the ‘ingredients’ of a cluttered workday, leaving only the essentials that inspire deep work. The visual of a clean, white desk surface paired with a single, high-quality metallic pen and a perfectly bound notebook is incredibly soothing. It creates a sensory experience of calm and order, where the only thing you can smell is your fresh coffee and the only thing you see is the path to your next big idea.
Essential Elements:
- Monochromatic color scheme (whites, grays, blacks).
- Hidden cable management tray.
- Single-item statement decor (like one sculpture or plant).
- Digital clock with a clean, sans-serif font.
- Wireless charging pad.
How to make it
- The Purge Phase: Remove every item from your cubicle. This is the ‘boiling down’ phase where you reduce your workspace to its core essence.
- Essential Selection: Only bring back items you use daily. If you haven’t touched it in a week, it’s ‘overcooked’ and needs to stay out of the recipe.
- Hidden Power: Use 3M command strips to hide power strips under the desk. A ‘done’ minimalist desk has zero visible wires, looking as if the technology is powered by magic.
- Space and Flow: Leave at least 50% of your desk surface empty. This ‘open space’ is a visual cue that allows your mind to expand without hitting a physical barrier.
- Maintenance Ritual: Spend 5 minutes at the end of every day resetting the ‘board.’ This ensures that every morning starts with the same clean, minimalist ‘flavor.’
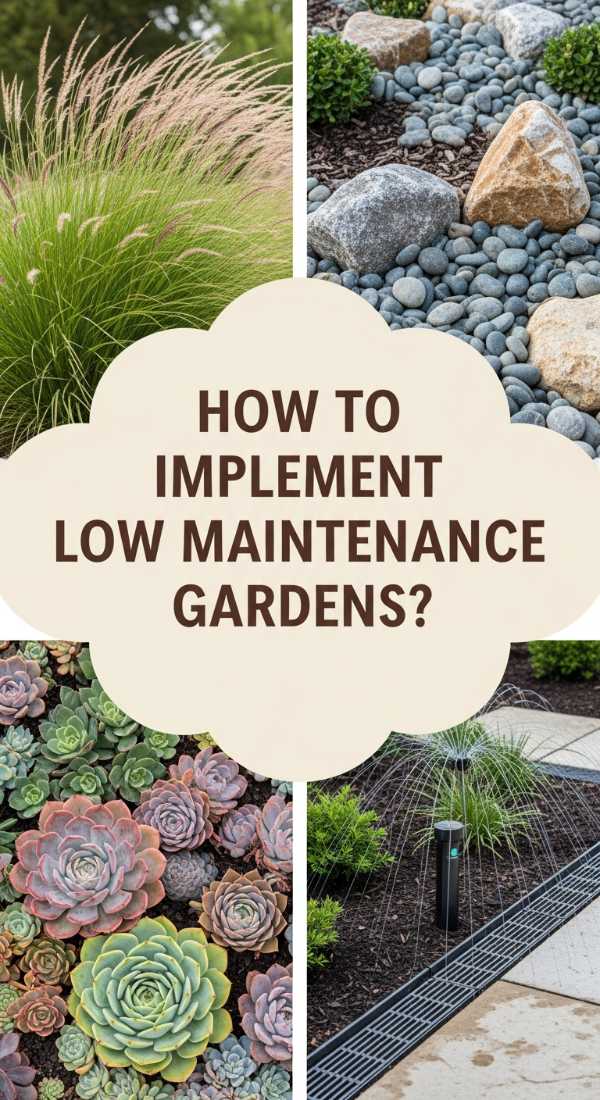
How to Implement Low Maintenance Landscaping for a Beautiful Front Yard
[IMAGE_10]
Why we love this
The ultimate luxury is a yard that looks like a million dollars but requires almost no work to maintain. We love low-maintenance landscaping because it uses the ‘board hack’ of permanent textures—think decorative slate, evergreen shrubs, and drought-resistant succulents that stay vibrant through every season. The smell of cedar mulch and the sight of architectural plants like yucca or lavender provide a sophisticated, ‘set-it-and-forget-it’ beauty. It’s the perfect lifestyle hack for those who want to enjoy the view without spending every weekend with a shovel in hand.
Essential Elements:
- Landscape fabric (to prevent weeds).
- River rock or pea gravel.
- Drought-tolerant plants (succulents, lavender, ornamental grasses).
- Automatic drip irrigation system.
- Hardy perennial groundcovers.
How to make it
- Ground Suppression: Lay down heavy-duty landscape fabric over the entire area. Use garden staples to ‘seal the edges’—this is your primary defense against ‘weeding heat.’
- Stone Layering: Spread a 2-inch layer of river rock over the fabric. The visual cue for a job well done is a completely uniform surface where no fabric is visible.
- Strategic Planting: Cut ‘X’ shapes in the fabric only where you want a plant. This ‘targeted prep’ ensures that moisture goes only to the plants you want and nowhere else.
- Irrigation Setup: Run a drip line under the rocks. This ensures that the ‘seasoning’ (water) is delivered directly to the roots without any waste or evaporation.
- Permanent Accents: Add large boulders or weathered wood pieces. These ‘non-perishables’ provide visual interest and structure that never wilts or needs pruning.
Conclusion: Embracing the Board Lifestyle
Whether you are styling a desk, a yard, or a digital screen, the viral food board hack has taught us that beauty lies in the arrangement. It’s about taking the simple elements of our lives and presenting them with care, balance, and a bit of sensory magic. When we treat our environment like a curated board, we find joy in the details and peace in the organization. So go ahead—start layering, start textures, and transform your everyday into something truly extraordinary.