
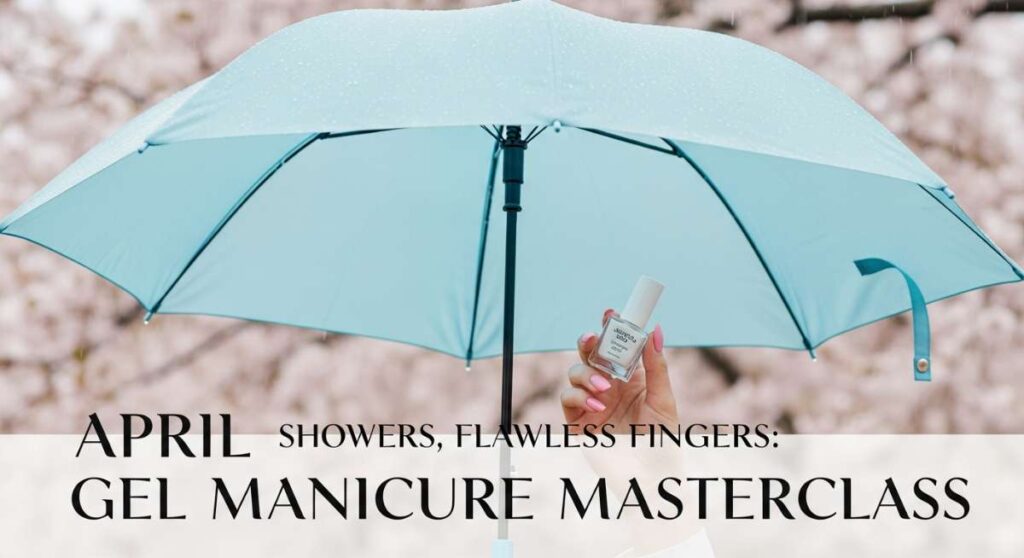
April Showers, Flawless Fingers: Master the Gel Mani This Month
Hi my loves! There is something so incredibly soothing about the sound of April rain tapping gently against the windowpane while you’re tucked away in your favorite cozy corner. It’s a time for renewal, for soft whispers of spring, and for giving ourselves the gentle care we truly deserve. I’ve always found that a fresh manicure is more than just a beauty routine; it’s a tiny, rhythmic ritual of self-love that makes even the grayest rainy day feel like a masterpiece.
This month, I want to invite you into my little sanctuary for an April Gel Manicure Masterclass. We’re going to step away from the bustle of the world and focus on the artistry at our fingertips. Whether you’re sipping a warm chamomile tea or listening to a lo-fi rainy day playlist, let’s transform our nails into reflections of the season’s blooming beauty. Grab your kits, my darlings, and let’s create some magic together.
7 Quick Steps to Master Pastel Gel Nails
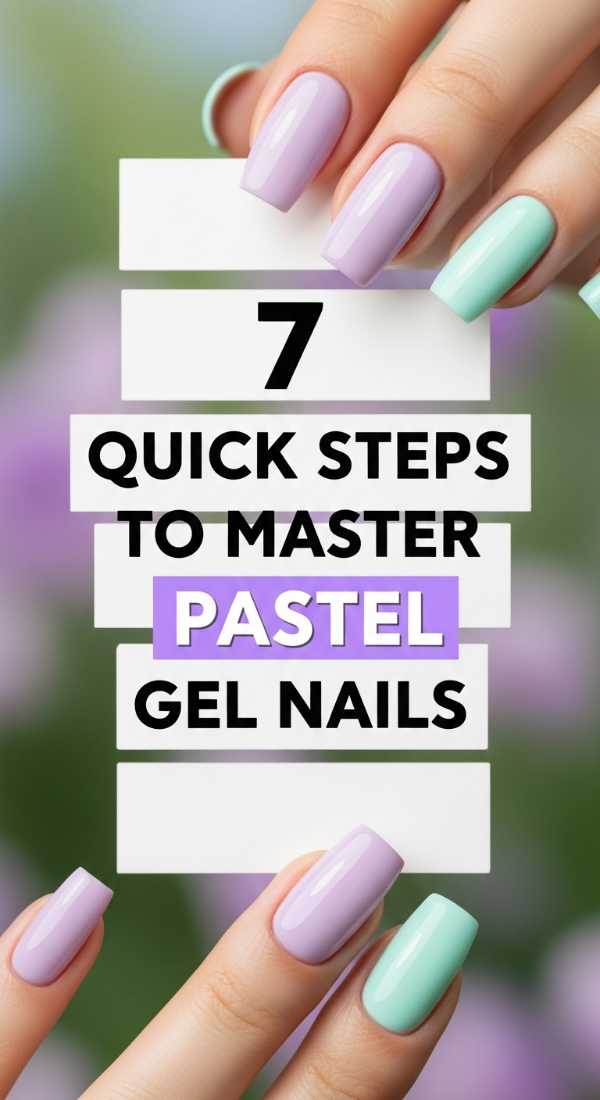
Why to love these Nails:
Pastels are like a soft hug for your hands. They capture that delicate, airy essence of spring blossoms and clear April skies, giving you a look that is both timeless and incredibly refreshing. It’s the ultimate palette for a clean, sophisticated vibe that whispers rather than shouts.
Essential Items:
- Pastel gel polish (Lavender, Mint, or Soft Lemon)
- Base coat and No-wipe Top coat
- UV/LED Lamp
- Lint-free wipes
- 91% Isopropyl alcohol
How to Prepare:
- Gently push back cuticles and buff the nail surface.
- Dehydrate the nail with alcohol on a lint-free wipe.
- Apply a thin layer of base coat and cure for 30 seconds.
- Apply the first ultra-thin layer of pastel gel (don’t worry if it’s streaky!).
- Cure for 60 seconds.
- Apply a second thin layer for full opacity and cure again.
- Seal with top coat, cure, and admire that creamy finish.
Budget Range
- Beetles Pastel Gel Set ($15.99)
- SUNUV LED Nail Lamp ($24.99)
- Modelones Dehydrator & Primer ($9.99)
4 Simple Ways to Add 3D Flowers
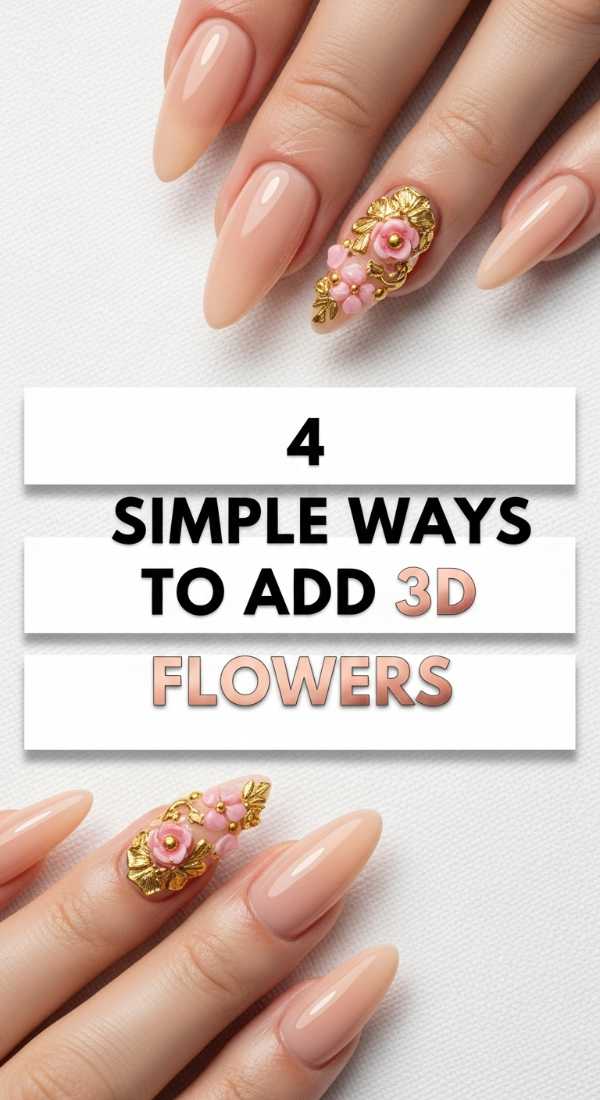
Why to love these Nails:
There is something so whimsical about 3D flowers; they make your nails look like a miniature garden in bloom. They add a tactile, artistic element that feels like you’re wearing tiny sculptures. It’s the perfect way to celebrate the floral awakening of April.
Essential Items:
- 3D Carving Gel or Hard Gel
- Silicone sculpting tools
- Tiny pearls or rhinestones for centers
- Fine liner brush
How to Prepare:
- Apply your base color and cure.
- Pick up a tiny bead of 3D carving gel with your silicone tool.
- Press and shape the bead into a petal shape directly on the nail.
- Place a tiny pearl in the center and cure for 90 seconds to ensure it’s set.
Budget Range
- Saviland 3D Sculpting Gel Kit ($12.50)
- Silicone Nail Art Tool Set ($7.00)
- Mixed Flatback Pearls ($6.00)
3 Easy Techniques for Clean Gel Lines

Why to love these Nails:
Minimalist lines bring a sense of order and modern elegance to your look. When your lines are crisp and clean, the whole manicure looks professional and high-end. It’s all about that quiet confidence found in precision.
Essential Items:
- Long-haired striper brush
- Highly pigmented spider gel or liner gel
- Nail art palette
How to Prepare:
- Load your striper brush evenly, pulling it through the gel to remove excess.
- Anchor your pinky finger on your table to stabilize your hand.
- Pull the brush in one fluid motion rather than several small strokes.
Budget Range
- Winstonia Long Liner Brush ($8.00)
- Born Pretty Liner Gel Set ($14.00)
- Glass Nail Art Palette ($5.00)
5 Secrets to Get a Mirror Chrome Finish

Why to love these Nails:
Chrome nails are like holding a piece of the future on your fingertips. They catch the light in the most mesmerising way, reflecting everything around you with a high-shine, liquid-metal effect that is simply breathtaking.
Essential Items:
- Chrome powder (Silver or Rose Gold)
- No-wipe top coat (Essential!)
- Sponge applicator or silicone tool
- Soft dusting brush
How to Prepare:
- Apply base color and cure.
- Apply no-wipe top coat and cure for ONLY 30 seconds (it needs to be slightly ‘grabby’).
- Buff the powder onto the nail using the sponge until it glows.
- Dust off excess powder gently.
- Seal with another layer of top coat, capping the edges well.
Budget Range
- Artdone Chrome Powder Palette ($10.99)
- iBD Intense Seal No-Wipe Top Coat ($12.00)
- Makeup sponges ($3.00)
6 Steps to Create Celestial Star Designs
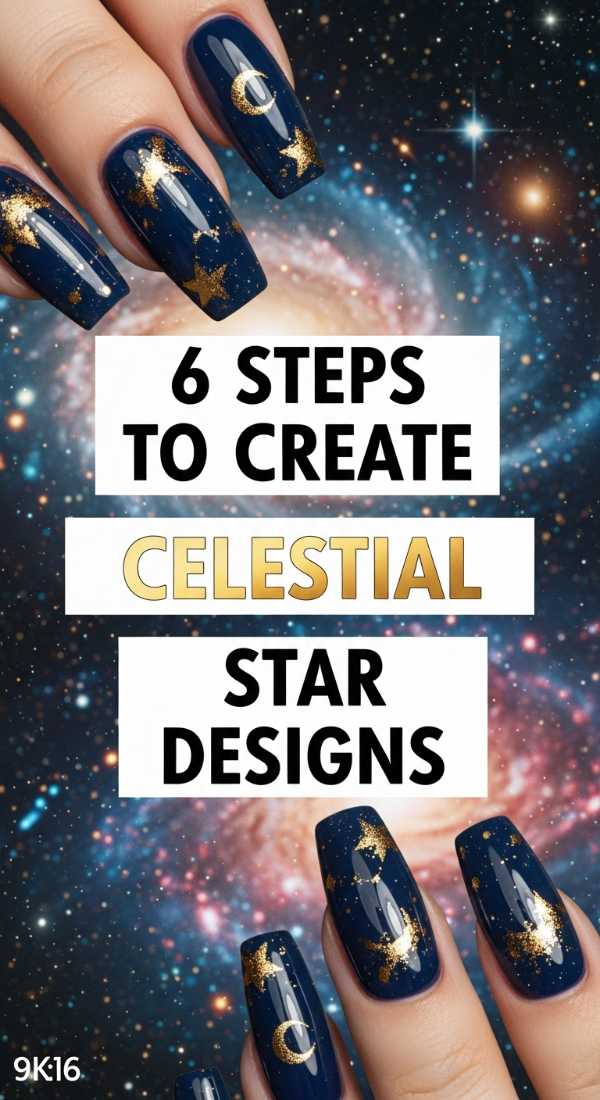
Why to love these Nails:
For those clear April nights when the stars feel close enough to touch. Celestial designs add a touch of mystery and magic to your style, reminding us that there is always beauty in the vastness of the sky.
Essential Items:
- Navy or Deep Purple gel polish
- Silver metallic gel
- Dotting tool
- Ultra-fine detail brush
How to Prepare:
- Apply your dark base color and cure.
- Use a dotting tool to place a small silver dot where the star center will be.
- Using the fine brush, pull four thin lines out from the dot (up, down, left, right).
- Add four shorter diagonal lines between the main points.
- Add tiny dots around the star for a ‘twinkle’ effect.
- Cure and top coat.
Budget Range
- Gelish ‘Arctic Freeze’ White/Silver ($13.00)
- Double-ended Dotting Tools ($5.00)
- Makartt Liner Brushes ($9.99)
4 Rules for the Perfect French Tip
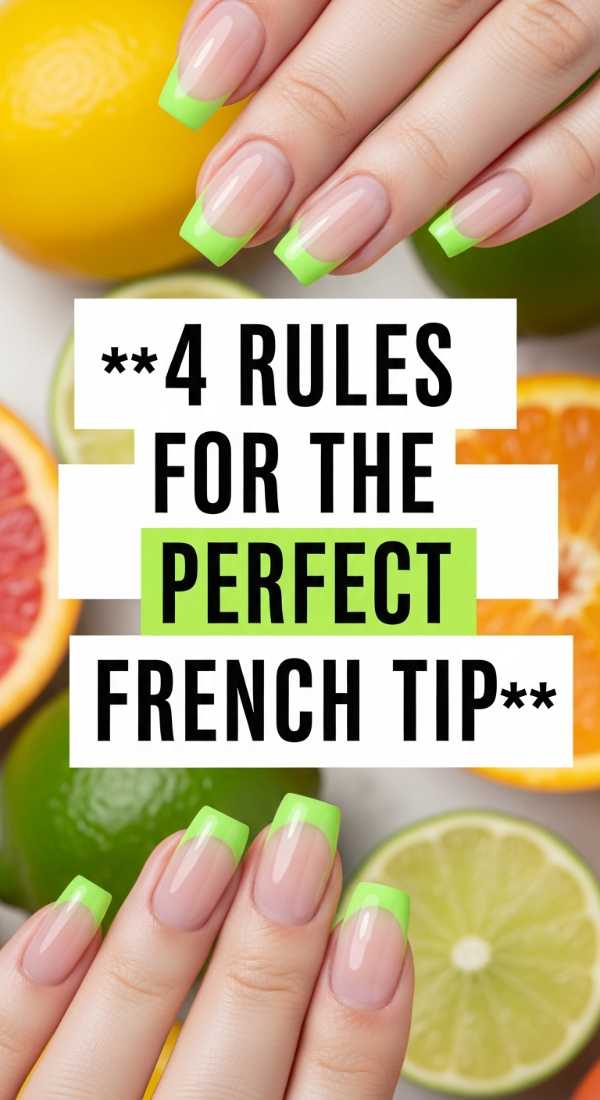
Why to love these Nails:
The French manicure is the ultimate classic. It’s clean, it’s chic, and it makes your fingers look endlessly long and elegant. It’s the ‘white tee and blue jeans’ of the nail world—it never goes out of style.
Essential Items:
- Sheer pink or nude base gel
- Crisp white gel polish
- Angled French brush
- Cleanup brush dipped in alcohol
How to Prepare:
- Apply two coats of your sheer base and cure.
- Map out the ‘smile line’ with three dots (center and two sides).
- Connect the dots with the angled brush in a smooth curve.
- Use the cleanup brush to sharpen the line before curing.
Budget Range
- Orly GFX French Tip Brush ($10.00)
- Kiara Sky ‘Pure White’ ($15.00)
- Gelish ‘Sweet Morning Dew’ Base ($14.00)
8 Hacks for Vibrant April Leaf Art
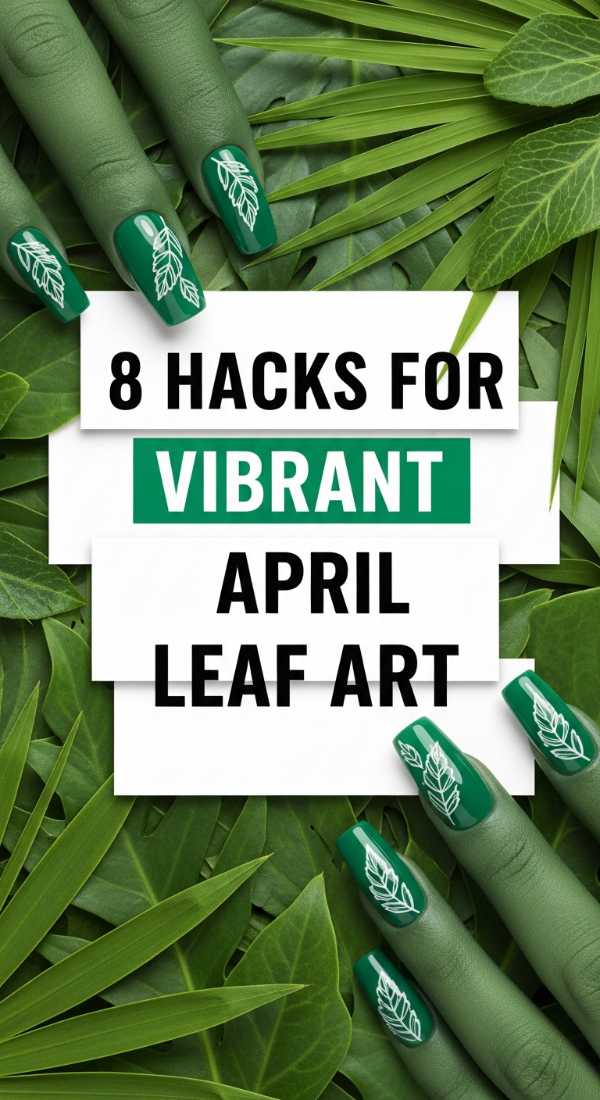
Why to love these Nails:
Nothing says April like the first pops of green. Leaf art feels organic and grounded, connecting you back to nature. It’s a wonderful way to wear the freshness of the outdoors wherever you go.
Essential Items:
- Assorted green gel polishes
- Fine detail brush
- Matte top coat (optional for a velvet leaf look)
How to Prepare:
- Start with a neutral base and cure.
- Paint a thin, slightly curved line for the stem.
- Press the side of your brush down and lift to create a natural leaf shape.
- Use a darker green for ‘veins’ to add depth.
- Mix a bit of yellow into your green for highlight.
- Cure and seal with matte or glossy top coat.
- Keep leaves asymmetrical for a natural look.
- Cure for a full 60 seconds to set the layers.
Budget Range
- Gellen ‘Greens’ 6-color set ($12.99)
- Kupa Detail Brush ($12.00)
- NYK1 Matte Top Coat ($15.00)
3 Ways to Apply Ruby Cat-Eye Polish
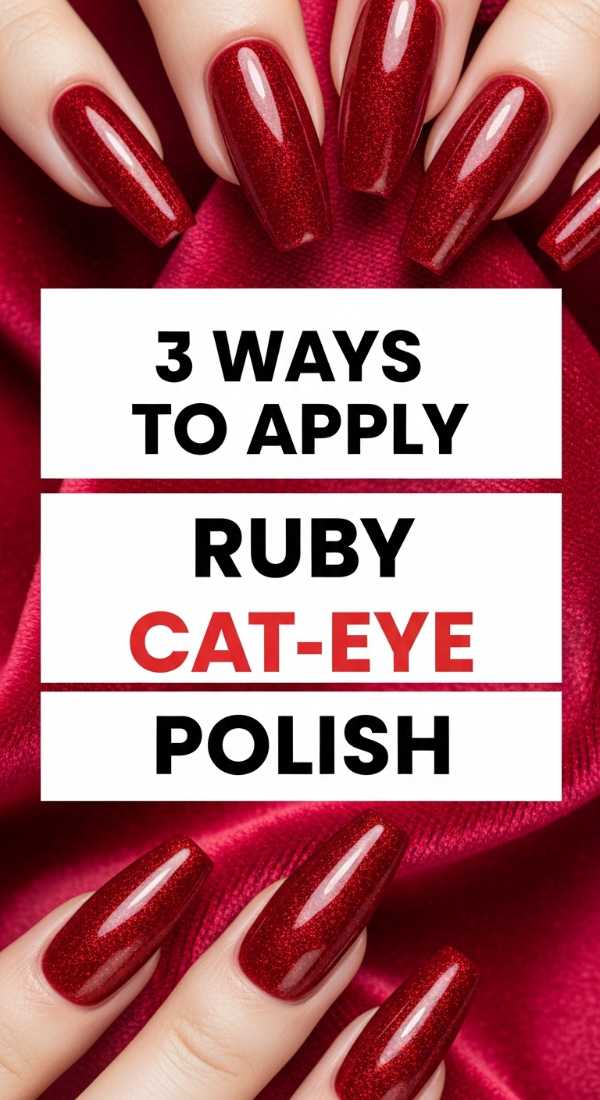
Why to love these Nails:
Cat-eye polish has a depth that is truly hypnotic. The ruby shade is particularly romantic and bold, looking like precious gemstones dancing on your nails. It’s the perfect ‘moody spring’ statement.
Essential Items:
- Magnetic ‘Cat Eye’ gel polish
- Strong neodymium magnet
- Black gel (optional as a base)
How to Prepare:
- Apply a black base for extra depth (optional) and cure.
- Apply a generous coat of cat-eye polish but do not cure yet.
- Hold the magnet 0.5cm away from the nail for 10 seconds to move the particles, then cure immediately.
Budget Range
- Mizhse Cat Eye Gel Polish ($8.99)
- Dual-headed Nail Magnet ($4.00)
- Aimeili Black Gel Polish ($7.00)
5 Tricks for a Flawless Glitter Gradient
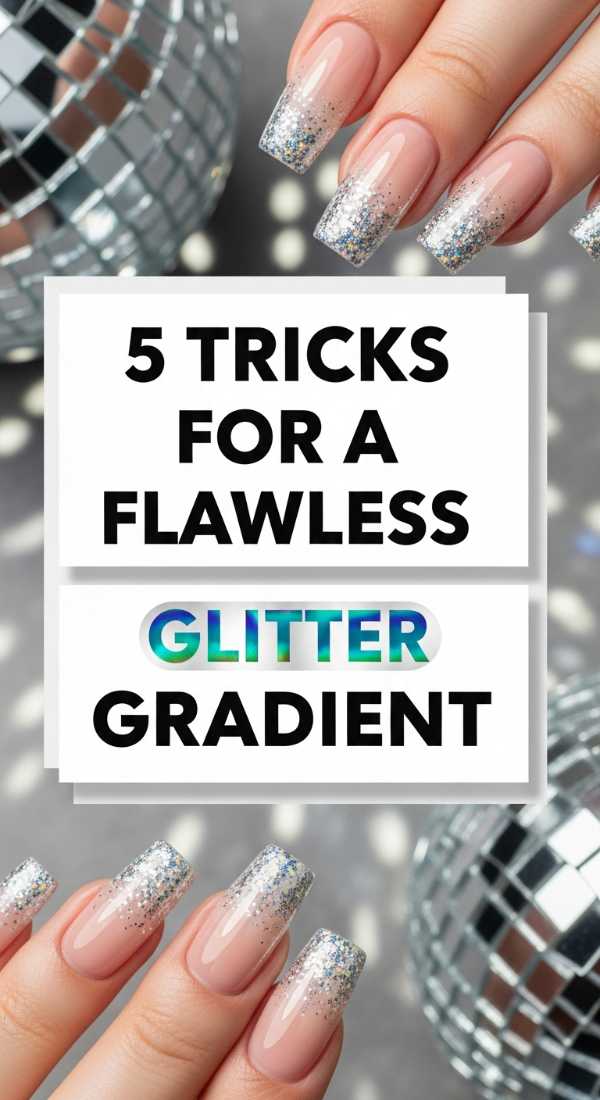
Why to love these Nails:
Who doesn’t love a bit of sparkle? A gradient feels sophisticated because it’s a soft transition into glam. It’s like champagne bubbles rising to the surface—celebratory and sweet.
Essential Items:
- Loose glitter or chunky glitter gel
- Ombre sponge
- Clear builder gel
How to Prepare:
- Apply your base color and cure.
- Apply glitter to the tip of the nail.
- Use the sponge to gently ‘tap’ the glitter towards the middle of the nail.
- Add a second, denser layer of glitter only at the very tip.
- Seal with a thick layer of top coat or builder gel to level the surface.
Budget Range
- Holographic Chunky Glitter ($7.00)
- MelodySusie Ombre Sponges ($6.00)
- IBD Building Gel ($14.00)
2 Methods to Shape Perfect Almond Nails
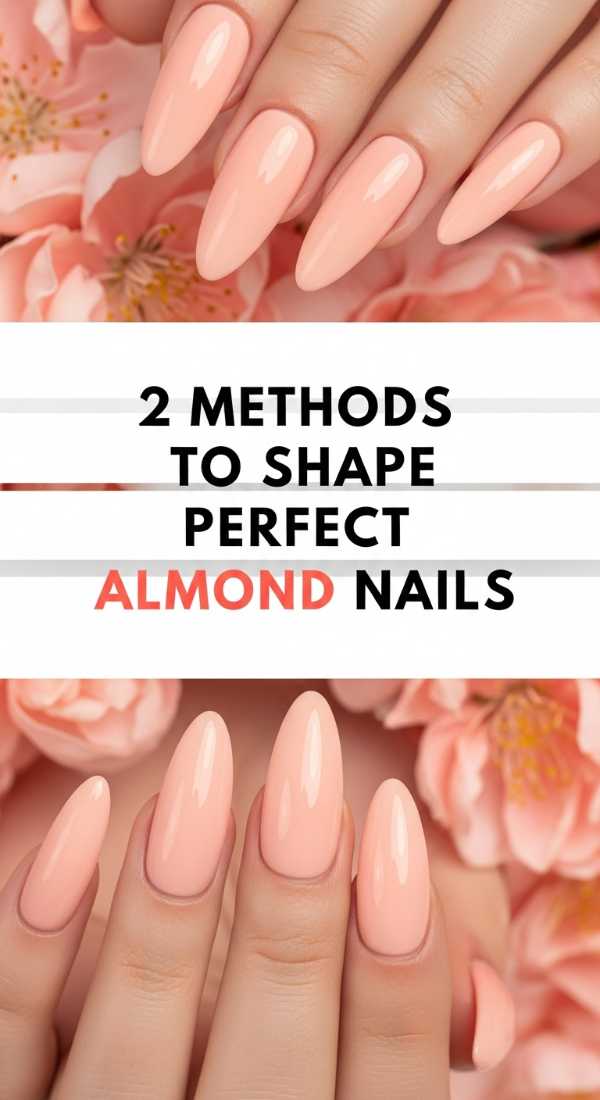
Why to love these Nails:
Almond is the most flattering nail shape for almost everyone. It elongates the fingers and provides a soft, feminine silhouette that is much stronger and less prone to breakage than square shapes.
Essential Items:
- 180/240 grit nail file
- Nail clippers
- Buffing block
How to Prepare:
- Mark the center point of your nail tip with a dot.
- File from the sides toward the center at an angle, then round off the sharp point into a soft ‘almond’ curve.
Budget Range
- OPI Edge File 180 grit ($4.50)
- Tweezerman Nail Clippers ($12.00)
- Flowery Sani-Block ($2.00)
Conclusion: Your April Glow Starts Here
As we wrap up our masterclass, I hope you feel inspired to take a little time for yourself this month. These designs are more than just polish; they are a way to express the beauty you carry inside, even when the weather is rainy. Remember, my loves, beauty is found in the patience of the process. Whether you chose the soft pastels or the bold cat-eye, your hands are now a reflection of the wonderful season ahead. Stay cozy, stay creative, and keep shining!