
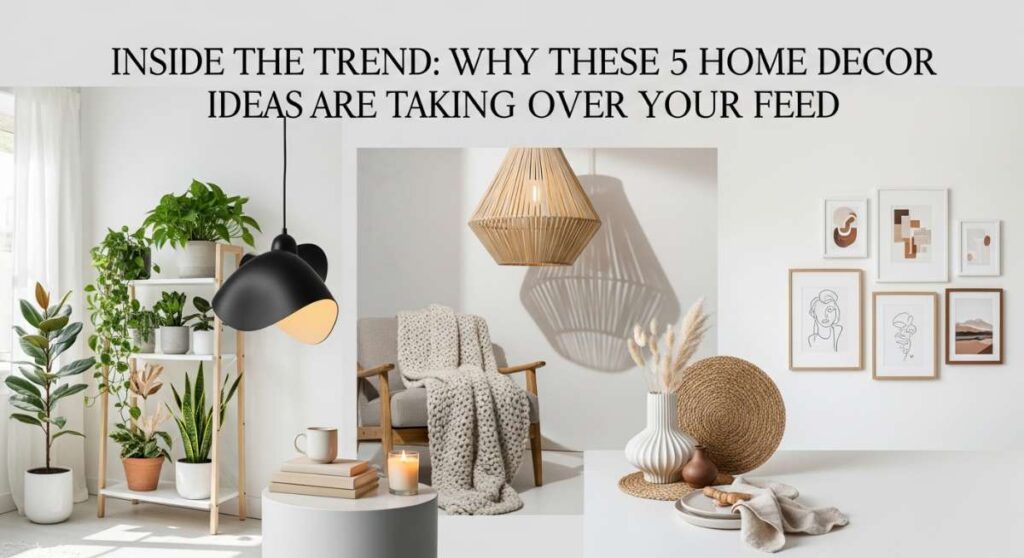
Have you ever found yourself scrolling through your feed at 2 AM, mesmerized by the way a soft linen curtain catches the moonlight, or how a perfectly organized desk seems to promise a life of utter clarity? You aren’t alone. We are living in an era where our homes have become more than just shelter; they are our sanctuaries, our creative studios, and our personal brand statements all wrapped into one. The trends popping up lately aren’t just about ‘stuff’—they are about creating a feeling of peace in a chaotic world.
Lately, my own feed has been a curated explosion of texture, light, and nostalgia. From the ‘clutter-core’ of a vintage-inspired living room to the zen-like precision of an underwater aquascape, these aesthetics are more than just visual candy—they are blueprints for a more intentional lifestyle. Whether you’re looking to overhaul your curb appeal or turn a tiny apartment corner into a whimsical retreat, there is something deeply grounding about the process of making a space your own.
Today, we’re diving deep into the 10 trends that are absolutely dominating the design world. I’ve broken down exactly why these looks are hitting the ‘viral’ mark and, more importantly, how you can recreate them without needing a professional interior designer. Let’s turn those saved Pinterest pins into your actual reality.
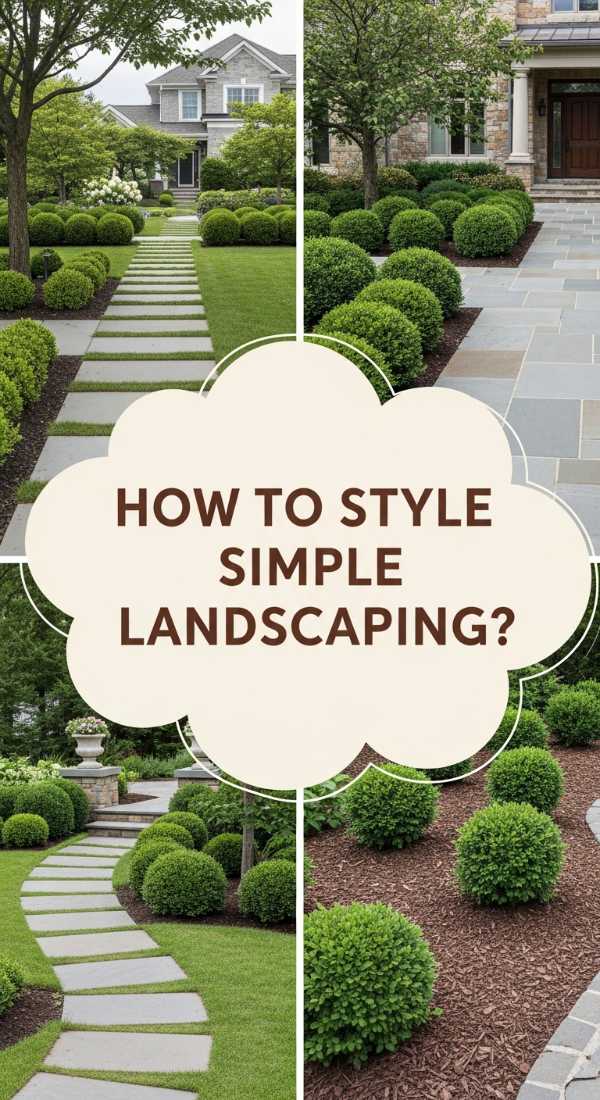
How to Design Simple Landscaping for a Dreamy Front Yard
Why we love this
There is nothing quite like the sensory symphony of a well-manicured front yard as you walk up to your door after a long day. The earthy fragrance of fresh mulch, the soft rustle of ornamental grasses against a breeze, and the visual rhythm of varied plant heights create an immediate sense of belonging. Simple landscaping transforms a house into a home, offering a tactile connection to nature that feels both grounded and aspirational, while boosting your home’s curb appeal with effortless grace.
Essential Elements:
- Dark brown or black hardwood mulch for contrast
- Layered perennials (Lavender, Hostas, or Boxwoods)
- Natural stone edging or pavers
- Solar-powered warm-glow path lights
- A focal point tree (like a Japanese Maple or Magnolia)
How to make it
- Define Your Borders: Use a garden hose or spray paint to mark out organic, curved beds. Avoid straight lines to create a softer, more professional look. Dig a 3-inch deep trench along the line to prevent grass from encroaching.
- Soil Preparation: Turn the soil to a depth of 6 inches. Amend the existing dirt with organic compost. You’re looking for a dark, crumbly texture that smells rich—this ensures your roots have the oxygen and nutrients needed to thrive.
- The Layering Technique: Place your tallest plants (shrubs) at the back, mid-sized flowering plants in the center, and groundcover at the front. Space them according to their ‘mature size’ labels to avoid overcrowding in two years.
- Mulching and Edging: Apply a 2-to-3-inch layer of mulch. Professional tip: keep mulch an inch away from the base of plant stems to prevent rot. Ensure the mulch is level and smooth for a high-end finish.
How to Organize Office Desk Setups for a Productive Work Cubicle

Why we love this
A clean desk is a clean mind, and there is a specific kind of ‘visual silence’ that comes from a perfectly curated workspace. Imagine the smooth touch of a felt desk mat under your wrists, the satisfying click of a mechanical keyboard, and the sight of wires neatly tucked away. This setup isn’t just about aesthetics; it’s about reducing the cognitive load, allowing you to focus on your deep work while surrounded by elements that spark joy and professional pride.
Essential Elements:
- Large wool felt or vegan leather desk mat
- Ergonomic monitor riser or arm
- Under-desk cable management tray
- Minimalist LED task lamp with adjustable color temperature
- Small ceramic tray for ‘everyday carry’ items
How to make it
- The Purge and Prime: Clear everything off the desk. Wipe the surface with a microfiber cloth until it’s dust-free. Only return items that you use daily; everything else goes into a drawer.
- Ergonomic Alignment: Place your monitor so the top third of the screen is at eye level. This prevents neck strain. Set your keyboard and mouse so your elbows maintain a 90-degree angle.
- Cable Stealth Mode: Route all power cables through a central spine or tray beneath the desk. Use Velcro ties (not plastic zip ties) to group cables together. The goal is for zero wires to be visible from a seated position.
- Zone Creation: Create a ‘Work Zone’ (computer/mouse) and a ‘Creative Zone’ (notebook/pen). Having a physical space dedicated to handwriting helps shift the brain out of ‘screen mode’ when brainstorming.
How to Pair JBL Speakers with Aesthetic Wallpapers for a Modern Vibe

Why we love this
This trend is all about the intersection of high-fidelity audio and digital art. There’s a certain mood created when the deep, thumping bass of a JBL speaker vibrates through a room while a matching high-definition wallpaper glows on your desktop or TV. It’s an immersive atmosphere—think neon synth-wave visuals paired with crisp highs and rich lows—that turns a standard room into a high-tech lounge where the vibes are always immaculate.
Essential Elements:
- JBL Charge or Pulse series speaker (for the light show)
- High-resolution 4K digital wallpaper (minimalist or retro-wave)
- Smart LED backlighting for the monitor
- Clear acrylic speaker stands
How to make it
- Sync the Visuals: Download a wallpaper that matches the color profile of your speaker. If you have a teal JBL speaker, look for ‘oceanic minimalist’ or ‘vaporwave’ wallpapers to create a unified color story.
- Acoustic Positioning: Place your JBL speaker approximately 6 inches from a wall. This uses the wall as a reflector to naturally boost the bass response without distorting the mid-range frequencies.
- The Light Link: If using a JBL Pulse, use the app to sync the LED patterns to the rhythm of your music. Match your computer’s ‘accent color’ in Windows or macOS settings to the speaker’s glow for a fully integrated tech ecosystem.
- Calibrate Levels: Set your source device (phone/PC) to 80% volume and adjust the final output on the speaker itself. This prevents digital clipping and ensures the clearest audio signal.
How to Create Cheap Pool Decks for an Affordable Summer Oasis

Why we love this
You don’t need a five-figure budget to enjoy the luxury of a poolside retreat. We love the clever use of budget-friendly materials like pressure-treated wood or even pallets to create a sun-drenched platform. Imagine the feeling of sun-warmed wood under your bare feet and the refreshing splash of water against the deck. It’s about democratizing luxury and creating a space where summer memories are made over cold drinks and tan lines.
Essential Elements:
- Pressure-treated 2x4s and decking boards
- Concrete deck blocks (no digging required)
- Outdoor-rated wood stain (cedar or driftwood grey)
- String lights and oversized outdoor floor pillows
How to make it
- Leveling the Foundation: Clear the area around your pool. Lay down landscape fabric and a thin layer of gravel. Place concrete deck blocks every 4 feet. Use a long level to ensure every block is perfectly horizontal—this is the most critical step for a stable deck.
- Framing the Platform: Build a rectangular frame using 2×6 pressure-treated joists. Secure the joists into the notches of the deck blocks. Check for squareness by measuring diagonally from corner to corner; the numbers must match.
- Laying the Planks: Screw your decking boards into the joists using 2.5-inch deck screws. Use a 16-penny nail as a spacer between boards to allow for water drainage and wood expansion.
- Sealing the Deal: Sand any rough edges to prevent splinters. Apply a high-quality weather sealant or stain. Tip: Apply the stain in the shade or during a cool evening to prevent it from drying too fast and becoming splotchy.
How to Use Vinyl Lattice Panels for Elegant Outdoor Privacy

Why we love this
Privacy doesn’t have to feel like a fortress. Vinyl lattice panels offer a delicate, airy way to screen off your patio while still letting the breeze flow through. We adore the way the sunlight filters through the diamond patterns, creating dancing shadows on the ground. When paired with climbing vines like jasmine or clematis, these panels become ‘living walls’ that smell divine and look like something out of a classic English garden.
Essential Elements:
- Heavy-duty vinyl lattice sheets (white or wood-grain)
- Lattice U-channel molding and H-channel connectors
- 4×4 pressure-treated posts or existing porch pillars
- Climbing plants in large terracotta pots
How to make it
- Measure and Cut: Measure the opening you wish to fill. Cut the vinyl lattice using a circular saw with a fine-toothed blade. Pro tip: Tape the cut line with painter’s tape before sawing to prevent the vinyl from shattering or chipping.
- Frame Assembly: Slide the lattice into the U-channel molding. The molding gives the lattice a ‘finished’ look and provides structural rigidity so it doesn’t flop or warp in the sun.
- Mounting: Screw the framed panels into your support posts. Do not over-tighten the screws; vinyl expands and contracts with the temperature, so leave a 1/8-inch gap within the channel for movement.
- Green Integration: Place planters at the base. Gently weave the tendrils of your climbing plants into the bottom diamonds of the lattice. Within one season, the vinyl will be partially obscured by lush, fragrant greenery.
How to Arrange Summer Table Centerpieces for Bright Outdoor Dining

Why we love this
Summer dining is all about vibrancy and freshness. A great centerpiece acts as the ‘anchor’ for a meal, pulling the colors of the garden onto the table. We love the mix of organic textures—the waxy skin of fresh lemons, the rough twine of a burlap runner, and the delicate petals of sunflowers. It creates an inviting, ‘al fresco’ atmosphere that makes even a simple Tuesday night dinner feel like a celebrated garden party.
Essential Elements:
- Low-profile wooden dough bowl or tray
- Fresh citrus fruits (lemons, limes, oranges)
- Small bud vases with wildflowers
- Unscented white pillar candles
- Eucalyptus sprigs for a silvery-green accent
How to make it
- The Foundation: Lay down a neutral runner. Place your dough bowl in the dead center of the table. A low-profile container is essential so guests can see each other over the arrangement.
- The Citrus Base: Fill the bowl with your fruit. Use a mix of whole fruit and a few halves (face up) to release a subtle, zesty aroma. The bright yellows and greens provide an instant ‘pop’ against the wood.
- Layering Height: Tightly cluster three bud vases of varying heights within the fruit. Fill them with hardy flowers like zinnias or sunflowers that can withstand the summer heat without wilting instantly.
- Final Accents: Tuck eucalyptus sprigs into the gaps between the fruit to add movement and texture. Just before guests arrive, light the candles to add a warm, flickering glow that transitions the table from afternoon to twilight.
How to Style a Patriotic Front Porch for Timeless Americana Charm

Why we love this
There is a comforting, nostalgic soul to Americana decor. It evokes images of parades, fireflies, and homemade lemonade. We love this look because it uses a classic color palette—crimson, navy, and cream—that feels bold yet incredibly welcoming. The tactile contrast of a crisp cotton flag against a weathered wooden porch creates a timeless aesthetic that celebrates heritage with a sophisticated, modern twist.
Essential Elements:
- Tea-stained cotton American flag
- Red geraniums in white ceramic planters
- Navy blue outdoor throw pillows
- Classic wooden rocking chairs or a porch swing
- Vintage-style bunting for the railings
How to make it
- The Flag Focal Point: Mount a flag bracket at a 45-degree angle near the front door. Ensure the flag is high enough so it doesn’t touch the ground. Opt for a tea-stained or ‘vintage’ wash flag to avoid a harsh, neon-bright look.
- Symmetry in Greens: Place two large white planters on either side of the door. Fill them with bright red geraniums. The height of the flowers should reach the midpoint of the door handle for a balanced visual.
- Textile Layering: Drape a navy-and-white striped outdoor rug under the welcome mat. Add navy pillows to your seating. Mixing patterns (stripes with solids) adds depth and prevents the porch from looking like a ‘costume.’
- Bunting Installation: Secure pleated bunting to the porch railing using clear zip ties hidden behind the folds. Space the pleats evenly—usually one every 3 feet—to create a rhythmic, professional ‘drape’ effect.
How to Achieve a Whimsical Apartment Aesthetic for Magic Living

Why we love this
In a world of minimalist gray, the whimsical aesthetic is a rebellious burst of magic. It’s about creating a space that feels like it belongs in a fairytale—soft glow-in-the-dark elements, velvet textures, and an abundance of indoor plants. We love how this style prioritizes wonder and personality over ‘rules,’ making your apartment feel like a cozy, enchanted forest where every corner holds a tiny, beautiful surprise.
Essential Elements:
- Warm-toned fairy lights or ‘mushroom’ lamps
- Eclectic gallery wall with ornate gold frames
- Velvet upholstery in jewel tones (emerald or amethyst)
- Hanging macrame planters
- Antique-style brass mirrors to reflect light
How to make it
- Lighting the Mood: Eliminate ‘the big light’ (overhead lighting). Instead, layer your light. Place small lamps at eye level and string fairy lights behind sheer curtains. This creates a soft, hazy glow that hides imperfections and adds mystery.
- The Floor-to-Ceiling Greenery: Use varied heights for plants. Place a tall Monstera on the floor, ivy on the bookshelves, and spider plants in hanging baskets. The goal is to ‘blur’ the corners of the room with foliage.
- Curated Clutter: Arrange your trinkets in ‘vignettes.’ Group items in odd numbers (threes or fives) on trays. Mix textures—put a rough crystal next to a smooth silk ribbon and a vintage book.
- Reflective Magic: Hang a large mirror opposite a window. This doubles the natural light and the ‘greenery’ in the room, making a small apartment feel like an expansive, sun-drenched conservatory.
How to Plan Aquarium Setup Ideas for a Calming Underwater Landscape

Why we love this
Aquascaping is truly living art. There is something profoundly meditative about watching the slow, rhythmic sway of aquatic moss and the gentle bubbles rising to the surface. It brings a slice of the hidden underwater world into your living room. The combination of cool water, natural stone, and vibrant green plants provides a ‘biological focal point’ that has been scientifically proven to lower stress and heart rates.
Essential Elements:
- Rimless glass aquarium for a seamless look
- Natural driftwood (Spider wood or Mopani)
- Live plants (Anubias, Java Fern, or Amazon Swords)
- Active substrate for plant growth
- Quiet, high-efficiency canister filter
How to make it
- Hardscape Composition: Before adding water, place your substrate (sloping it from back to front to create depth). Arrange your ‘hardscape’—the wood and rocks. Use the ‘Rule of Thirds’ by placing your main focal piece slightly off-center for a natural look.
- Planting Technique: Mist the substrate with water. Use long tweezers to tuck plant roots into the soil. Tip: For plants like Anubias, do not bury the rhizome (the thick stem); instead, glue or tie it to a rock or piece of wood.
- The Gentle Fill: Place a clean saucer or plastic wrap over the substrate. Pour water slowly onto the saucer to prevent the force of the water from uprooting your plants or clouding the substrate.
- The Nitrogen Cycle: Do not add fish immediately. Run the filter for 2-4 weeks, testing the water for ammonia and nitrites. Once the ‘good bacteria’ have established, you’ll see a visual cue of crystal-clear water and healthy new plant growth.
How to Curate Vintage Grandma House Aesthetic for the Ultimate Cozy Feel

Why we love this
Also known as ‘Grandmacore,’ this trend is a warm hug in interior design form. It’s all about the ‘lived-in’ look: the scent of dried lavender and old books, the touch of a handmade crochet throw, and the sight of mismatched floral china. We love it because it’s sustainable, sentimental, and rejects the coldness of modern mass-production in favor of items that have a history and a soul.
Essential Elements:
- Crochet or quilted blankets in pastel tones
- Vintage floral wallpaper or peel-and-stick prints
- Antique wooden side tables with character (scratches welcome!)
- Dried flower bouquets in mismatched vases
- Ornate lace doilies and embroidered linens
How to make it
- Thrifted Foundation: Source 70% of your items from thrift stores or estate sales. Look for solid wood furniture with ‘good bones.’ Don’t worry about matching wood stains; the eclectic mix is what creates the ‘collected over time’ feel.
- Pattern Mixing: Don’t be afraid to pair a floral wallpaper with a striped rug. The key is to keep the color palette consistent (e.g., all muted pastels or all warm earth tones). This creates visual interest without looking chaotic.
- The Textile Layer: Drape blankets over the backs of chairs. Use linen tablecloths even for casual meals. Texture is king in this aesthetic—aim for soft, natural fibers that invite you to sit down and stay a while.
- Scent and Sound: Complete the vibe with a stovetop potpourri of cinnamon and apples. Avoid bright white LED bulbs; use ‘warm white’ or ‘amber’ bulbs to mimic the soft glow of candlelight and old-fashioned lamps.
Conclusion: Your Home, Your Narrative
At the end of the day, these trends are just starting points. Whether you find peace in the structured lines of a modern office or the whimsical chaos of a fairy-lit apartment, the goal is the same: to create a space that reflects who you are. These viral ideas are taking over our feeds because they remind us that our environments have the power to change our moods and inspire our days. So, pick the one that speaks to your soul, grab some mulch or a crochet hook, and start building your own personal oasis.
Frequently Asked Questions
Q: Are these trends expensive to implement?
A: Not at all! Most of these, like the Grandma Core or the Summer Centerpieces, rely heavily on thrifting, DIY-ing, or using natural elements like citrus and wildflowers. It’s more about the arrangement than the price tag.
Q: How do I choose which aesthetic is right for me?
A: Look at your ‘saved’ images on social media. Is there a recurring theme? Do you lean toward ‘cluttered and cozy’ or ‘minimal and clean’? Start with one small corner of a room and see how that style makes you feel before committing to a full-house overhaul.
Q: Can I mix these styles together?
A: Absolutely! ‘Whimsical’ and ‘Grandma Core’ pair beautifully together. The most interesting homes are often a ‘mashup’ of different styles that reflect a person’s multifaceted personality.