

From Pinterest to Reality: 10 Viral Home Aesthetics You Can Actually Recreate
We’ve all been there—curling up on the sofa with a warm cup of coffee, mindlessly scrolling through Pinterest until we’ve saved three hundred pins of homes that look like they belong in a high-end editorial. There is something so deeply soothing about a perfectly curated space, isn’t there? It’s more than just decor; it’s about the feeling of peace that washes over you when your surroundings finally match the aesthetic of your dreams. However, the gap between a digital pin and your actual living room can feel like a canyon.
The good news is that those ‘viral’ looks aren’t reserved for professionals with unlimited budgets. Most of the time, the magic is in the details—the specific way a plant is placed, the texture of a walkway, or the subtle glow of a well-positioned speaker. I’ve spent the last few months deconstructing these trends to figure out how we can bring that ‘Pinterest-perfect’ energy into our own homes without the headache. Today, I’m sharing ten actionable ways to turn those digital dreams into your daily reality.
Whether you’re looking to overhaul your front yard or just want to make your cubicle feel a little less like a box, these guides are designed to be approachable, stylish, and totally doable. Let’s stop pinning and start building!
How to Design Simple Landscaping for an Inviting Front Yard

Why we love this
There is nothing quite like the sensory experience of walking up to a home that smells of fresh lavender and damp cedar mulch. A well-designed front yard creates a rhythmic flow that guides the eye toward the front door, offering a soft, organic welcome after a long day of work. We love this look because it uses layered heights and varying textures—think the velvety leaves of dusty miller against the crisp blades of ornamental grasses—to create a sophisticated, high-end feel that looks expensive but is actually quite simple to maintain. It transforms a house into a sanctuary from the moment you step onto the curb.
Essential Elements:
- Native perennial flowers (Lavender, Salvia, or Coneflowers)
- Evergreen shrubs for year-round structure
- Natural cedar or dark hardwood mulch
- Professional-grade plastic or metal landscape edging
- Varying sizes of river rock or decorative stones
How to make it
- Define Your Borders: Use a garden hose or spray paint to outline curved, organic shapes for your flower beds. Curves feel more natural and ‘expensive’ than harsh straight lines.
- Prepare the Ground: Remove all grass and weeds from the marked area. Dig down about 3 inches to ensure you have a clean slate, then till the soil to loosen it up for new roots.
- Install Edging: Hammer in your landscape edging along the perimeter of the bed. This prevents grass from creeping in and keeps your mulch neatly contained. Ensure the edging sits about an inch above the soil level.
- The Layering Technique: Place your tallest plants (like shrubs or tall grasses) at the back, closest to the house. Position medium-sized perennials in the center, and low-growing groundcovers or annuals at the very front edge. This ‘stadium seating’ for plants ensures every flower is visible.
- Mulch and Water: Lay down a 2-to-3-inch layer of mulch across the entire bed. This regulates soil temperature and provides that dark, finished look. Give everything a deep soak immediately after planting to settle the roots.
How to Organize an Office Desk Setup for a Productive Work Cubicle

Why we love this
The modern viral desk aesthetic is all about ‘soft productivity’—a space that feels calming rather than clinical. We love this because it replaces the harsh glare of fluorescent office lights with the warm, amber glow of a desk lamp and the tactile satisfaction of a felt desk mat. When your cubicle is organized with intention, the mental clutter dissipates, leaving room for deep focus and creative flow. It’s about creating a tiny, personalized ecosystem where the aroma of a small essential oil diffuser and the sight of a thriving pothos plant make the 9-to-5 grind feel like a luxury experience.
Essential Elements:
- Large felt or vegan leather desk mat
- Monitor riser (wood or acrylic)
- Ergonomic cable management clips
- Task lighting with warm-toned bulbs
- Small indoor plant (Pothos or Snake Plant)
- Minimalist desk organizers in cohesive colors
How to make it
- Clear the Slate: Remove everything from your desk. Wipe down the surface to remove dust and grime, creating a fresh foundation for your new setup.
- Establish the Zones: Place your desk mat in the center. This defines your primary workspace. Set your monitor on a riser to bring it to eye level; this reduces neck strain and creates storage space underneath for your keyboard or notebooks.
- Manage the Chaos: Use adhesive cable clips to route all charging cables and power cords down the back of the desk legs. Keeping wires out of sight is the fastest way to achieve a high-end ‘Pinterest’ look.
- Layer Your Lighting: Turn off your overhead lights if possible and use a dedicated desk lamp. Position it to the side of your monitor to reduce glare while providing a warm, focused glow on your documents.
- Curate Personal Touches: Add one high-quality plant and one or two meaningful items (like a ceramic tray for pens). The key is to keep the surface 70% clear to maintain a sense of mental space.
How to Coordinate JBL Speakers for a High Fidelity Sound Aesthetic

Why we love this
There is a specific kind of magic that happens when a room is perfectly balanced with high-fidelity sound; it’s like the air itself becomes more vibrant. We love the JBL aesthetic because it bridges the gap between rugged durability and sleek, modern design, allowing the speakers to serve as both decor and a sensory gateway. Imagine the deep, resonant bass of a jazz track filling the corners of your room while the speakers sit unobtrusively on your bookshelf, looking like pieces of modern art. It’s about creating a ‘soundscape’ that matches your lifestyle, whether you’re hosting a dinner party or enjoying a quiet morning coffee.
Essential Elements:
- Two or more JBL PartyBoost-compatible speakers (like the Flip or Charge series)
- Nonslip minimalist speaker stands
- A central ‘hub’ location (like a media console)
- Subtle cable concealment kits
- High-quality streaming source
How to make it
- Analyze Room Acoustics: Walk around your room and identify the ‘dead zones.’ To get the best sound, you want to place speakers at ear level, preferably in opposite corners of the room to create a wide stereo field.
- Sync the System: Power on your primary speaker and connect it to your device. Use the JBL Portable app to activate ‘PartyBoost’ or ‘Stereo Mode,’ then press the connect button on your secondary speakers to link them into a cohesive network.
- Positioning for Fidelity: Angle the speakers slightly inward toward the center of the seating area. This ‘toeing in’ ensures the high frequencies hit your ears directly, creating a crisp and immersive listening experience.
- Aesthetic Integration: Place speakers on dedicated stands or integrated into bookshelves. Avoid placing them directly against a wall, as this can make the bass sound muddy; leave at least 2-3 inches of ‘breathing room’ behind them.
- Calibrate Volume: Adjust the volume levels of each speaker individually through the app to ensure no single corner is overwhelming, creating a seamless blanket of sound throughout the space.
How to Build Cheap Pool Decks for a Luxury Above Ground Look

Why we love this
An above-ground pool can often feel like an eyesore, but with a custom-built deck, it transforms into a Mediterranean-inspired backyard oasis. We love this project because it uses affordable pressure-treated lumber and smart design to mimic the look of an expensive in-ground resort. There is something incredibly satisfying about the feeling of warm wood underfoot as you step directly from your lounge chair into the cool, sparkling water. It’s about blurring the lines between the pool and the landscape, creating a cohesive entertainment area where you can spend long, sun-drenched afternoons with family and friends.
Essential Elements:
- Pressure-treated 2×4 and 2×6 lumber
- Decking screws (3-inch and 2.5-inch)
- Concrete deck blocks for foundations
- Semi-transparent wood stain in a modern ‘teak’ or ‘driftwood’ finish
- Solar-powered post cap lights
How to make it
- Plan Your Layout: Measure the height of your pool wall. Your deck should sit just under the top rail of the pool. Stake out the perimeter and ensure the ground is level before starting.
- Set the Foundation: Place concrete deck blocks every 4 feet. These blocks hold your 4×4 support posts without the need for digging deep holes, which saves time and money. Use a level to ensure every block is perfectly even.
- Frame the Deck: Build a rectangular outer frame using 2×6 boards. Attach joists every 16 inches on center. This provides the structural integrity needed to support the weight of multiple people and furniture.
- Lay the Decking: Screw down your decking boards, leaving a 1/8-inch gap between them for water drainage. Use a ‘picture frame’ border around the edges for a professional, viral-worthy finish.
- Finish and Protect: Sand down any rough spots and apply two coats of semi-transparent stain. This protects the wood from water damage while giving it that high-end ‘Pinterest’ color. Finish by adding solar lights to the corners for a night-time glow.
How to Install Vinyl Lattice Panels for a Private Backyard Retreat

Why we love this
Privacy is the ultimate luxury, and there is a romantic, ‘secret garden’ quality to vinyl lattice that we absolutely adore. Unlike heavy wooden fences, lattice allows dappled sunlight and gentle breezes to filter through, creating a space that feels secluded but airy. When paired with climbing vines like jasmine or clematis, the white or wood-grain panels become a living wall that smells divine and provides a lush, green backdrop for your morning yoga or evening wine. It’s an easy way to hide unsightly AC units or neighbor’s yards while adding a layer of architectural interest to your home.
Essential Elements:
- High-quality vinyl lattice panels
- 4×4 vinyl or pressure-treated posts
- Lattice U-channel molding (for the edges)
- Stainless steel screws
- Climbing plants or faux ivy privacy screens
How to make it
- Set Your Posts: Determine where you need the most privacy. Dig holes 2 feet deep, set your 4×4 posts in concrete, and ensure they are perfectly vertical using a spirit level. Space them exactly the width of your lattice panels (usually 4 feet).
- Prepare the Panels: Slide the lattice panels into the U-channel molding. This molding gives the lattice a finished, ‘framed’ look and prevents the edges from warping or rattling in the wind.
- Attach to Posts: Screw the U-channel (with the lattice inside) directly into the posts. Leave a 2-inch gap at the bottom to prevent moisture buildup and to make weed-whacking easier.
- Pre-drill for Expansion: Since vinyl expands and contracts with the temperature, drill holes in the lattice that are slightly larger than your screws. This prevents the panels from buckling in the summer heat.
- The Green Touch: Plant fast-growing climbers at the base of the lattice. Use small green zip-ties to ‘train’ the vines through the holes until they can support themselves.
How to Create Summer Table Centerpieces for an Elegant Garden Party

Why we love this
A great centerpiece is the heartbeat of a garden party; it’s the conversation starter that sets the tone for the entire evening. We love the ‘relaxed elegance’ aesthetic which combines the organic beauty of sliced citrus with the soft, flickering light of tapered candles. The aroma of fresh rosemary sprigs tucked between lemons creates a refreshing Mediterranean scent profile that perfectly complements a summer menu. It’s about creating a tactile, visual feast that makes your guests feel like they’ve been transported to a boutique vineyard in Tuscany, all while sitting in your own backyard.
Essential Elements:
- Low-profile wooden or ceramic dough bowl
- Fresh citrus (lemons, limes, or oranges)
- Eucalyptus branches or fresh herbs (Rosemary, Thyme)
- Assorted glass bud vases
- Tapered candles in brass or ceramic holders
How to make it
- Select Your Base: Start with a long, low runner or a shallow wooden bowl. Keeping the centerpiece low ensures that guests can see each other across the table for easy conversation.
- Layer Your Greenery: Lay down a base of eucalyptus or olive branches. Let the leaves spill naturally over the edges of the bowl or runner to create a lush, effortless look.
- Add the ‘Pop’ of Color: Nestle whole citrus fruits into the greenery. For an extra ‘viral’ touch, slice a few lemons in half to expose the vibrant inside and place them face up—the scent is incredible!
- Vary the Heights: Place 3 to 5 tapered candles in holders at irregular intervals along the centerpiece. The variation in height creates visual interest and a sophisticated, rhythmic flow.
- Incorporate Florals: Use 3 small bud vases with single stems of white roses or peonies and tuck them into the gaps. This adds a layer of delicacy to the rustic fruit and greenery.
How to Curate Patriotic Decor for a Classic Americana Front Porch

Why we love this
There is a timeless, nostalgic comfort in the ‘Classic Americana’ aesthetic that never goes out of style. We love this look because it relies on a sophisticated palette of navy, cream, and muted red, rather than bright, plastic decorations. Imagine sitting in a wicker rocking chair, the sound of a cotton flag snapping softly in the breeze, surrounded by the rustic texture of galvanized metal planters. It’s a tribute to heritage and home that feels both festive and incredibly grounded. It’s the kind of porch that invites neighbors to stop by and stay for a glass of iced tea.
Essential Elements:
- High-quality cotton or tea-stained American flag
- Bunting for porch railings
- Navy blue outdoor throw pillows
- Galvanized metal buckets for planters
- White hydrangeas or red geraniums
How to make it
- The Anchor Piece: Mount a traditional flag bracket to a sturdy porch pillar. Choose a ‘tea-stained’ or vintage-style flag for a softer, more designer-led look than a standard bright nylon flag.
- Symmetrical Planting: Place two large galvanized buckets on either side of your front door. Fill them with bright red geraniums for a pop of color that contrasts beautifully against white or blue siding.
- Drape the Bunting: Attach pleated cotton bunting to your porch railing. Use zip ties or small hooks to ensure the pleats hang evenly and don’t sag in the middle.
- Cozy Textiles: Swap out your standard porch pillows for navy and white striped outdoor cushions. This introduces the ‘patriotic’ color scheme in a subtle, lifestyle-oriented way.
- Finishing Accents: Add a natural fiber doormat and perhaps a wooden lantern with a battery-operated candle. The goal is to make the space feel lived-in and welcoming, not just decorated for a holiday.
How to Achieve a Whimsical Apartment Aesthetic for a Dreamy Interior

Why we love this
The ‘Whimsical Dream’ aesthetic is all about breaking the rules and leaning into the magic of childhood wonder, reimagined for an adult space. We love this because it prioritizes comfort and joy through soft, cloud-like textures, iridescent finishes, and unexpected pops of pastel. Walking into a whimsical room feels like walking into a hug—the air is filled with the scent of vanilla, and the light is filtered through sheer, starry curtains to create a soft, ethereal glow. It’s a space that encourages daydreaming and creativity, making even a small city apartment feel like a sprawling, magical loft.
Essential Elements:
- Sheer iridescent or ‘starry’ window curtains
- Faux fur or chunky knit oversized floor pillows
- Fairy lights with warm ‘copper’ wiring
- Curved, velvet furniture pieces
- Whimsical art prints (botanicals, moons, or surrealism)
How to make it
- Set the Light: Replace standard ‘cool’ lightbulbs with warm-toned LEDs. String copper fairy lights along the ceiling perimeter or drape them inside a tall glass vase to create a ‘firefly’ effect.
- Texture Overload: Layer your textiles. Place a soft shag rug over your standard carpet, and pile the sofa with various textures like velvet, faux fur, and silk. This creates the ‘cloud’ effect essential to the aesthetic.
- Curate a Gallery Wall: Use mismatched vintage frames painted in pastel shades to display art. Mix botanical sketches with abstract shapes to keep the eye moving and the vibe playful.
- Integrate Curves: Whimsy thrives on organic shapes. If you can, choose a round coffee table or a curved ‘bean’ sofa. If not, use round pillows and circular mirrors to soften the ‘boxy’ feel of an apartment.
- Floating Elements: Use clear acrylic shelves to display your favorite books or trinkets. This makes items look like they are floating on the wall, adding to the dreamy, gravity-defying feel of the room.
How to Design Aquarium Setup Ideas for a Tranquil Living Area
Why we love this
There is a profound sense of tranquility that comes from watching a beautifully aquascaped tank; it’s like having a living piece of art that breathes and grows. We love this aesthetic because it brings a slice of the natural world indoors, offering a focal point that is both silent and mesmerizing. The soft hum of the water and the sight of vibrant green mosses swaying in the current can lower your heart rate instantly. It’s not just about the fish; it’s about creating a miniature, underwater forest that adds a sophisticated, ‘bio-luxe’ vibe to any modern living room.
Essential Elements:
- Rimless glass aquarium tank
- Hardscape materials (Seiryu stone or Spider wood)
- Live aquatic plants (Anubias, Java Fern, or Moss)
- Active substrate (Aqua-soil) for plant growth
- Low-profile LED plant light
How to make it
- The ‘Rule of Thirds’: When placing your hardscape (stones and wood), don’t center them. Place your largest piece about one-third of the way from the left or right side. This creates a more natural, professional-looking ‘golden ratio’ composition.
- Substrate Sloping: Pour your soil so that it is higher in the back and lower in the front. This creates an illusion of depth, making the tank look much larger than it actually is.
- Planting with Precision: Use long tweezers to tuck the roots of your plants into the soil. Group taller plants in the back and use ‘carpeting’ plants like Monte Carlo in the foreground to create a lush, green ‘lawn’ effect.
- Gentle Filling: Place a small plate on top of the soil and pour water onto the plate slowly. This prevents the water flow from uprooting your carefully placed plants and clouding the water.
- The Nitrogen Cycle: This is the most important step for the ‘lifestyle’ of the tank. Let the filter run for at least 2-4 weeks before adding fish. This allows beneficial bacteria to grow, ensuring the water stays crystal clear and the environment remains healthy.
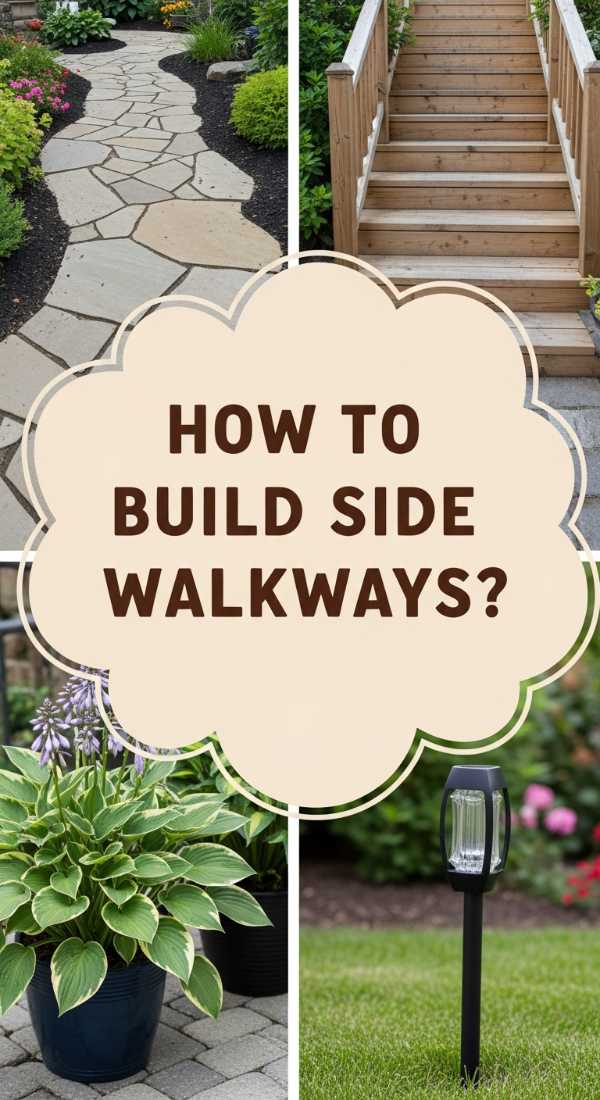
How to Pave a Side House Walkway for Seamless Outdoor Curb Appeal
[IMAGE_10]
Why we love this
A paved walkway is the ultimate functional upgrade that also happens to look incredibly chic. We love this project because it turns a forgotten, muddy side-yard into a purposeful, structured path that connects the front and back of your home. There is a satisfying ‘crunch’ of fine gravel and the solid, smooth feel of pavers that makes your outdoor space feel professionally ‘finished.’ It’s about creating a seamless transition that uses geometry and nature to improve your home’s curb appeal while making every inch of your property accessible and beautiful.
Essential Elements:
- Large concrete or slate pavers (12×12 or larger)
- Paver base (crushed stone) and leveling sand
- Landscape fabric (weed barrier)
- Decorative pea gravel or river rock
- Timber or metal edging
How to make it
- Mark and Dig: Use stakes and string to mark a 3-foot wide path. Dig out the area to a depth of about 4 inches. This allows space for your base layers and ensures the final path is flush with the ground.
- Lay the Foundation: Roll out landscape fabric to prevent weeds. Add 2 inches of crushed stone paver base and compact it firmly using a tamper. This provides the ‘skeleton’ of your walkway.
- Leveling Sand: Add a 1-inch layer of leveling sand on top of the base. Use a straight board to ‘screed’ the sand, ensuring it is perfectly flat and smooth.
- Place the Pavers: Lay your pavers down, leaving a 2-to-4-inch gap between each one. Use a rubber mallet to gently tap them into the sand, checking with a level as you go to ensure none of them are tilting.
- Fill the Gaps: Pour your decorative pea gravel into the spaces between the pavers. Use a broom to sweep the gravel into the cracks until it is level with the pavers. This creates that high-end, ‘modern-zen’ look while allowing for excellent drainage.
Wrapping Up Your Home Transformation
Recreating a viral aesthetic isn’t about perfectly replicating a photo; it’s about capturing the *essence* of what made you save that pin in the first place. Whether it’s the organized calm of a desk mat or the rhythmic beauty of a new garden path, these changes are about making your home a place that serves your soul. Start small, take your time with the steps, and remember that the most beautiful home is one that feels like *you*.
Frequently Asked Questions
Q: Can I really build a pool deck on a budget?
A: Absolutely! By using pressure-treated lumber and deck blocks instead of pouring concrete footings, you can save hundreds in labor and materials while still achieving a high-end look.
Q: How do I keep my outdoor lattice from turning yellow?
A: Choose high-quality UV-stabilized vinyl. Regular cleaning with a simple mix of soap and water once a season will keep it looking crisp and white for years.
Q: Is it hard to maintain live aquarium plants?
A: It’s easier than you think! Start with ‘low-tech’ plants like Anubias or Java Fern which don’t require CO2 injection and can thrive in standard aquarium lighting.