
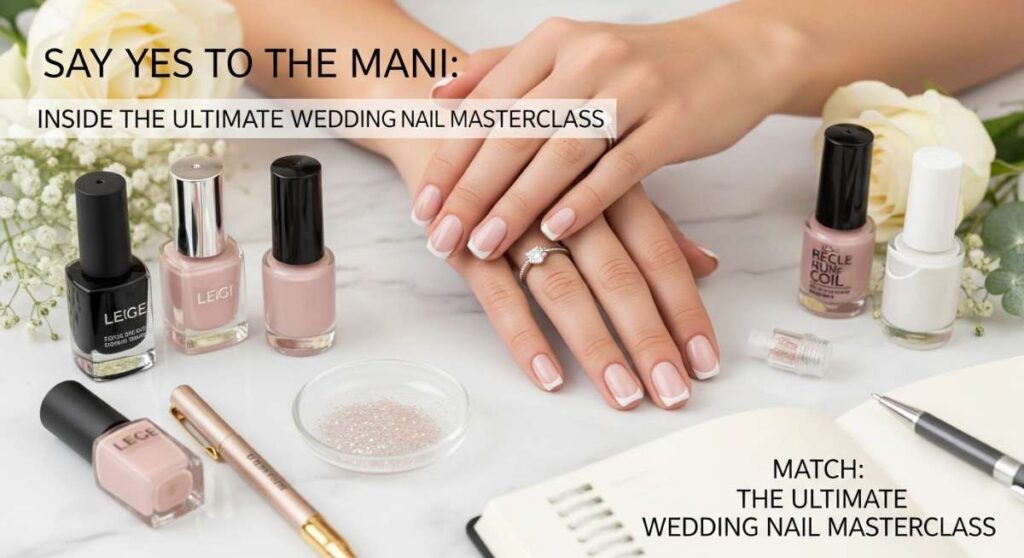
Say Yes to the Mani: Inside the Ultimate Wedding Nail Masterclass
Hello, my loves! Grab a warm cup of lavender tea and settle in, because today we are talking about one of the most intimate details of your big day. There is something so incredibly magical about the moment he slides that ring onto your finger; it’s a heartbeat captured in time, and your hands deserve to feel as radiant as your soul does in that second.
I’ve spent months dreaming up this little corner of the internet for you—a cloud-soft embrace of a guide to help you navigate the world of bridal manicures. Whether you’re the bride, a cherished bridesmaid, or a guest celebrating love, your nails are the finishing touch to your beautiful story. Let’s dive into this masterclass together, shall we?
7 Easy Steps to Elegant Bridal Nails
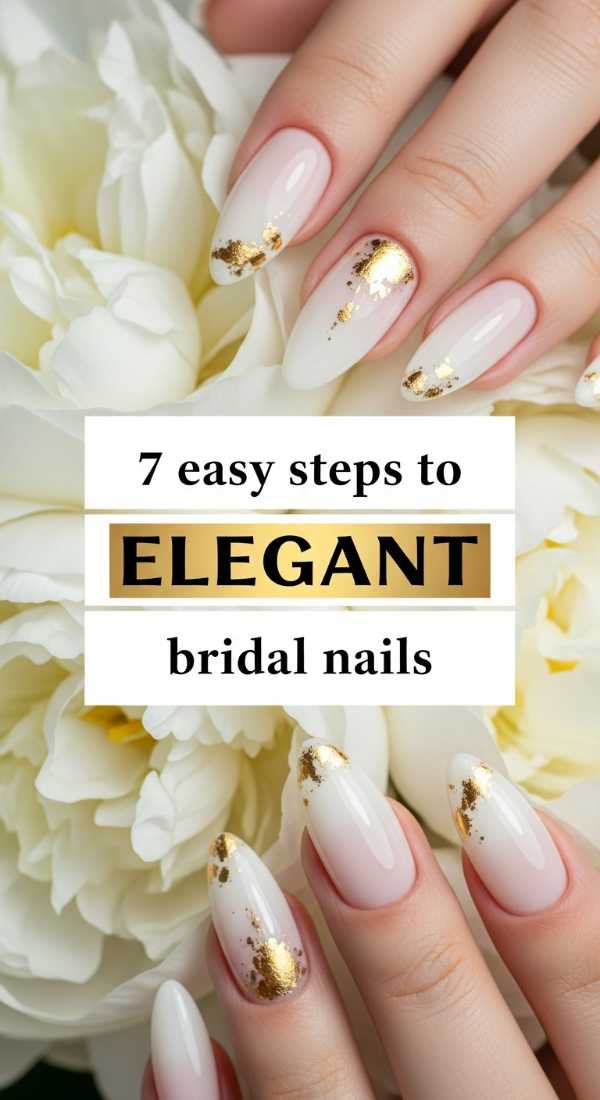
Why to love these Nails:
These are for the bride who wants a timeless, ethereal glow. They whisper sophistication without shouting, making your engagement ring the true star of the show. It’s like a soft filter for your fingertips.
Essential Items:
- Sheer peach or ‘ballet slipper’ pink polish
- High-shine gel top coat
- Fine grit nail buffer
- Cuticle oil (jojoba based)
- Moisturizing hand mask
How to Prepare:
- Gently shape nails into a soft oval.
- Buff the surface to remove ridges.
- Apply a nourishing hand mask for 15 minutes.
- Push back cuticles gently with an orange stick.
- Apply a thin base coat.
- Layer two sheer coats of your chosen pink.
- Seal with the high-shine top coat for a glass-like finish.
Budget Range
- Essie Ballet Slippers – $10.00
- CND SolarOil – $12.50
- Sally Hansen Gel Top Coat – $8.00
5 Ways to Style Classy Wedding Nails

Why to love these Nails:
Classy nails are all about the ‘quiet luxury’ aesthetic. They look expensive, polished, and perfectly manicured, ensuring your wedding photos look just as stunning fifty years from now as they do today.
Essential Items:
- Creamy nude polish
- Gold foil flakes
- Matte top coat
- Micro-liner brush
- Rosewater hand spray
How to Prepare:
- Select a nude that matches your skin’s undertone.
- Apply two coats of solid cream polish.
- Use the liner brush to add a tiny gold flake at the base.
- Try a matte finish for a modern twist on class.
- Finish with a spritz of rosewater for hydration.
Budget Range
- OPI Mimosas for Mr. & Mrs. – $11.50
- Nail Art Gold Foil – $5.00
- Zoya Matte Velvet Top Coat – $12.00
4 Simple Beach Wedding Nail Tips
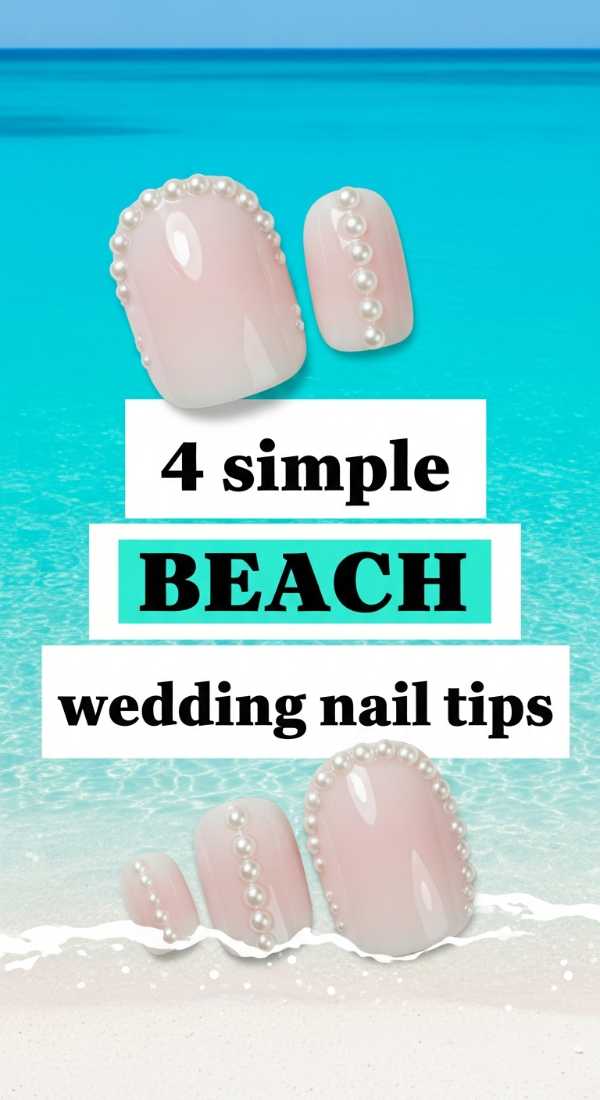
Why to love these Nails:
Beach weddings are all about the salt air and the sun’s kiss. These tips bring a bit of the ocean’s sparkle to your hands, using iridescent finishes that catch the natural light beautifully against the sand.
Essential Items:
- Iridescent ‘Glazed Donut’ powder
- Sea-foam blue accent polish
- UV LED lamp (if using gel)
- Sponge applicator
How to Prepare:
- Keep nails shorter to avoid breakage in the sand.
- Apply a milky white base coat.
- Rub in the iridescent powder while the polish is tacky.
- Add a tiny sea-foam dot on the ring finger for a ‘something blue’.
Budget Range
- Born Pretty Pearl Powder – $7.00
- Gelish Mini Harmony Lamp – $35.00
- Olive & June ‘BP’ Polish – $9.00
3 Easy French Tip Wedding Hacks
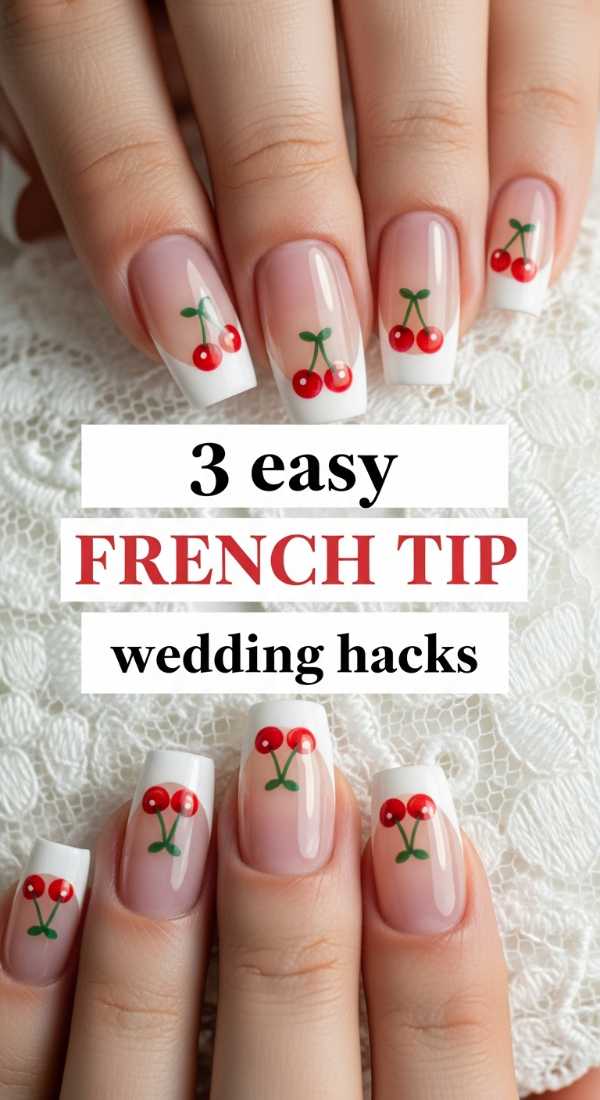
Why to love these Nails:
The classic French manicure is a bridal staple for a reason, but it can be tricky to DIY! These hacks ensure you get that crisp, clean line without the stress of a shaky hand.
Essential Items:
- Silicone nail stamper
- Opaque white stamping polish
- Reinforcement stickers
How to Prepare:
- The Stamper Method: Apply white polish to the silicone head and press your nail tip into it.
- The Sticker Method: Place a reinforcement sticker to mask the curve.
- The Cleanup Method: Use a brush dipped in acetone to ‘carve’ the smile line.
Budget Range
- What Up Nails Silicone Stamper – $8.50
- Maniology Bam! White Polish – $10.00
- Angle Cleanup Brush – $6.00
6 Steps to Bridesmaid Nail Perfection
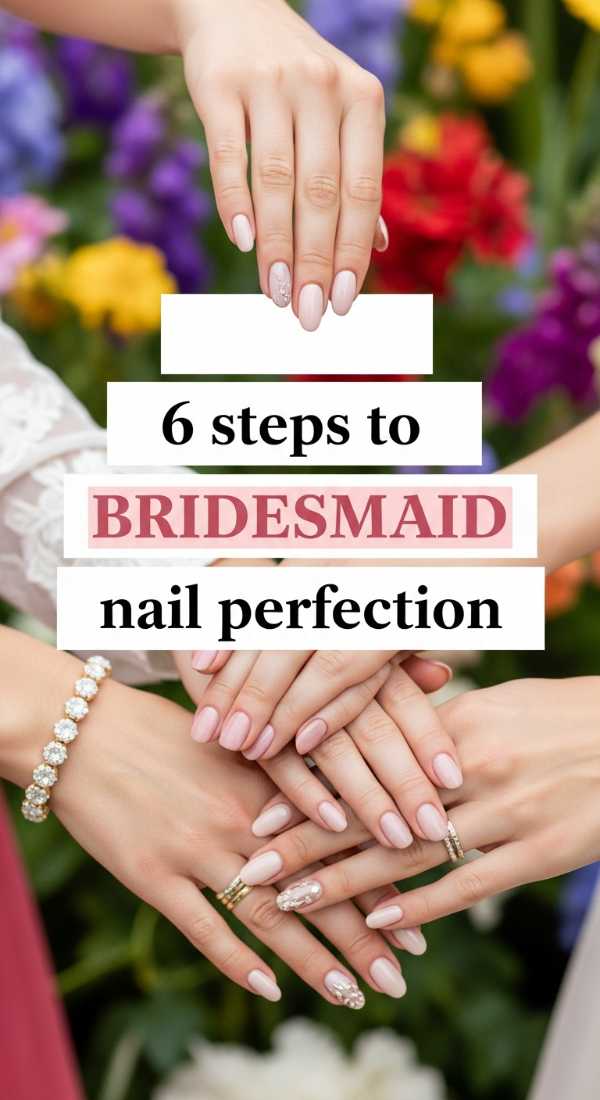
Why to love these Nails:
Bridesmaids need a look that complements the bride while standing out on their own. These steps focus on harmony and coordination with the wedding color palette.
Essential Items:
- Coordinating mauve or champagne polish
- Nail primer
- Fast-dry drops
- Silk wrap (for repairs)
How to Prepare:
- Sync with the bride on the exact shade.
- Apply a strong primer to prevent chipping during setup.
- Apply two thin layers of the theme color.
- Add a subtle shimmer top coat.
- Use fast-dry drops—essential for busy bridesmaids!
- Moisturize cuticles right before photos.
Budget Range
- Seche Vite Dry Fast Top Coat – $9.95
- Butter London Priming Base – $18.00
- ILNP Champagne Blush – $10.00
8 Ways to Apply Pearl Wedding Nails
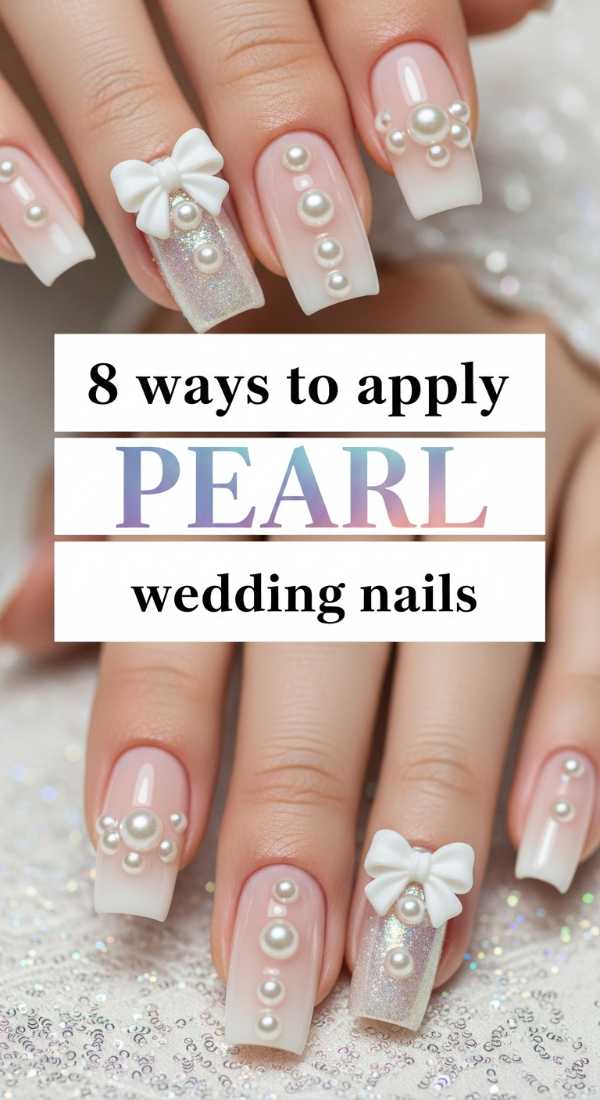
Why to love these Nails:
Pearls are the ultimate symbol of bridal purity and elegance. Adding them to your nails creates a 3D texture that looks like jewelry for your fingertips—truly a romantic choice.
Essential Items:
- Flat-back pearl gems (mixed sizes)
- Jewel picker tool
- Strong nail glue or thick top coat
- Pearlescent base polish
How to Prepare:
- Paint a shimmering pearlescent base.
- Map out your pearl placement (line, cluster, or single).
- Apply a dot of glue.
- Use the picker tool to place the pearl.
- Press firmly for 5 seconds.
- Repeat for different sizes.
- Seal around (not over) the pearls with top coat.
- Avoid snagging by checking the edges.
Budget Range
- Swarovski Crystal Pearls – $12.00
- Dual-ended Wax Picker – $4.00
- KDS Nail Glue – $6.00
5 Steps to Western Wedding Nail Art
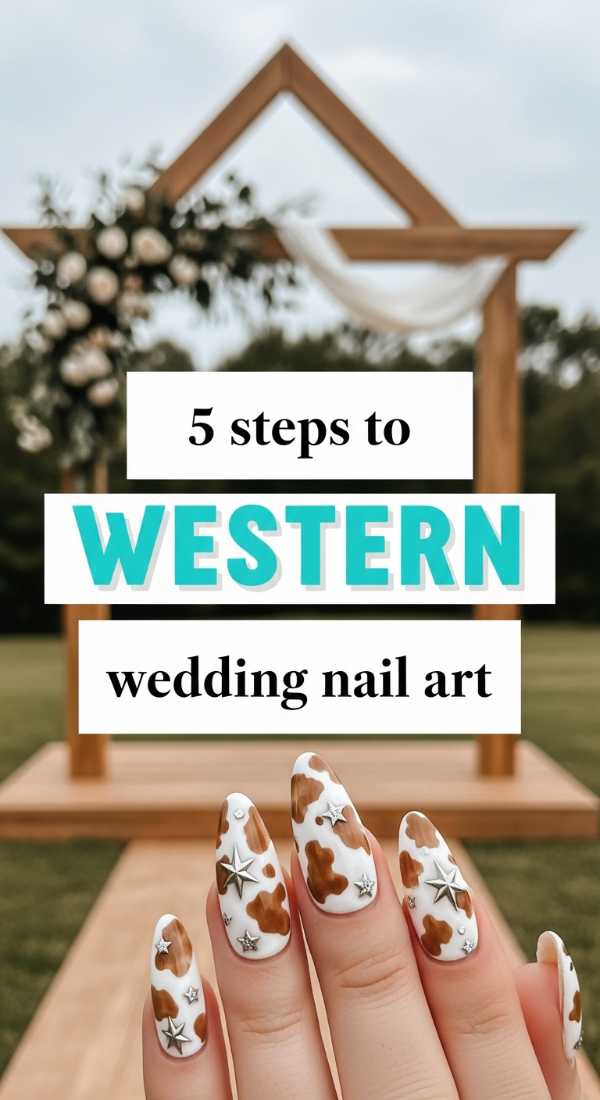
Why to love these Nails:
For the rustic, country, or western-themed bride, these nails incorporate earthy elements like turquoise and copper. It’s a beautiful way to honor your heritage and personal style.
Essential Items:
- Turquoise blue polish
- Copper metallic sharpie or polish
- Matte tan base color
How to Prepare:
- Start with a matte tan or ‘sand’ base.
- Use a dry brush technique to swirl in turquoise.
- Detail the edges with copper for a ‘tooled leather’ look.
- Apply a satin finish top coat.
- Pair with silver rings for the full effect.
Budget Range
- Orly Desert Muse Collection – $15.00
- Metallic Nail Art Pen – $7.00
- Pacifico Turquoise Polish – $9.00
4 Easy Ways to Get Cute Wedding Nails
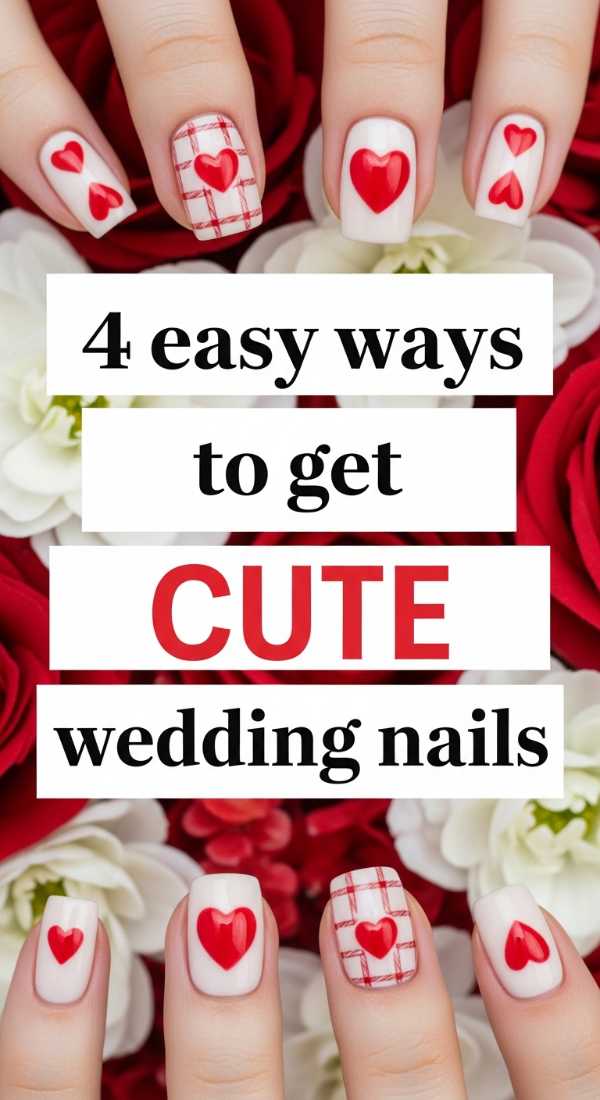
Why to love these Nails:
If your style is more playful and sweet, ‘cute’ wedding nails with tiny heart accents or soft glitter gradients are the way to go. They show off your joyful personality!
Essential Items:
- Heart-shaped nail decals
- Fine loose glitter
- Pastel pink polish
How to Prepare:
- Apply a base of soft pastel pink.
- Place a single heart decal on each ring finger.
- Add a soft glitter gradient from the cuticle up.
- Finish with a plumping top coat for a ‘squishy’ cute look.
Budget Range
- Deco Miami Nail Stickers – $8.00
- Holo Taco Cosmic Unicorn Skin – $13.00
- Essie Gel Couture ‘Princess Charming’ – $13.00
3 Bold Black Wedding Nail Styles

Why to love these Nails:
Who says you can’t wear black at a wedding? For the modern, edgy bride or a black-tie evening affair, black nails are incredibly chic, striking, and surprisingly romantic when paired with white lace.
Essential Items:
- Jet black crème polish
- Velvet matte top coat
- Silver striping tape
How to Prepare:
- The Matte Noir: A full matte black set for ultimate drama.
- The Tuxedo: Black tips on a nude base.
- The Galactic: Black with a holographic ‘starry’ top coat.
Budget Range
- Lights Lacquer ‘Midnight Train’ – $13.00
- Revlon Matte Top Coat – $6.00
- Cirque Colors Glitter – $14.00
7 Tips for Lace Wedding Nail Designs
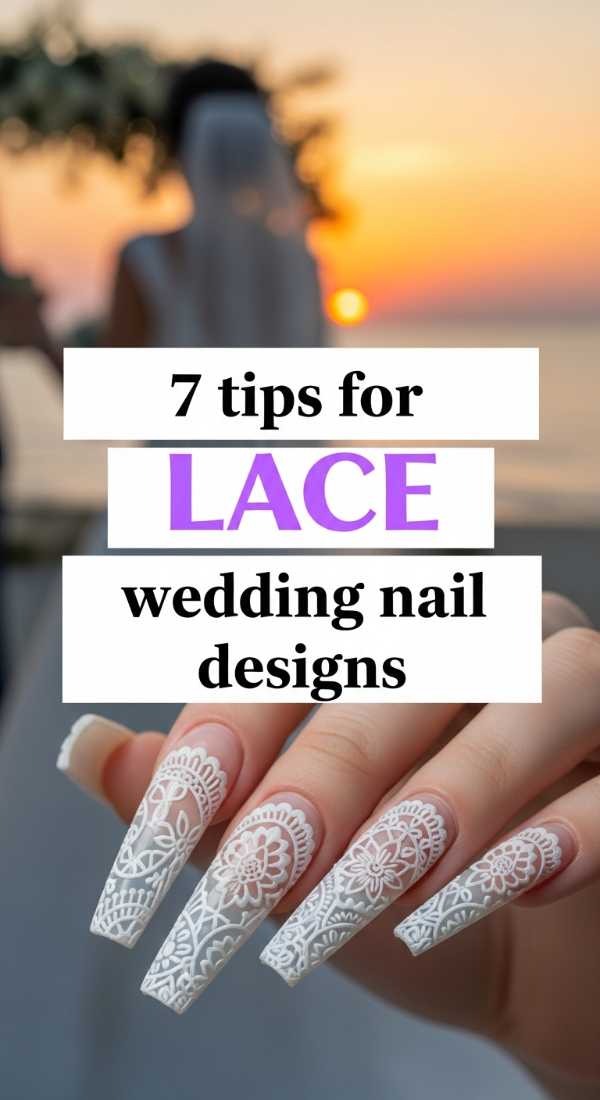
Why to love these Nails:
Lace nails are the pinnacle of bridal intricacy. They mimic the fabric of your gown, creating a cohesive and stunningly detailed look that feels like a work of art.
Essential Items:
- Lace nail stamping plate
- White stamping polish
- Scraper card
- Clear jelly stamper
- Liquid latex (for skin protection)
How to Prepare:
- Apply liquid latex around your cuticles.
- Apply white polish to the lace design on the plate.
- Scrape off the excess at a 45-degree angle.
- Pick up the image with the jelly stamper.
- Roll the image onto your nail slowly.
- Peel off the latex.
- Seal with a smudge-free top coat.
Budget Range
- MoYou London Bridal Plate – $10.00
- Maniology Smudge-Free Top Coat – $9.00
- Pueen Latex Barrier – $7.50
A Soft Heartfelt Conclusion
As you prepare for your walk down the aisle, remember that these little rituals—painting your nails, choosing your scent, putting on your veil—are all part of the beautiful transition into your new life. Your hands will hold your bouquet, wipe away happy tears, and clasp the hand of your partner for a lifetime. I hope this masterclass made you feel a little more pampered and a lot more inspired. You are going to be a breathtaking bride, my loves. Wishing you all the love in the world!
Frequently Asked Questions
- How far in advance should I get my wedding nails done? Ideally, 1-2 days before the wedding to ensure they are fresh but you aren’t rushed on the big day.
- Should I choose Gel or Regular Polish? Gel is highly recommended for brides as it is chip-resistant and stays shiny throughout the honeymoon!
- Can I do my own wedding nails? Absolutely! With the right tools and a little practice (try a few ‘test runs’ weeks before), DIY bridal nails are a lovely way to save money and relax.
- What nail shape is best for photos? Almond or Oval shapes tend to elongate the fingers and look most graceful in close-up ring shots.