
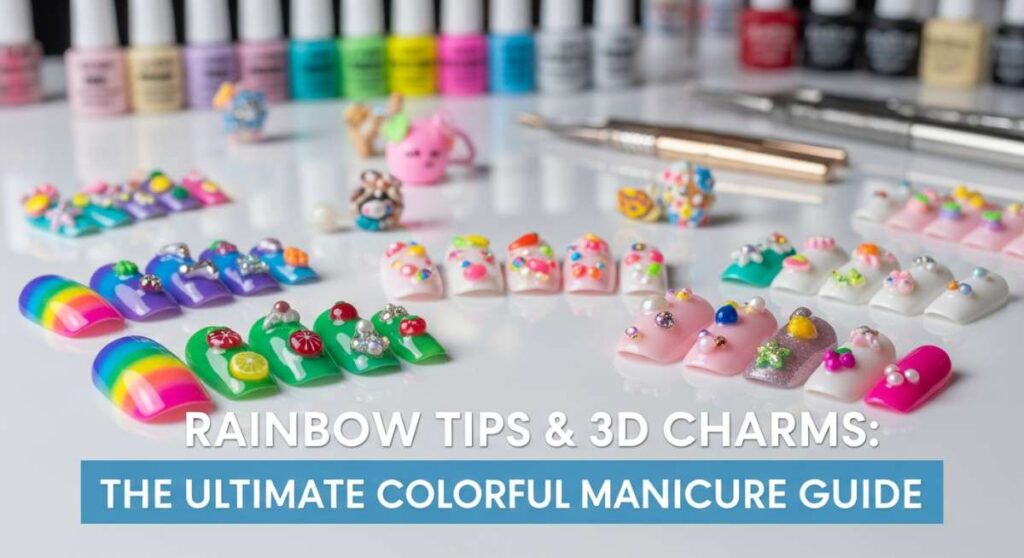
Rainbow Tips & 3D Charms: The Ultimate Colorful Manicure Guide
Hello, my beautiful loves! There is something so incredibly magical about looking down at your hands and seeing a literal rainbow staring back at you. In a world that can sometimes feel a bit gray, I’ve found that my maximalist manicures are like a soft, cloud-soft embrace for my soul. It’s not just about the polish; it’s about the joy that radiates from your fingertips every time you reach for your morning coffee or wave hello to a friend.
Today, I am opening up the doors to my personal heart-space—my maximalist nail studio—to share all the secrets behind these vibrant, 3D masterpieces. We are going beyond the basic French tip and diving headfirst into a world of texture, neon hues, and whimsical charms. Whether you’re a seasoned pro or just starting your DIY journey, I want you to feel empowered to play, experiment, and express your truest, most colorful self.
5 simple steps to design colorful junk nails

Why to love this recipe:
Junk nails are the ultimate expression of a ‘more is more’ philosophy! This style is like wearing a tiny, curated treasure chest on your fingertips, allowing you to mix and match all the little things that make you smile.
Essential Ingredients:
- Clear builder gel
- Assorted tiny resin charms (gummy bears, bows, fruit)
- Multicolor glitter flakes
- Neon gel polish set
- Ultra-glossy top coat
How to Prepare:
- Apply a vibrant base color to each nail and cure.
- Layer a thin coat of builder gel where you want your ‘junk’ to live.
- Place your charms and glitters into the wet gel, clustering them for that ‘maximalist’ look.
- Cure under a UV lamp for 60 seconds to lock everything in place.
- Seal the gaps around the charms with a top coat to prevent snagging.
Budget Range
- Beetles Neon Gel Set ($15.99)
- 50pcs Mixed Resin Charms ($8.50)
- Makartt Rhinestone Glue ($9.99)
Create vibrant multicolor nails in 6 easy phases
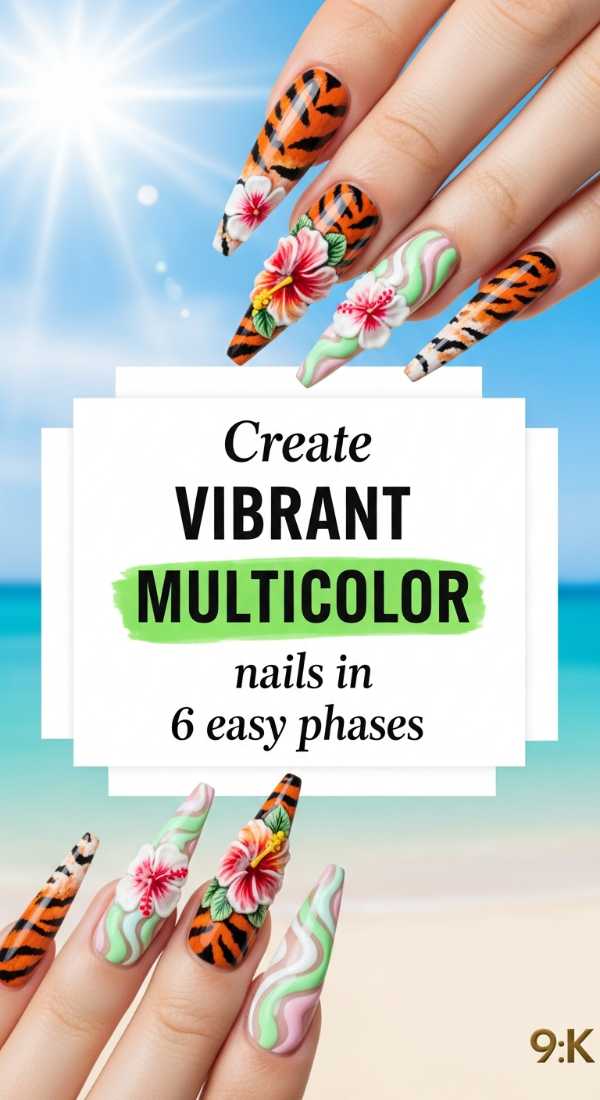
Why to love this recipe:
Sometimes you just can’t pick one color, and you shouldn’t have to! This multi-phase approach ensures each nail looks intentional and bright without feeling messy.
Essential Ingredients:
- 5 different pastel or neon polishes
- Nail primer
- Base coat
- Lint-free wipes
- Alcohol cleanser
- High-shine top coat
How to Prepare:
- Prep the nail plate by removing oils with an alcohol cleanser.
- Apply a thin layer of primer and base coat, then cure.
- Phase One: Paint the thumb and index finger in your first two chosen shades.
- Phase Two: Paint the remaining three fingers in contrasting colors.
- Phase Three: Apply a second coat to all nails for full opacity.
- Phase Four: Finish with a top coat and cure for a glass-like finish.
Budget Range
- Modelones Pastel Series ($12.00)
- SAVILAND Nail Prep Dehydrator ($7.99)
Sculpt stunning colorful stiletto nails in 4 quick steps
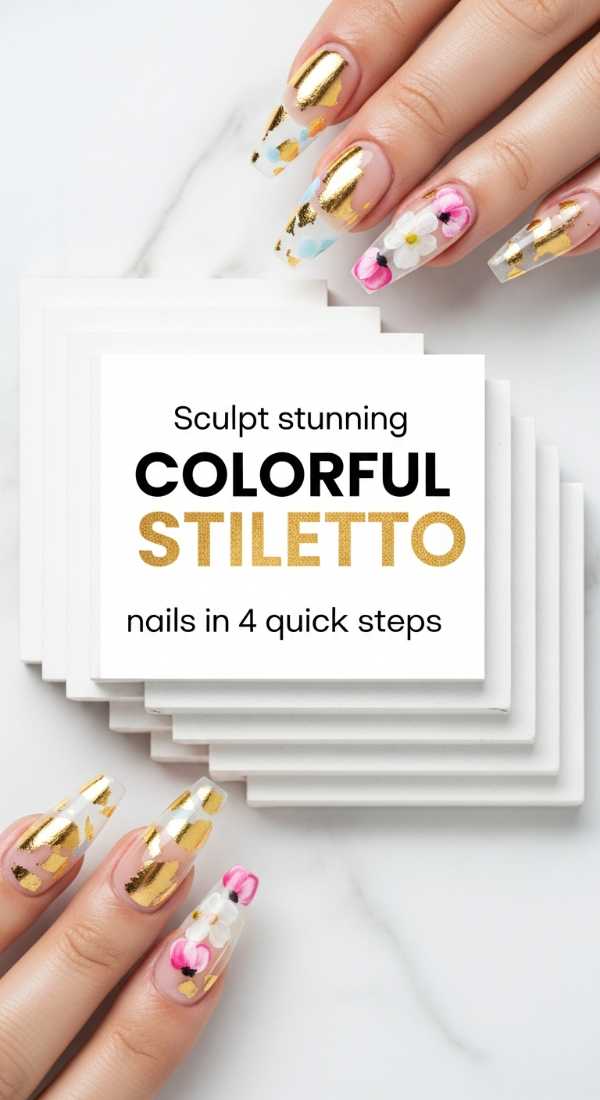
Why to love this recipe:
The stiletto shape is so fierce and elongating! When paired with bright colors, it becomes a statement piece that turns your hands into actual works of art.
Essential Ingredients:
- Stiletto nail tips or forms
- Colorful acrylic powder (pink, teal, or yellow)
- Acrylic monomer
- Dashing Diva nail glue
- Nail file (100/180 grit)
How to Prepare:
- Glue the stiletto tips to your natural nails and blend the seam with a file.
- Dip your brush into the monomer and then into the colorful acrylic powder to create a bead.
- Lay the bead at the center of the nail and sculpt it toward the tip and cuticle.
- File the edges once dry to sharpen that beautiful stiletto point.
Budget Range
- Morovan Acrylic Nail Kit ($24.99)
- ECBASKET Stiletto Tips ($6.99)
Style 10 different color nails for a bold summer look
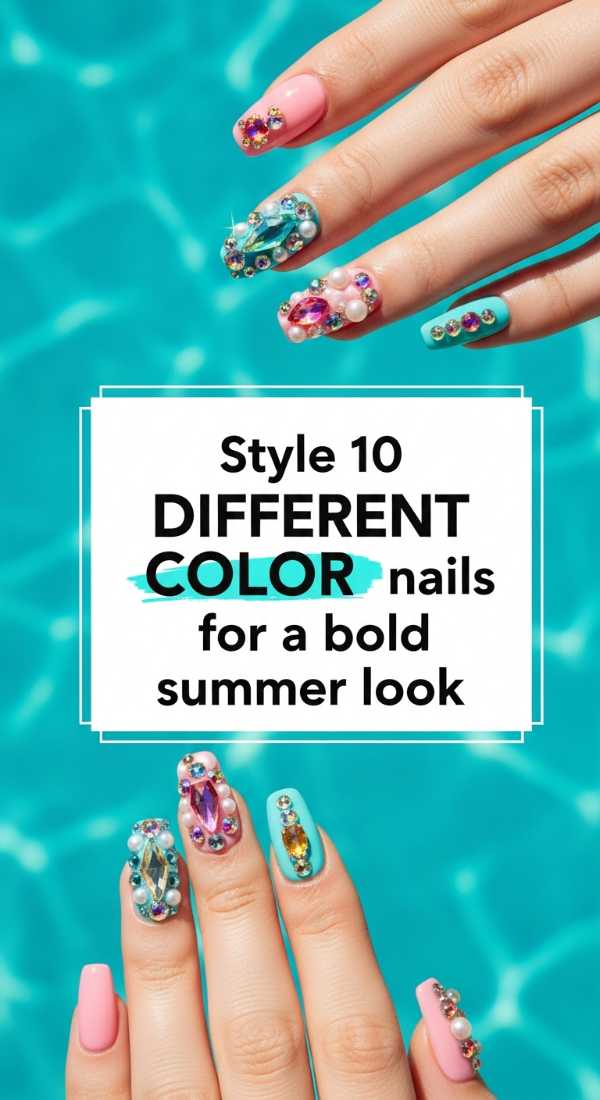
Why to love this recipe:
This is the ultimate ‘Skittles’ manicure! It’s playful, energetic, and perfectly captures the sun-drenched vibes of a perfect summer afternoon.
Essential Ingredients:
- A collection of 10 unique gel colors
- Dotting tool
- Matte and Glossy top coats
- Cuticle oil (lemon scented)
How to Prepare:
- Line up your 10 colors in the order you want them to appear on your hands.
- Paint each individual nail a different color, starting from the left pinky to the right pinky.
- Add a tiny dot of a contrasting color at the base of each nail for a hidden detail.
- Choose a matte top coat for one hand and glossy for the other for a fun texture contrast.
Budget Range
- Lavender Violets 18-piece Set ($19.99)
- Cuccio Revitalize Oil ($7.00)
Blend two color nails perfectly with these 3 techniques
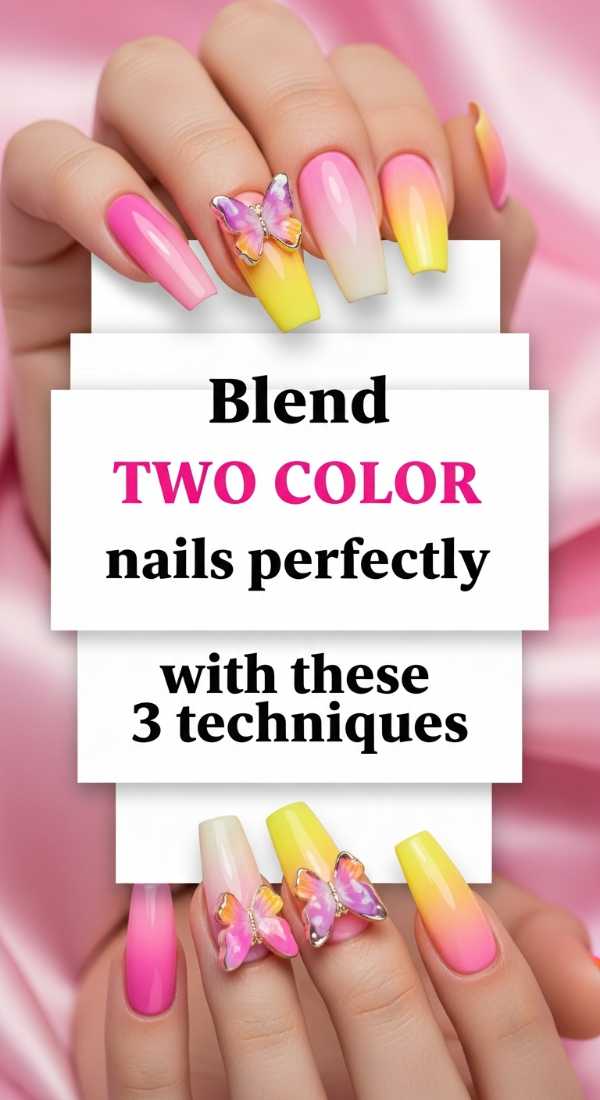
Why to love this recipe:
The soft transition between two colors is so soothing to look at. It’s like a sunset on your nails, blending the boundaries of shade and light.
Essential Ingredients:
- Two complementary gel colors
- Ombre sponge or makeup wedge
- Liquid latex (for skin protection)
- UV Lamp
How to Prepare:
- Technique 1 (The Sponge): Paint stripes of both colors on a sponge and dab onto the nail.
- Technique 2 (The Brush): Use a fan brush to softly pull the wet colors into each other at the center.
- Technique 3 (The Vertical Blend): Paint half the nail vertically in one color and the other half in another, then blur the line.
Budget Range
- Born Pretty Ombre Brushes ($6.50)
- Pueen Latex Tape ($8.99)
Find your next colorful nail inspo in 7 unique styles
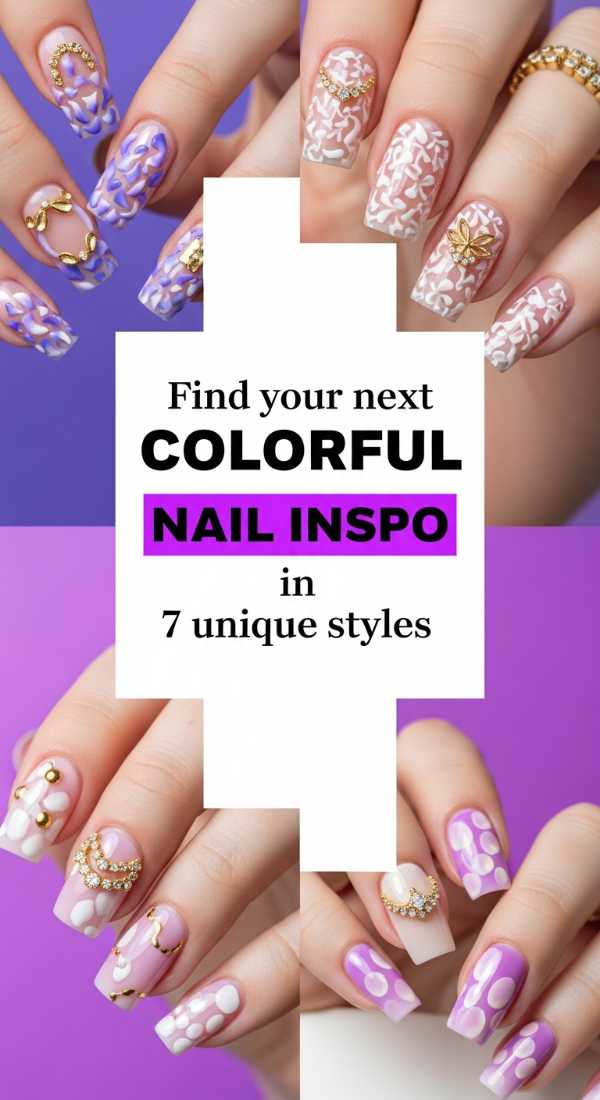
Why to love this recipe:
We all get ‘nail-block’ sometimes! This guide helps you tap into different moods, from retro vibes to futuristic neons, so you always have a fresh look.
Essential Ingredients:
- Inspo board (Pinterest or Instagram)
- Various nail art brushes
- Striping tape
- Foil transfer glue
How to Prepare:
- Look through 7 styles: Retro Swirls, Aura Nails, French Rainbow, Checkerboard, Fruit Slices, Velvet Cat-Eye, and Negative Space.
- Pick the style that matches your current energy.
- Map out the design on a practice tip first.
- Apply the chosen style using thin, patient layers of color.
Budget Range
- Gellen Nail Art Brushes ($8.99)
- Transfer Foil Paper Set ($7.50)
Build colourful acrylic nails that last using 5 pro tips
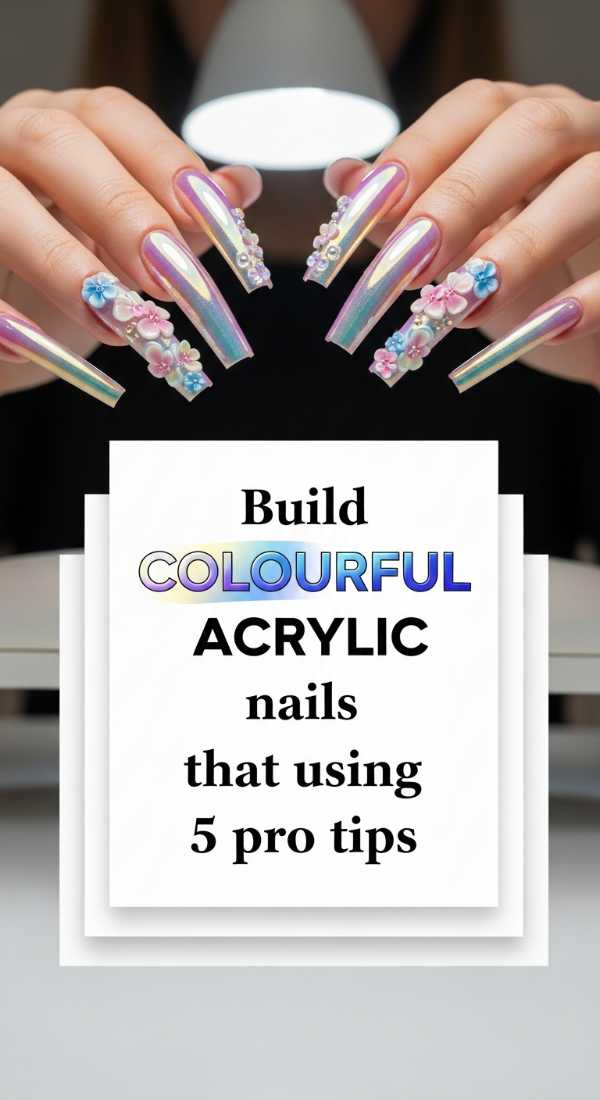
Why to love this recipe:
There is nothing worse than a beautiful mani chipping early! These pro tips ensure your colorful creations stay vibrant and attached for weeks.
Essential Ingredients:
- High-quality pH bonder
- Acid-free primer
- Professional grade monomer
- Fine grit buffer
- Top-tier colorful acrylic powder
How to Prepare:
- Tip 1: Dehydrate the nail thoroughly—moisture is the enemy of adhesion!
- Tip 2: Use an acid-free primer to create a ‘sticky’ surface for the acrylic.
- Tip 3: Master your liquid-to-powder ratio; beads should be smooth, not runny.
- Tip 4: Leave a tiny gap at the cuticle to prevent lifting.
- Tip 5: Cap the free edge with clear acrylic to protect the color underneath.
Budget Range
- Mia Secret Professional Kit ($32.00)
- Young Nails Protein Bond ($14.95)
Master multi colored nails art with 8 creative tricks
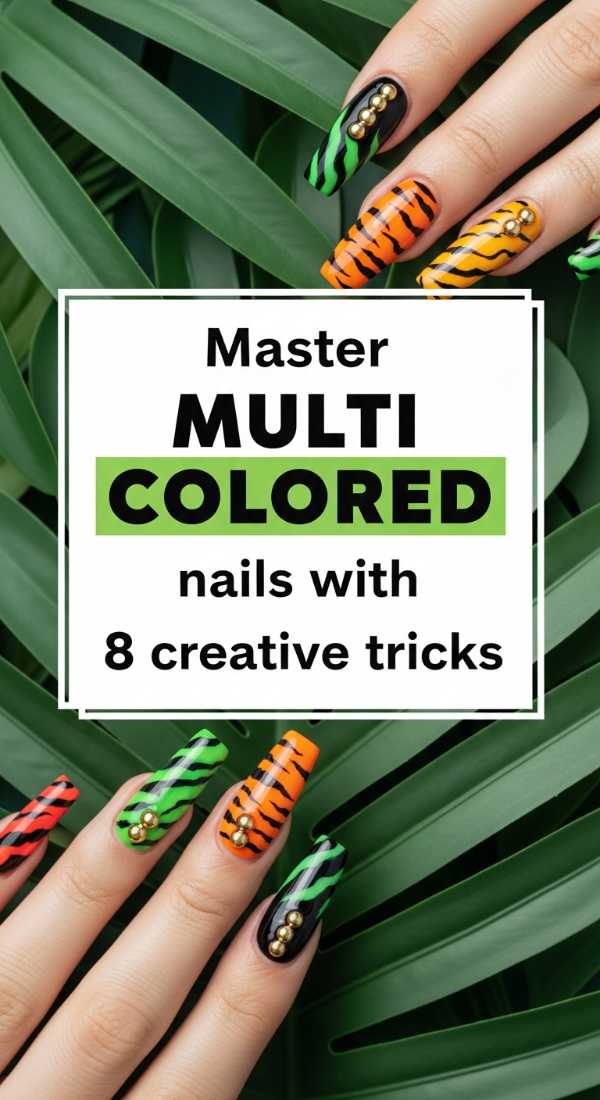
Why to love this recipe:
Nail art is a skill that grows with you. These tricks will help you elevate a simple multi-colored look into something that looks like it cost $200 at a salon.
Essential Ingredients:
- Fine liner brush
- Blooming gel
- Gold leaf flakes
- Stamping plates
How to Prepare:
- Trick 1: Use blooming gel for watercolor effects.
- Trick 2: Layer ‘jelly’ polishes over glitters for depth.
- Trick 3: Use a toothpick for tiny, precise hearts.
- Trick 4: Apply chrome powder over specific sections using a silicone tool.
- Trick 5: Use striping tape for crisp, clean geometric lines.
- Trick 6: Flash cure for 10 seconds between colors to prevent bleeding.
- Trick 7: Mix colors on a palette to create custom intermediate shades.
- Trick 8: Use a matte top coat before drawing fine lines to prevent ‘spreading’.
Budget Range
- Bioseaweed Gel Blooming Gel ($12.00)
- Aora Chrome Powder ($15.00)
Craft 3D colorful nail designs in 4 detailed stages
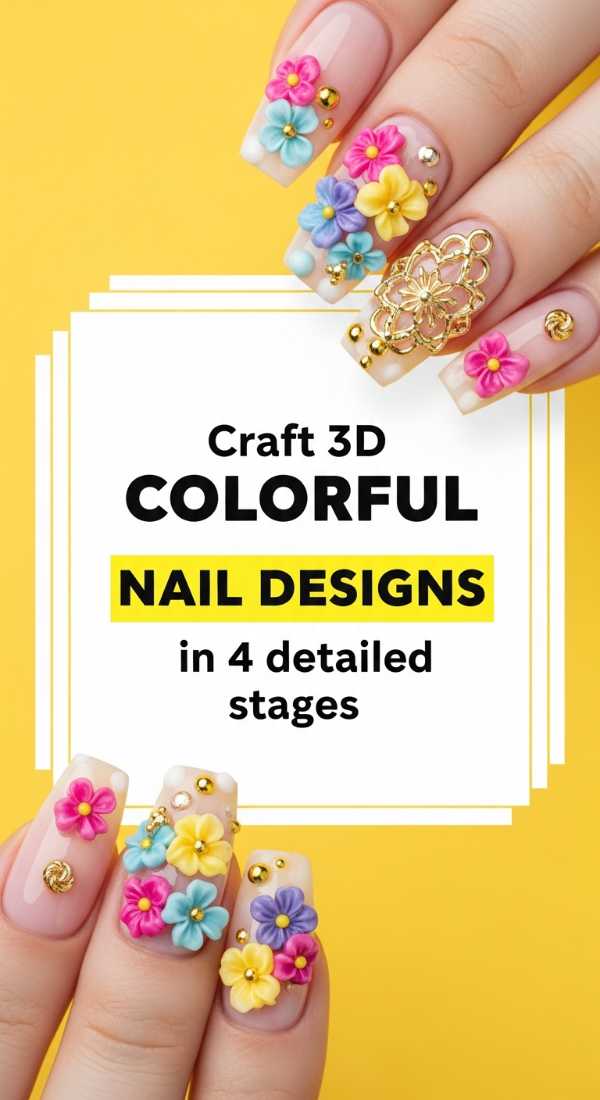
Why to love this recipe:
3D designs add a tactile dimension to your life! Feeling the tiny ridges of a 3D flower or the smooth curve of a gem is a lovely sensory experience.
Essential Ingredients:
- 3D Sculpting Gel (non-wipe)
- Silicone carving tools
- Pearl embellishments
- Curved tweezers
How to Prepare:
- Stage 1: Apply your base colors and a matte top coat (it helps the 3D gel grip).
- Stage 2: Roll the 3D sculpting gel into small spheres or snakes using your fingers (wear gloves!).
- Stage 3: Place the gel on the nail and use silicone tools to press into petal or ribbon shapes.
- Stage 4: Once the shape is perfect, cure for a full 120 seconds and tuck pearls into the centers.
Budget Range
- Saviland 5-in-1 Builder Gel ($13.99)
- Teenitor Silicone Nail Tools ($6.50)
Apply DIY color street nails flawlessly in 6 minutes
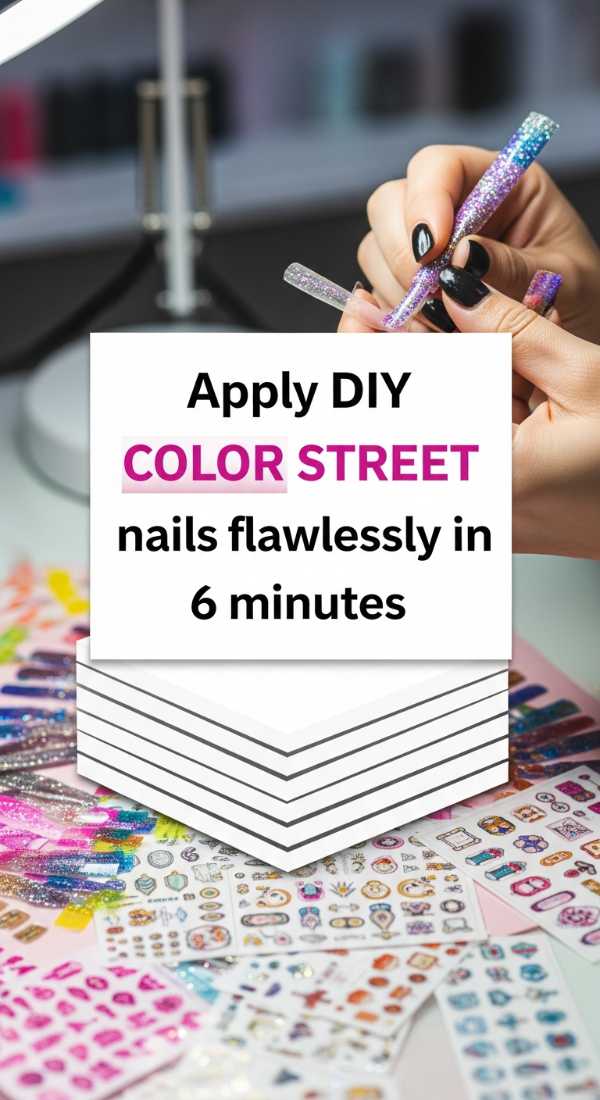
Why to love this recipe:
For my busy loves who still want that maximalist pop! These dry polish strips are a lifesaver when you have zero time but a big event.
Essential Ingredients:
- Color Street nail strips
- Glass nail file
- Alcohol prep pad
- Rubber cuticle pusher
How to Prepare:
- Clean each nail with an alcohol pad to remove any natural oils.
- Select the strip size that best fits your nail.
- Peel the clear cover and the polish strip from the backing.
- Apply the strip to the center of the nail, smoothing it down toward the edges.
- Perforate the excess over the tip using your thumbnail or a file.
- Smooth out any tiny bubbles with a rubber cuticle pusher for a seamless finish.
Budget Range
- Color Street Sets ($11.00 – $14.00)
- Mont Bleu Glass Nail File ($9.99)
Embrace Your Inner Artist
My loves, I hope this guide sparks a little fire of creativity in your heart. Remember, there are no ‘mistakes’ in nail art—only happy accidents that lead to new designs. Whether you’re rocking 3D gummy bears or a soft rainbow ombre, let your nails be a reflection of the beautiful, vibrant light you carry inside. Go forth and paint your world bright!