
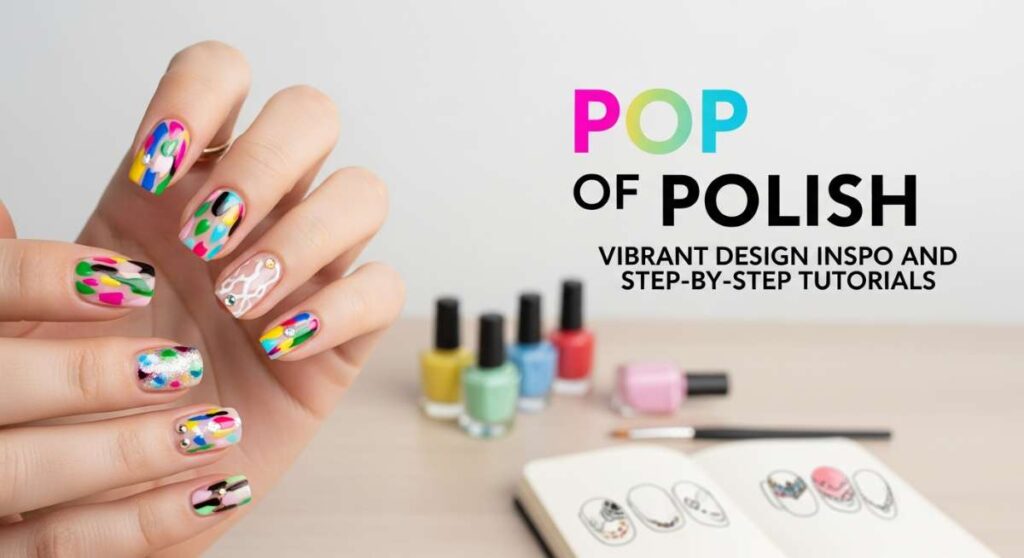
Pop of Polish: Vibrant Design Inspo and Step-by-Step Tutorials
Hello, my beautiful loves! Welcome back to our cozy little corner of the internet. I hope your day is feeling like a warm, cloud-soft embrace. Lately, I’ve been feeling a pull toward everything bright and cheerful. There is something so incredibly healing about looking down at your hands and seeing a rainbow of possibilities staring back at you, don’t you think?
Life can get a little grey sometimes, but our nails never have to be. Whether you’re sipping a lavender latte or typing away at your desk, a pop of vibrant color is that tiny spark of joy that reminds us to stay playful. Today, I’ve gathered all my favorite secrets, from the daintiest blends to the boldest 3D charms, just for you.
Grab your favorite blanket, maybe a glass of sparkling water with a slice of lemon, and let’s dive into the magical world of colorful nail art together. These aren’t just tutorials; they are little love letters to your creativity. Let’s make something beautiful, shall we?
5 easy steps to design multi colored nails
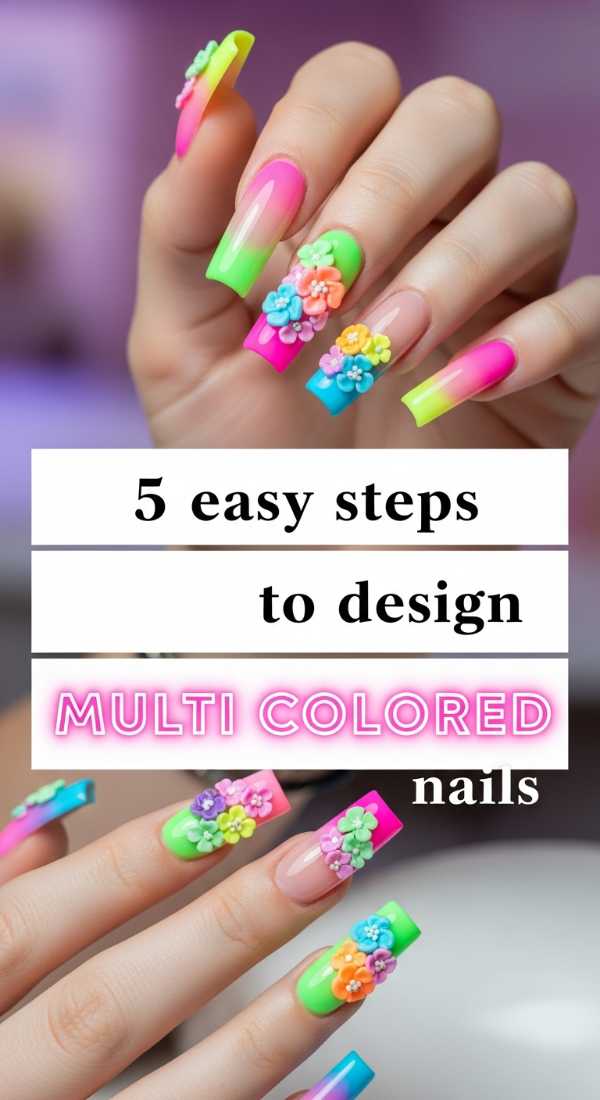
Why to love this recipe:
This is the ultimate ‘pick-me-up’ for those weeks when you just can’t choose a single mood. It’s playful, effortless, and makes every outfit feel like a celebration of your personality.
Essential Ingredients:
- 5 different pastel or neon polishes
- Clear base coat
- High-gloss top coat
- Cuticle oil
How to Prepare:
- Gently push back cuticles and apply a thin base coat.
- Assign one unique color to each finger on your hand.
- Apply two thin layers of each color for maximum vibrance.
- Seal with a glossy top coat to lock in the shine.
- Massage a drop of lavender cuticle oil for that salon finish.
Budget Range
- Essie Expressie Polishes ($9)
- Sally Hansen Insta-Dri ($6)
- Holo Taco Glossy Taco ($11)
Apply 3D charms to colorful junk nails in 3 minutes
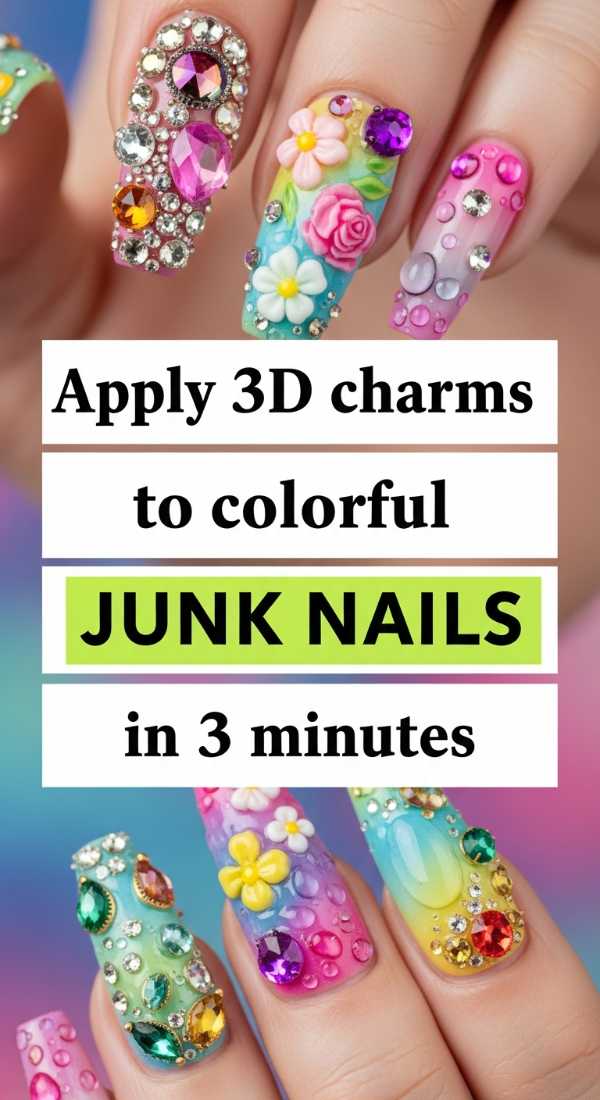
Why to love this recipe:
Junk nails are the ‘maximalist’ dream! It’s all about texture and personality. Adding 3D charms makes your nails feel like tiny pieces of wearable jewelry that tell a story.
Essential Ingredients:
- Assorted resin charms (bows, hearts, gummy bears)
- Nail rhinestone glue or thick builder gel
- Tweezers
- UV/LED Lamp
How to Prepare:
- Choose your charm and place a small bead of glue on the finished nail.
- Use tweezers to gently nestle the charm into the glue.
- Flash cure under the lamp for 30 seconds to set.
- Seal the edges of the charm with a tiny bit more top coat to prevent snagging.
Budget Range
- Amazon 100pc Kawaii Charm Set ($8)
- Makartt Rhinestone Glue ($10)
- SunUV Mini Lamp ($15)
Create stunning different color nails in 4 simple phases
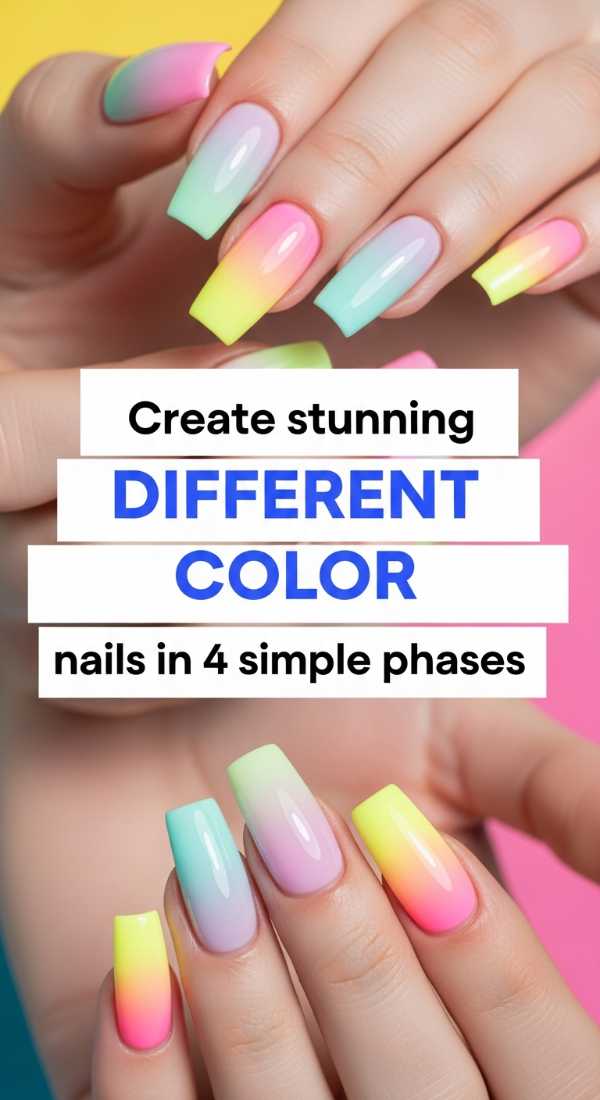
Why to love this recipe:
This technique focuses on harmony. Instead of random colors, we are building a cohesive story across your fingertips that looks professionally curated but feels like home.
Essential Ingredients:
- 3 tonal shades (e.g., three shades of blue)
- 2 metallic accents
- Lint-free wipes
How to Prepare:
- Phase 1: Organize your colors from darkest to lightest.
- Phase 2: Apply the ‘anchor’ dark color to your thumb and pinky.
- Phase 3: Use the lighter tones and metallics for the middle fingers.
- Phase 4: Clean up edges with a brush dipped in acetone for a crisp finish.
Budget Range
- OPI Infinite Shine Set ($20)
- Zoya Professional Lacquer ($12)
Master these 6 techniques for colorful nail designs
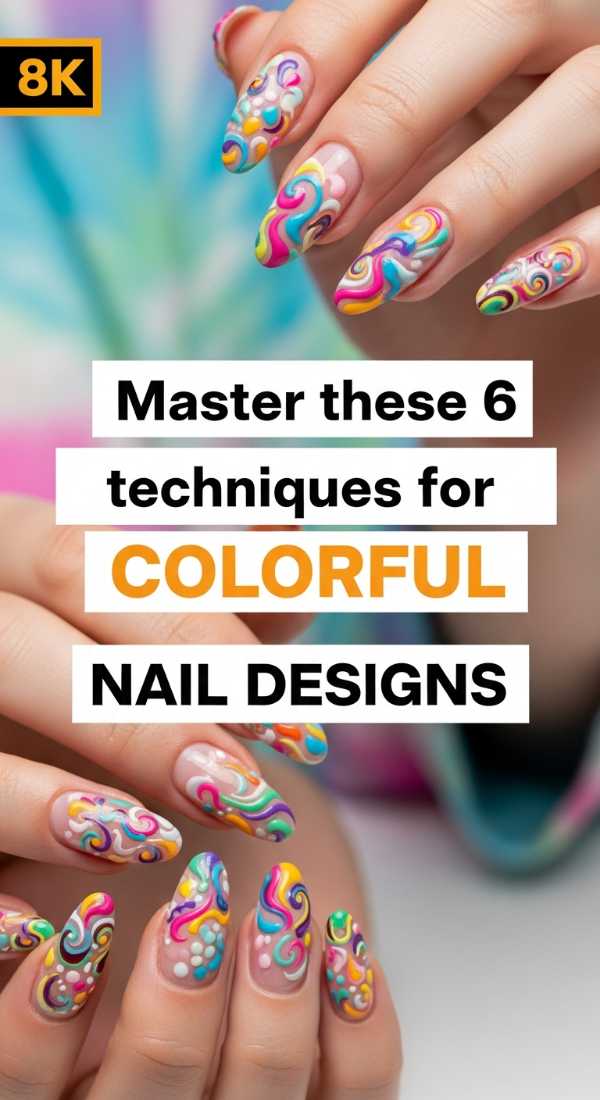
Why to love this recipe:
Learning these techniques is like filling your creative toolbox. Once you know these, you can create literally thousands of different looks depending on your mood, my loves.
Essential Ingredients:
- Sponge wedges
- Dotting tools
- Striping tape
- Thin liner brush
- Stamping kit
- Water bowl (for marbling)
How to Prepare:
- Practice the ‘Sponge Gradient’ by dabbing two colors together.
- Use ‘Dotting Tools’ to create tiny, delicate floral patterns.
- Apply ‘Striping Tape’ for crisp, geometric color blocks.
- Try ‘Water Marbling’ by dropping polish into water and swirling.
- Use the ‘Liner Brush’ for hand-painted swirls.
- Finish with ‘Stamping’ for intricate, uniform patterns.
Budget Range
- Winstonia Nail Art Brush Set ($12)
- Born Pretty Stamping Plate ($5)
7 pro secrets for vibrant color nails
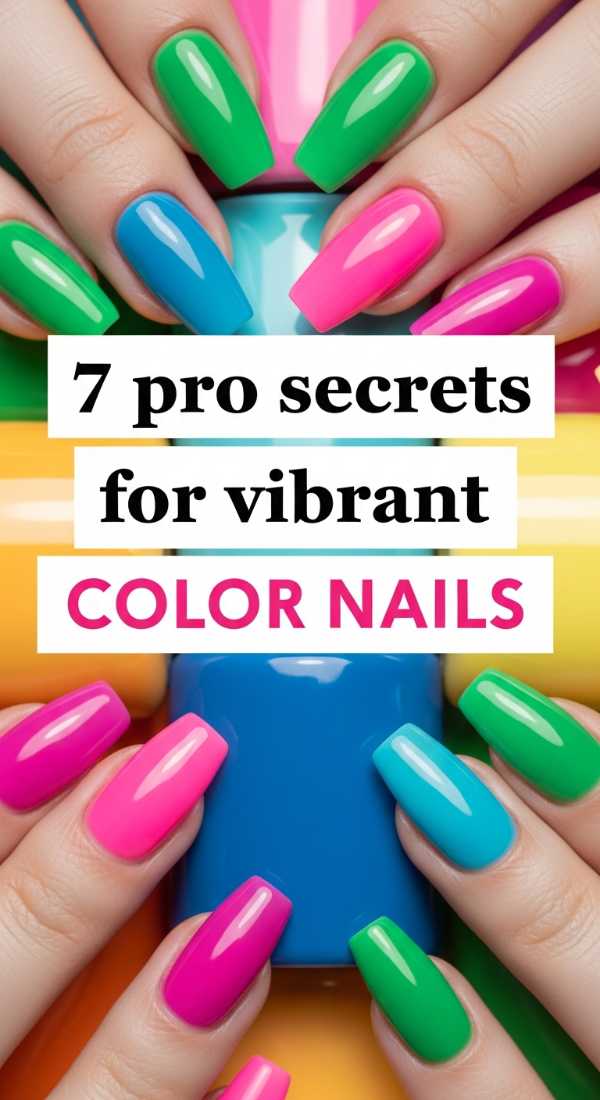
Why to love this recipe:
Have you ever wondered why salon nails just look… punchier? These secrets are the ‘magic sauce’ that turns a simple DIY into a high-end masterpiece that lasts for weeks.
Essential Ingredients:
- White nail polish (as a base)
- 90% Isopropyl alcohol
- Buffing block
- Professional-grade top coat
How to Prepare:
- Secret 1: Always apply a white base coat to make neons truly ‘pop.’
- Secret 2: Dehydrate the nail plate with alcohol before painting.
- Secret 3: Paint in very thin, patient layers.
- Secret 4: ‘Cap the edge’ by running the brush along the very tip of the nail.
- Secret 5: Warm the polish bottle between your palms instead of shaking.
- Secret 6: Use a clean-up brush for perfect cuticle lines.
- Secret 7: Re-apply top coat every 3 days to maintain vibrancy.
Budget Range
- Orly Bonder Base Coat ($15)
- Seche Vite Fast Dry Top Coat ($9)
Blend two color nails flawlessly in 3 easy steps

Why to love this recipe:
The ombré look is like a sunset on your nails. It’s soft, romantic, and hides regrowth beautifully. It’s the ‘cloud-soft’ aesthetic in physical form.
Essential Ingredients:
- Two coordinating colors
- Makeup sponge
- Liquid latex or tape (for skin protection)
How to Prepare:
- Apply the lighter color as your base and let it dry completely.
- Paint horizontal stripes of both colors onto the makeup sponge.
- Gently dab the sponge onto the nail, moving it slightly up and down to blur the line.
Budget Range
- Walgreens Makeup Sponges ($4)
- Pueen Latex Tape ($9)
Apply your color street nails in 10 minutes

Why to love this recipe:
For my busy loves who are always on the go but still want that ‘polished’ feel, dry nail strips are a total game changer. Zero dry time, 100% sparkle.
Essential Ingredients:
- Color Street nail strips
- Alcohol prep pad
- Nail file
How to Prepare:
- Cleanse nails thoroughly with the alcohol pad.
- Remove the clear cover and peel the polish strip from the backing.
- Center the strip, press down firmly, and fold the excess over the tip to file it away.
Budget Range
- Color Street Solids ($11)
- Color Street Glitters ($13)
Sculpt colourful acrylic nails in 8 professional steps
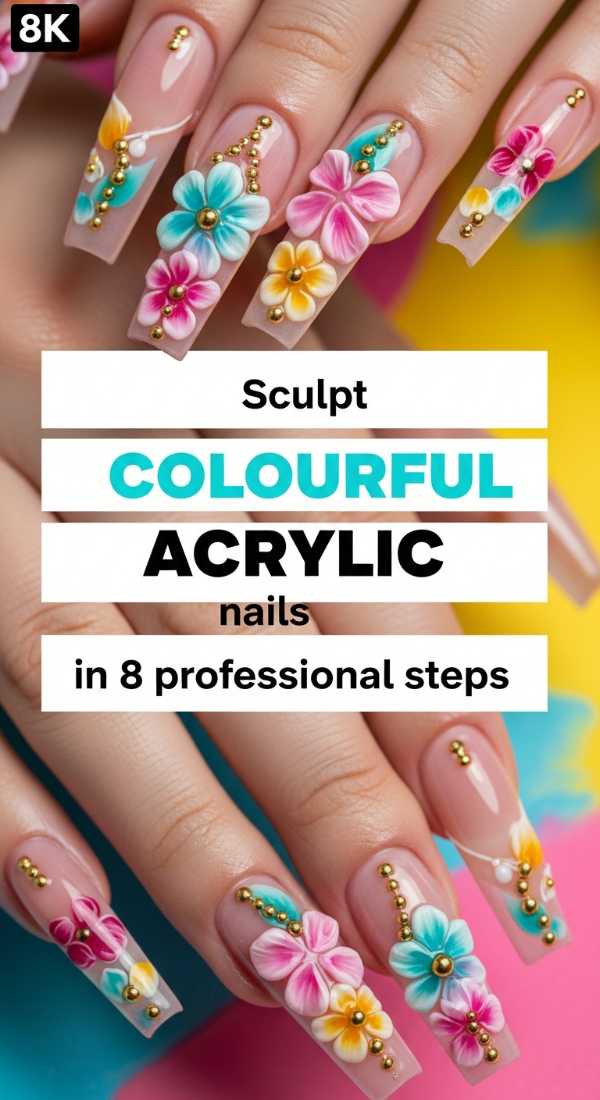
Why to love this recipe:
Acrylics are for the bold hearts who want length and strength. Using colored acrylic powder allows you to build the color into the very structure of the nail for a look that never chips.
Essential Ingredients:
- Colored acrylic powder
- Liquid monomer
- Acrylic brush (Kolinsky)
- Nail forms or tips
How to Prepare:
- Prep the natural nail and apply a primer.
- Fit the nail form securely under the free edge.
- Dip brush in monomer, then into the colored powder to create a ‘bead.’
- Place the bead at the center and pat into shape.
- Add a smaller bead near the cuticle and blend down.
- Once dry, file the sidewalls and surface for smoothness.
- Buff until the color glows.
- Apply a non-wipe gel top coat and cure.
Budget Range
- Mia Secret Acrylic System ($25)
- Young Nails Monomer ($20)
Shape your colorful stiletto nails in 4 quick moves

Why to love this recipe:
Stiletto nails are fierce and elegant. They elongate the fingers and provide a huge canvas for all those vibrant colors we love so much.
Essential Ingredients:
- 100/180 grit nail file
- Nail clippers
- A steady hand
How to Prepare:
- Find the exact center point of your nail tip.
- File the side walls at a sharp angle toward that center point.
- Taper the edges until they meet in a soft or sharp peak.
- Round off the very tip slightly so it’s wearable but still pointed.
Budget Range
- Flowery Professional Nail Files ($5)
- Tweezerman Nail Clippers ($12)
Get perfect multicolor nails with 5 daily habits
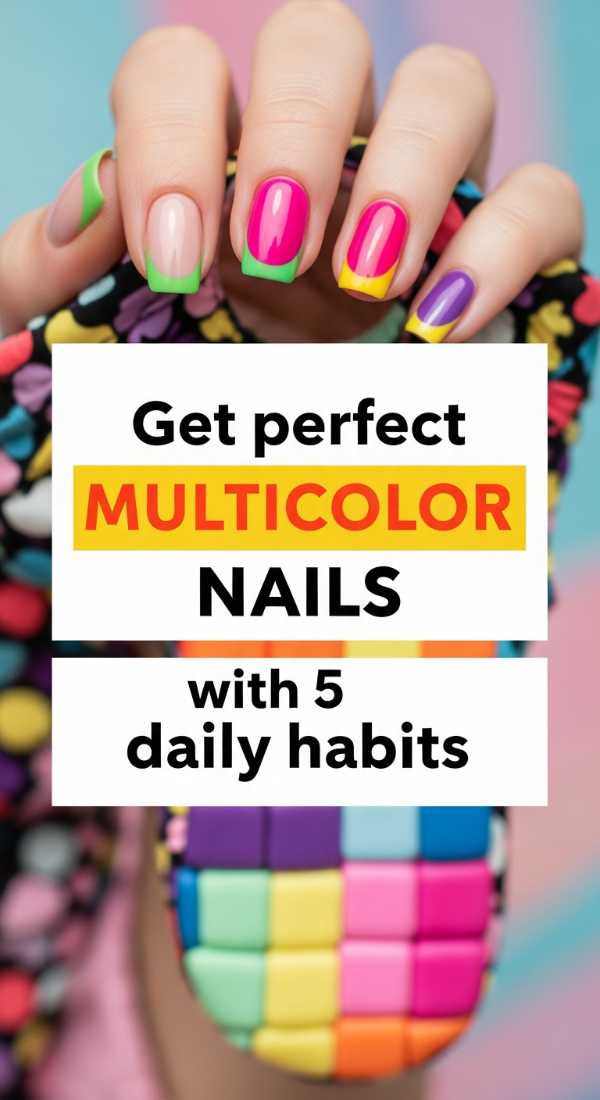
Why to love this recipe:
Beautiful nails start with health. These habits are a form of daily self-love that ensures your colorful designs have the strongest, smoothest canvas possible.
Essential Ingredients:
- High-quality cuticle oil
- Hand cream
- Glass nail file
How to Prepare:
- Apply cuticle oil every single night before bed.
- Wear gloves while doing dishes or using cleaning supplies.
- Never use your nails as ‘tools’ to open soda cans.
- File in one direction only using a glass file to prevent peeling.
- Stay hydrated! Healthy nails start from the inside out.
Budget Range
- CND SolarOil ($9)
- L’Occitane Shea Butter Hand Cream ($13)
- Bona Fide Glass Nail File ($10)
Stay Vibrant, My Loves
I hope these tutorials spark a little light in your soul today. Remember, your nails are just another way to express the beautiful, multi-colored magic that is already inside of you. Don’t be afraid to get messy, try a new shade, or add that extra bit of glitter. You deserve to feel inspired every time you look at your hands. Until next time, stay soft, stay bright, and keep shining!