
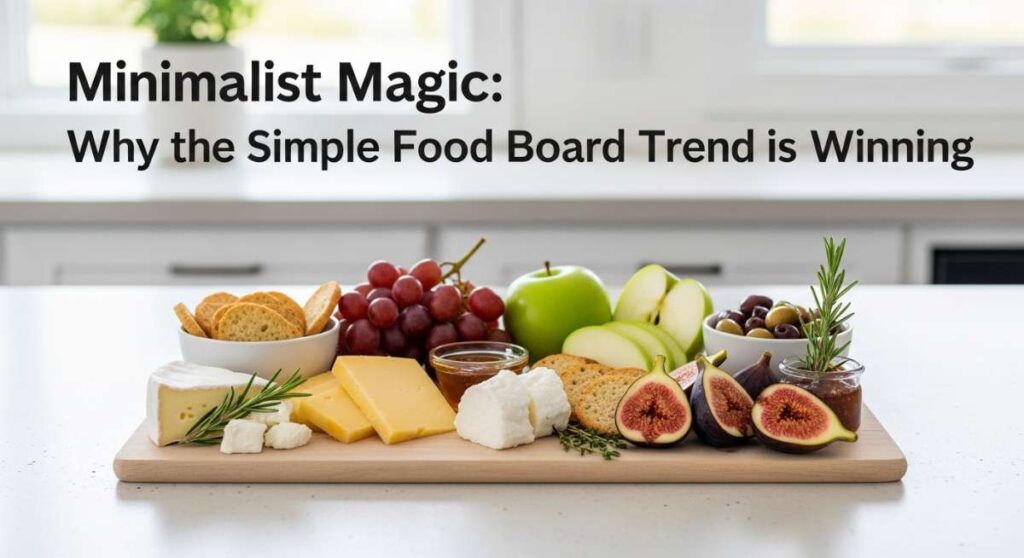
Minimalist Magic: Why the Simple Food Board Trend is Winning
There is something inherently soul-soothing about a gathering that doesn’t require a three-course menu and a stack of stained recipe cards. Lately, I’ve found myself leaning away from the over-the-top, cluttered charcuterie boards of the past and embracing what I call ‘Minimalist Magic.’ It’s that viral shift toward simplicity—a single star ingredient, a few thoughtful pairings, and the space to actually breathe and enjoy the company of your favorite people.
I remember a recent Sunday afternoon when I was feeling overwhelmed by a long to-do list. Instead of a complex dinner, I laid out a single board featuring warm bread, a block of local butter, and some fresh garden herbs. The transformation in the room was instant. We sat around that board for hours, talking, laughing, and savoring every bite without the pressure of a formal meal. This trend isn’t just about food; it’s about reclaiming our time and focusing on the pure, unadulterated joy of seasonal flavors.
7 Easy Ways to Use Rhubarb (Step-by-Step Guide)

Why we love this
Rhubarb is often misunderstood, but when treated with a little sweetness and heat, it transforms into a tart, silky masterpiece that wakes up the palate. On a food board, a warm rhubarb compote offers a vibrant pink hue that looks like a sunset and smells like a spring meadow. The texture is soft yet slightly fibrous, providing a beautiful contrast to crunchy crackers or soft cheeses, and that signature zing cuts right through rich fats for a perfectly balanced bite.
Ingredients
- 4 cups fresh rhubarb, chopped into 1-inch pieces
- 3/4 cup granulated sugar
- 1 tablespoon fresh orange zest
- 1 teaspoon vanilla bean paste
- A pinch of sea salt
How to make it
- Begin by preparing your rhubarb: wash the stalks thoroughly and trim the ends. Cut the stalks into uniform 1-inch pieces to ensure even cooking and a consistent texture in the final compote.
- In a medium-sized heavy-bottomed saucepan, combine the chopped rhubarb, granulated sugar, orange zest, and sea salt. Let the mixture sit for about 10 minutes at room temperature; this process, called maceration, draws out the natural juices and helps create a syrup without adding water.
- Place the saucepan over medium-low heat. Stir gently with a wooden spoon until the sugar has completely dissolved and the juices begin to bubble softly. Avoid high heat, as you want to gently break down the rhubarb fibers rather than burning the sugar.
- Simmer the mixture for 12 to 15 minutes. You are looking for the rhubarb to become tender and start to fall apart, forming a thick, glossy sauce. If it looks too thin, continue simmering for another 2-3 minutes while stirring frequently to prevent sticking to the bottom.
- Once the desired consistency is reached, remove the pan from the heat and stir in the vanilla bean paste. Let the compote cool to room temperature before serving on your board, as it will thicken significantly as it cools, reaching a spreadable, jam-like perfection.
10 Quick Summer Desserts You Need to Try
Why we love this
Summer hosting should be effortless, and a grilled peach and honey board is the epitome of golden-hour elegance. The aroma of caramelized fruit sugars mingling with smoky char marks creates an intoxicating scent that fills the kitchen. Each slice of peach is succulent and warm, yielding to the pressure of a fork, while a drizzle of wildflower honey and a sprinkle of thyme add layers of floral and earthy notes that feel sophisticated yet deeply comforting.
Ingredients
- 6 large, ripe peaches (halved and pitted)
- 2 tablespoons melted unsalted butter
- 1/4 cup high-quality honey
- 1 cup mascarpone cheese
- Fresh thyme sprigs for garnish
How to make it
- Preheat your grill or a heavy cast-iron grill pan to medium-high heat. You want the grates to be hot enough to sear the fruit quickly without turning it into mush. Lightly oil the grates to prevent the fruit from sticking.
- Brush the cut sides of the peach halves generously with melted butter. This not only prevents sticking but also aids in the caramelization process, creating those beautiful, deep brown grill marks.
- Place the peaches cut-side down onto the hot grill. Press down very lightly to ensure good contact. Grill for 3 to 4 minutes without moving them; this allows the natural sugars to react with the heat to develop flavor and visual appeal.
- Carefully flip the peaches using tongs. The flesh should be soft and slightly charred. Grill for another 2 minutes on the skin side just to warm the fruit through to the center.
- Remove the peaches from the grill and arrange them on a large wooden board. Dollop small amounts of mascarpone cheese into the center of each peach half. While still warm, drizzle the entire board with honey and scatter fresh thyme over the top. Serve immediately while the fruit is still radiating heat and the cheese begins to slightly melt.
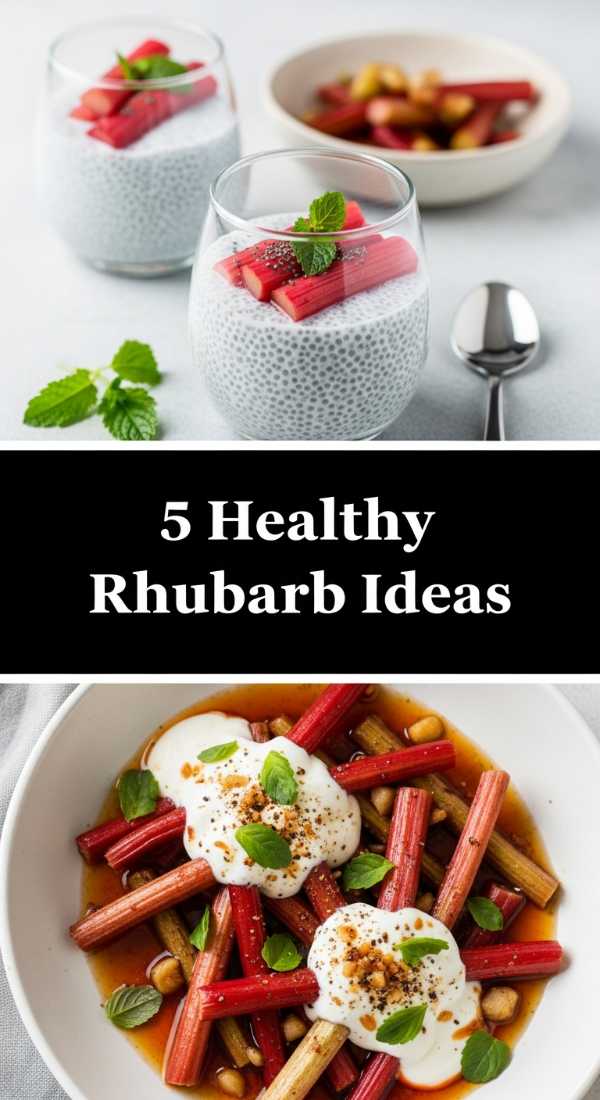
5 Healthy Rhubarb Recipes for Guilt-Free Treats
Why we love this
Healthy eating doesn’t have to be boring, and a raw rhubarb and Greek yogurt dip board is the perfect proof. The sharp, clean crunch of raw rhubarb stalks dipped into a creamy, protein-rich yogurt base is incredibly refreshing on a humid afternoon. The yogurt is light and airy, whipped with a hint of maple syrup to temper the rhubarb’s acidity, creating a snack that feels indulgent but leaves you feeling energized and light.
Ingredients
- 2 cups plain Greek yogurt (full fat recommended for creaminess)
- 2 tablespoons pure maple syrup
- 1/2 teaspoon ground cardamom
- 3-4 slender rhubarb stalks, sliced into thin matchsticks
- 1/2 cup crushed pistachios
How to make it
- Start by preparing the yogurt base: in a medium bowl, whisk the Greek yogurt, maple syrup, and ground cardamom together vigorously for about 2 minutes. This incorporates air, making the dip feel lighter and more mousse-like in texture.
- Taste the mixture and adjust the sweetness if necessary. The cardamom adds a sophisticated, spicy undertone that complements the tartness of the rhubarb beautifully.
- Spread the yogurt mixture in a shallow layer across a small marble or ceramic board. Using the back of a spoon, create decorative swirls and ‘wells’ in the yogurt to catch the toppings.
- Top the yogurt with the crushed pistachios, which provide a necessary salty crunch and a pop of green color.
- Arrange the rhubarb matchsticks around the yogurt dip. Ensure the rhubarb is sliced very thin (about 1/8th of an inch) so that it is easy to bite and provides a crisp, refreshing snap rather than a tough chew.
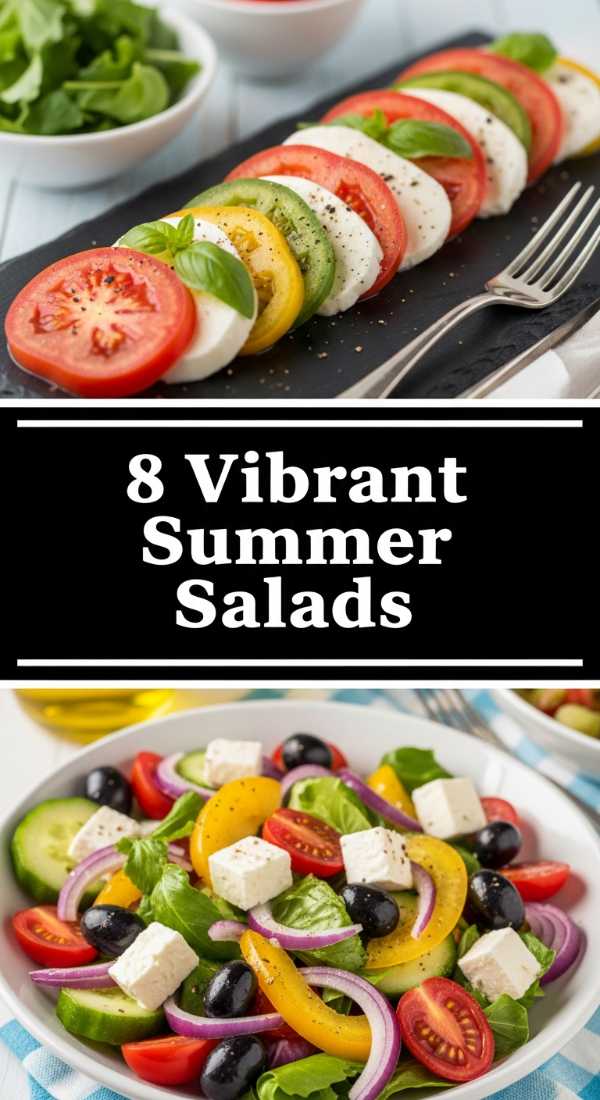
8 Fresh Summer Salads for Every BBQ
Why we love this
The deconstructed heirloom tomato salad board is a visual feast that celebrates the peak of harvest season. There is nothing quite like the smell of sun-warmed tomatoes and bruised basil leaves filling the air. Each slice of tomato is a heavy, juice-filled jewel of red, yellow, and purple, paired with creamy mozzarella and a drizzle of punchy balsamic glaze. It’s the kind of dish that encourages guests to build their own perfect bite, making the meal feel interactive and alive.
Ingredients
- 4-5 large heirloom tomatoes of various colors
- 2 balls of fresh buffalo mozzarella
- 1 bunch fresh Genovese basil
- Extra virgin olive oil (the good stuff)
- Balsamic glaze and flaky sea salt
How to make it
- Slice your heirloom tomatoes into thick, substantial rounds (about 1/2 inch thick). Using a variety of shapes and sizes creates a more rustic, appetizing look on the board.
- Tear the buffalo mozzarella by hand rather than slicing it with a knife. This creates craggy edges that are better at holding the olive oil and balsamic glaze, resulting in a more flavorful experience.
- Arrange the tomato slices on a large wooden board in an overlapping circular pattern, tucking the torn pieces of mozzarella into the gaps between the tomatoes.
- Tuck fresh basil leaves throughout the arrangement. For the best aroma, clap the basil leaves between your hands before placing them; this ‘wakes up’ the essential oils in the leaves.
- Generously drizzle the entire board with high-quality extra virgin olive oil and a zig-zag of balsamic glaze. Finish with a heavy sprinkle of flaky sea salt, which draws out the tomato juices and adds a delightful crunch to every bite.
6 Flavorful Ways to Use Fresh Chives

Why we love this
Chives are the unsung heroes of the herb garden, and a Whipped Chive Butter Board is the ultimate way to showcase their delicate onion-and-garlic profile. The butter is whipped until it’s as light as a cloud, then folded with emerald-green snips of fresh chives that provide a subtle, peppery bite. Spread onto warm, crusty baguette slices, it melts into every crevice, releasing an aroma that is savory, buttery, and utterly addictive.
Ingredients
- 2 sticks high-quality salted butter (softened to room temperature)
- 1 large bunch fresh chives, finely minced
- 1 clove garlic, pasted
- 1 teaspoon lemon zest
- Edible flower petals (optional)
How to make it
- Ensure your butter is truly at room temperature; it should be soft enough that a finger leaves an easy indentation. Place the butter in a stand mixer or a bowl with a hand mixer.
- Whip the butter on high speed for at least 3 to 5 minutes. You are looking for the color to lighten significantly (becoming almost white) and for the volume to double as air is incorporated.
- Fold in the finely minced chives, garlic paste, and lemon zest using a spatula. Do not over-mix at this stage; you want the flecks of green chives to be visible and evenly distributed throughout the pale butter.
- Using an offset spatula or the back of a spoon, spread the whipped butter onto a clean wooden board in decorative, sweeping motions. Create little ridges and peaks that look inviting and artisanal.
- Scatter a few more fresh chives and optional edible flower petals over the top for a professional finish. Serve with warm, sliced artisan bread or crackers, encouraging guests to swipe through the butter directly from the board.
10 Simple Rhubarb Desserts for Beginners
Why we love this
For those new to baking, a Rhubarb Galette Board is a foolproof way to impress. The crust is intentionally rustic and ‘imperfect,’ which is exactly where its charm lies. The scent of buttery pastry baking in the oven alongside the tart, jammy rhubarb is the ultimate comfort. Served on a board with small bowls of vanilla bean whipped cream, it’s a tactile, cozy dessert that invites everyone to tear off a piece and dive in.
Ingredients
- 1 pre-made pie crust (or homemade shortcrust)
- 3 cups sliced rhubarb
- 1/2 cup sugar plus 1 tablespoon for dusting
- 1 tablespoon cornstarch
- 1 egg (for wash)
How to make it
- Preheat your oven to 400°F (200°C). Roll out your pie crust on a piece of parchment paper until it is about 12 inches in diameter. It doesn’t need to be a perfect circle!
- In a bowl, toss the sliced rhubarb with 1/2 cup of sugar and the cornstarch. The cornstarch is vital as it thickens the juices that the rhubarb releases, preventing a soggy crust.
- Pile the rhubarb mixture into the center of the dough, leaving a 2-inch border all the way around the edge.
- Fold the edges of the dough over the rhubarb, pleating it as you go to create a rustic rim. The center should still be open, exposing the fruit.
- Brush the crust with a beaten egg and sprinkle with the remaining tablespoon of sugar for a golden, crunchy finish. Bake for 30-35 minutes until the crust is deep golden brown and the fruit is bubbling. Slide the parchment onto a board and serve warm.
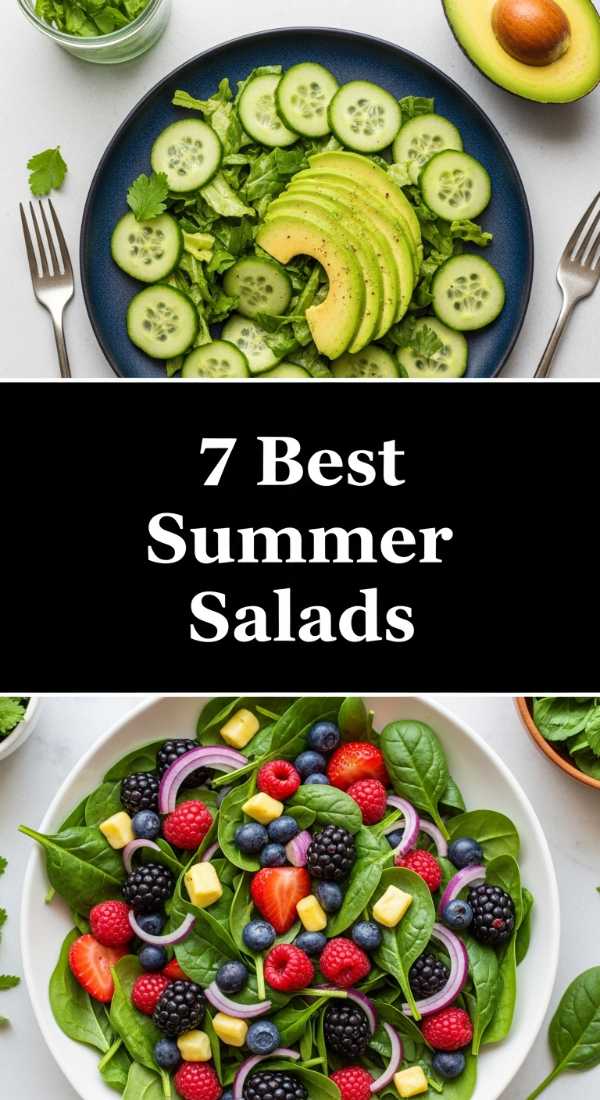
7 Best Summer Salads You’ll Make Weekly

Why we love this
The Watermelon and Feta Board is the ultimate refresher for those sweltering July afternoons. The contrast between the ice-cold, crunchy sweetness of the watermelon and the salty, creamy crumbles of feta is a culinary match made in heaven. Every bite feels like a splash of cold water, accented by the cool tingle of fresh mint. It’s a clean, vibrant dish that looks like a party on a platter and requires zero cooking.
Ingredients
- 1 small seedless watermelon, cubed
- 200g block of high-quality feta cheese
- 1/2 red onion, thinly shaved
- 1/2 cup fresh mint leaves, torn
- Lime wedges for squeezing
How to make it
- Chill your watermelon in the refrigerator for at least 4 hours before preparation. A cold watermelon is essential for the texture and refreshing quality of this board.
- Cut the watermelon into uniform 1-inch cubes and arrange them in a single layer across a large, flat board. Avoid stacking them too high so that the toppings can reach every piece.
- Crumble the feta cheese over the watermelon by hand. Use a block of feta kept in brine for the best flavor and moisture; pre-crumbled feta can often be too dry for this application.
- Scatter the thinly shaved red onion over the top. To take the bite out of the onions, soak the slices in ice water for 10 minutes before drying and adding them to the board.
- Finish with a generous amount of torn mint leaves and a final squeeze of fresh lime juice across the entire board. The lime juice acts as a bridge between the sweet fruit and the salty cheese.
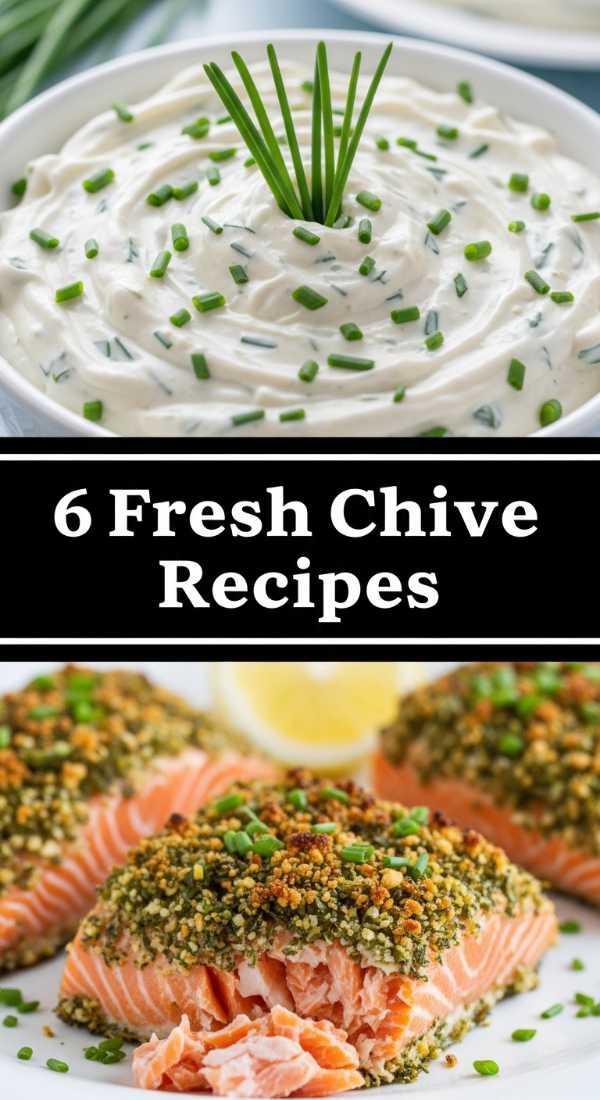
5 Delicious Recipes Starring Fresh Chives
Why we love this
This Chive and Smoked Salmon Cream Cheese Board is a brunch-lover’s dream. The velvety smoothness of the cream cheese is punctuated by the sharp, fresh snap of garden chives, providing a canvas for the silky, salty smoked salmon. It’s an aromatic experience—the sea-salt scent of the fish combined with the earthy herbiness of the chives. It feels luxurious and indulgent, yet it’s incredibly simple to assemble for a morning gathering.
Ingredients
- 250g cream cheese, softened
- 100g smoked salmon, sliced into ribbons
- 1/4 cup fresh chives, chopped
- 1 tablespoon capers, drained
- Everything bagel seasoning
How to make it
- In a small bowl, mix the softened cream cheese with half of the chopped chives until well combined. The cream cheese should be easy to spread; if it’s too stiff, add a teaspoon of milk to loosen it up.
- Spread the cream cheese mixture onto a slate or wooden board, creating deep ‘swooshes’ with a knife to provide plenty of surface area for the toppings.
- Artfully drape the ribbons of smoked salmon over the cream cheese. Fold them loosely so they have volume and height, making the board look more bountiful.
- Sprinkle the capers and the remaining chives over the salmon. The capers add a burst of briny acidity that cuts through the rich cream cheese and fatty salmon.
- Finish with a dusting of everything bagel seasoning for crunch and serve with toasted bagels or pumpernickel bread on the side.
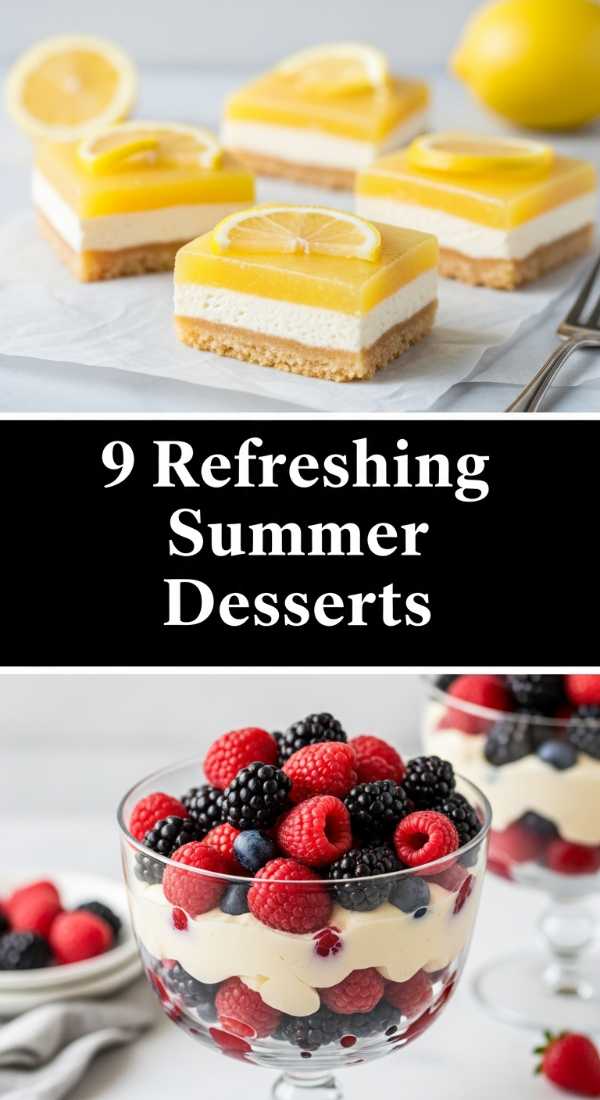
9 Refreshing Summer Desserts for Hot Days

Why we love this
When the heat is unbearable, the Frozen Berry and Honey Yogurt Board is your best friend. This is essentially a giant sheet of healthy ‘bark’ served on a board. The berries are frozen into a state of icy sweetness, while the honey adds a floral stickiness that keeps you coming back for more. It’s a sensory delight—the cold snap of the yogurt, the burst of frozen juice from the berries, and the smooth, cold finish.
Ingredients
- 500g full-fat Greek yogurt
- 1 cup mixed berries (blueberries, raspberries, strawberries)
- 3 tablespoons honey
- 1/4 cup granola
- Fresh mint for garnish
How to make it
- Line a large baking sheet with parchment paper. Spread the Greek yogurt over the parchment in an even layer about 1/2 inch thick. Try to make the edges slightly thicker so they don’t melt as quickly.
- Press the mixed berries into the yogurt. Large strawberries should be sliced, while blueberries and raspberries can be left whole.
- Drizzle the honey in a lattice pattern over the berries and yogurt. The honey will partially freeze, creating a chewy, candy-like texture.
- Sprinkle the granola over the top for a much-needed crunch. Place the tray in the freezer for at least 3-4 hours, or until the yogurt is completely solid.
- Once frozen, peel the yogurt off the parchment and break it into large, irregular shards. Arrange the shards on a chilled wooden board and serve immediately before it begins to soften.
6 Healthy Summer Salads for Weight Loss
[IMAGE_10]
Why we love this
The Cucumber and Radish Crunch Board is the epitome of clean eating without sacrifice. This board focuses on the extreme hydration and crispness of garden-fresh vegetables. The aroma is incredibly green and fresh, like a garden after a rainstorm. The peppery bite of the radishes contrasts beautifully with the mild, watery crunch of the cucumbers, all tied together by a light, zesty lemon-tahini drizzle that adds creaminess without the heavy calories.
Ingredients
- 2 English cucumbers, sliced into rounds
- 1 bunch red radishes, thinly sliced
- 2 tablespoons tahini
- 1 tablespoon lemon juice
- 1 teaspoon toasted sesame seeds
How to make it
- Prepare your vegetables by slicing them as thinly as possible. Using a mandoline slicer is recommended for the radishes to achieve that translucent, paper-thin quality that makes them less aggressive in flavor.
- Arrange the cucumber rounds in a ‘shingle’ pattern across the board, then scatter the radish slices over the top to create layers of pink and green.
- In a small jar, whisk together the tahini, lemon juice, and a splash of water until you have a pourable consistency. Tahini varies in thickness, so add water one teaspoon at a time until it is perfect.
- Drizzle the dressing over the vegetables in a thin stream. You don’t want to drown them; the goal is to lightly coat the slices to enhance their natural flavors.
- Finish with a sprinkle of toasted sesame seeds for a nutty aroma and a bit of visual texture. This board is best served very cold, so keep the veggies in the crisper drawer until the moment of assembly.
Conclusion: Embracing the Ease
The simple food board trend isn’t just about what we eat; it’s about how we gather. By stripping away the complexity, we make room for what truly matters: the flavors of the season and the people we share them with. Whether it’s the tart zing of rhubarb or the fresh snap of chives, these minimalist boards prove that sometimes, less really is so much more.