
10 Viral Home Decor Trends That Are Actually Worth the Hype
Hello, my sweet loves! Today I am welcoming you into my sanctuary with a big, warm hug. Lately, I’ve been spending so much time reflecting on how our homes aren’t just four walls and a roof, but a cloud-soft embrace for our souls at the end of a long day. We deserve a space that reflects our inner light, and I’ve been scrolling through so many viral trends that just make my heart skip a beat.
I know how overwhelming it can be when your feed is flooded with ‘aesthetic’ homes that feel a bit out of reach. That’s why I’ve curated this special list of wall decor trends that are actually doable, affordable, and oh-so-dreamy. We’re going to walk through these together, step-by-step, turning those bare patches into beautiful stories. Let’s create some magic in your home today, shall we?
7 Easy Ways to Style Outdoor Wall Decor
Why we love this
There is something so incredibly soul-soothing about extending your living space into the great outdoors. Styling your outdoor walls allows you to create a secret garden vibe that feels like a private escape from the noisy world. It softens the harsh lines of fences and brick, making your patio feel like a lush, cozy room under the stars. When we treat our outdoor spaces with the same love as our interiors, magic truly happens every single evening.
Ingredients
- Weather-resistant metal wall art
- Outdoor-rated mirrors
- Cedar wood lattice panels
- String lights with mounting clips
- Hanging wall planters
- UV-resistant faux greenery
- Outdoor command hooks
How to make it
- Begin by thoroughly cleaning the outdoor surface to ensure any adhesives or mounting hardware will stay secure through the seasons.
- Install a central lattice panel or a large piece of metal art to act as the primary focal point of the wall.
- Mount outdoor-rated mirrors at eye level to reflect the surrounding greenery and create the illusion of a much larger garden space.
- Secure hanging planters at varying heights around your central piece to add texture and a sense of vertical movement.
- Intertwine delicate string lights through the decor pieces to ensure the wall glows beautifully after the sun goes down.
- Add small decorative accents like metal butterflies or dragonflies to fill in any gaps for a whimsical, layered effect.
- Check all attachments to ensure they are wind-resistant and apply a clear weather-proofing spray if using natural wood elements.
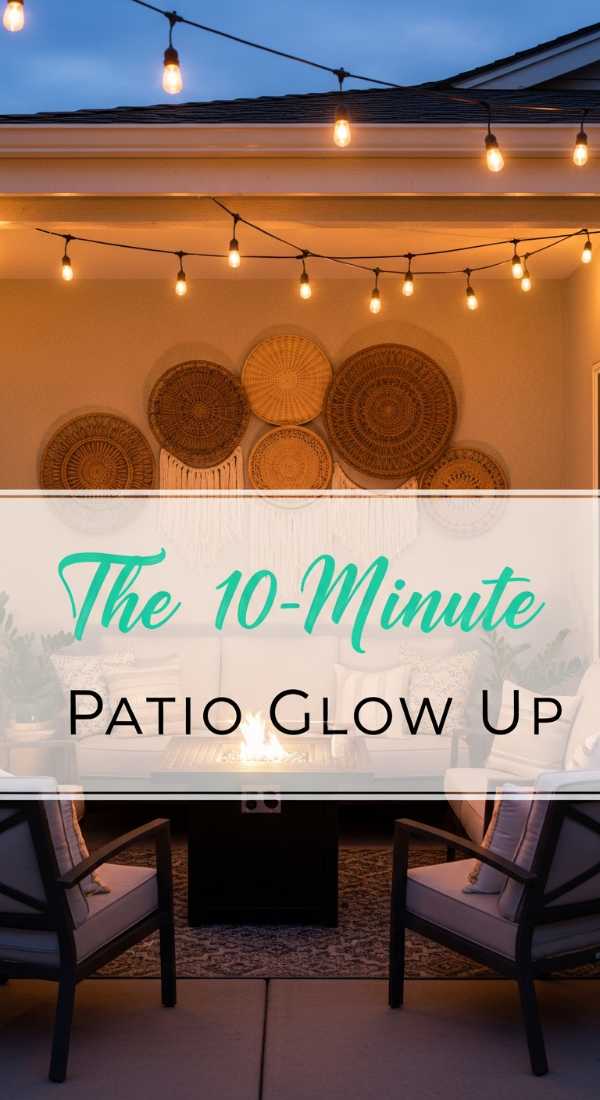
How to Get the Luxury Patio Wall Decor Look in 10 Minutes
Why we love this
We all deserve that high-end resort feeling without having to book a flight or break the bank. This look is all about sleek lines and sophisticated textures that make your morning coffee feel like a five-star experience. It’s about creating a polished, intentional atmosphere that looks like it was curated by a professional designer in just a few moments. You’ll be amazed at how a few bold, luxurious choices can completely elevate your spirit and your home’s exterior.
Ingredients
- Large-scale composite stone panels
- Black matte solar sconces
- Modern minimalist address numbers
- High-gloss oversized planters
- Industrial-strength outdoor adhesive
How to make it
- Identify a blank section of your patio wall that is visible from your main seating area to maximize the visual impact.
- Apply the industrial-strength adhesive to the back of your lightweight composite stone panels and press them firmly onto the wall.
- Space the panels evenly to create a contemporary grid pattern that mimics expensive architectural masonry work.
- Mount your matte black solar sconces on either side of the panels to provide sophisticated, cord-free lighting.
- Attach modern, oversized house numbers or a singular bold metal monogram to the center of the panel arrangement.
- Place your high-gloss planters at the base of the wall to ground the design and add a touch of polished greenery.
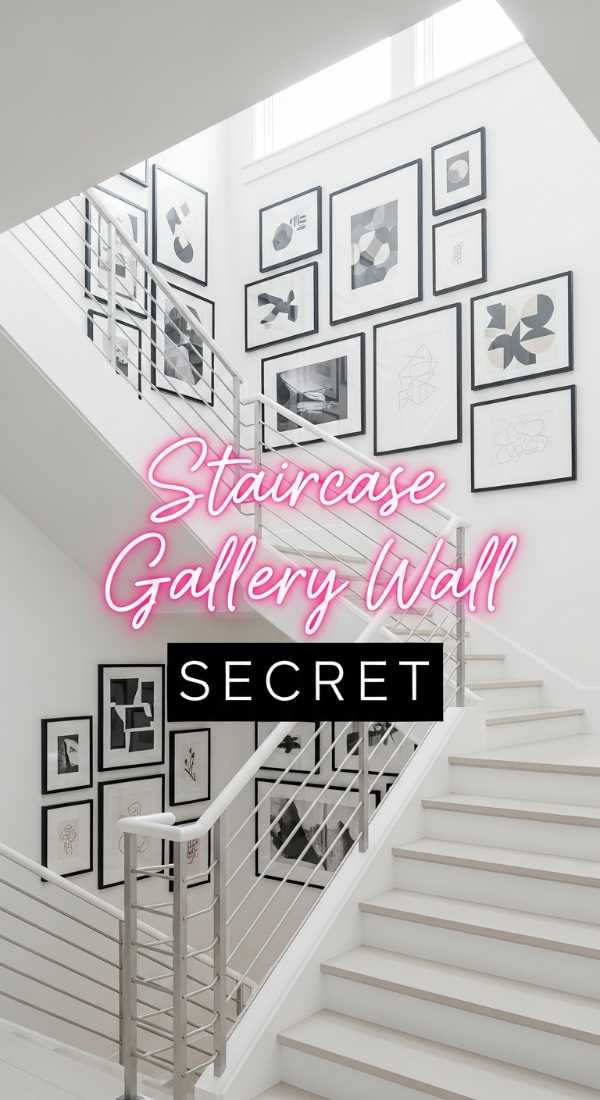
5 Steps to Create the Ultimate Stairs Wall Decor Gallery
Why we love this
The staircase is often the ‘spine’ of the home, yet we so frequently leave those walls empty and cold. A well-curated gallery wall here turns a functional transition into a beautiful journey through your favorite memories and artistic tastes. It adds so much warmth and character to a space that you pass through dozens of times a day, making every trip upstairs a delight. It’s the perfect way to display a collection that grows with your family over the years.
Ingredients
- Assorted frames in a unified color palette
- Kraft paper for templates
- Painter’s tape
- Level and measuring tape
- Hammer and picture nails
- Wall putty for stabilization
How to make it
- Trace each of your frames onto Kraft paper and cut them out to create lightweight templates for planning your layout.
- Tape the paper templates to the wall along the incline of the stairs, maintaining a consistent 2-3 inch gap between each piece.
- Step back frequently to ensure the overall shape of the gallery follows the angle of the handrail for a harmonious flow.
- Drive your nails directly through the paper templates to ensure perfect placement without leaving unnecessary marks on your walls.
- Remove the paper and hang your actual frames, using a level to make sure every single piece is perfectly straight.
- Apply a small dot of wall putty to the bottom corners of each frame to keep them from shifting when people walk up and down the stairs.
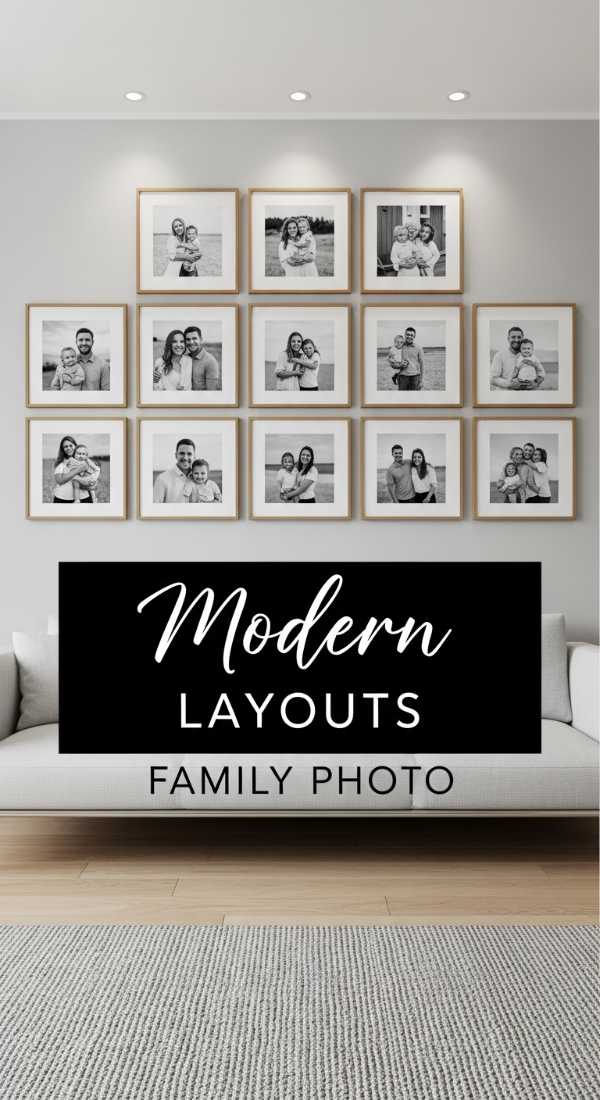
9 Easy Ways to Display Family Photos Wall Decor Like a Pro
Why we love this
There is nothing more precious than the faces of the people we love, and displaying them should feel like an art form. This trend moves away from cluttered tabletops and toward a sophisticated, professional gallery look that celebrates your history. It turns your home into a living scrapbook that feels organized, intentional, and deeply emotional all at once. It’s about honoring your heritage while maintaining a modern, clean aesthetic that fits perfectly with your lifestyle.
Ingredients
- Black and white printed photos
- Matte boards for framing
- Uniform gallery frames
- Picture rail or floating shelves
- Dimmable picture lights
- Adhesive spacers
How to make it
- Convert all your selected photos to black and white or a consistent sepia tone to create a cohesive and professional appearance.
- Use oversized white matte boards within your frames to give the photos breathing room and a high-end gallery feel.
- Arrange the frames in a strict grid pattern for a modern look, or a staggered ‘salon’ style for something more eclectic.
- Install floating shelves if you prefer to lean your photos, allowing for easy swapping as your family grows and changes.
- Add a battery-operated picture light above the most significant photos to draw the eye and create a cozy evening ambiance.
- Use adhesive spacers on the back of the frames to keep them perfectly parallel to the wall and prevent any tilting.
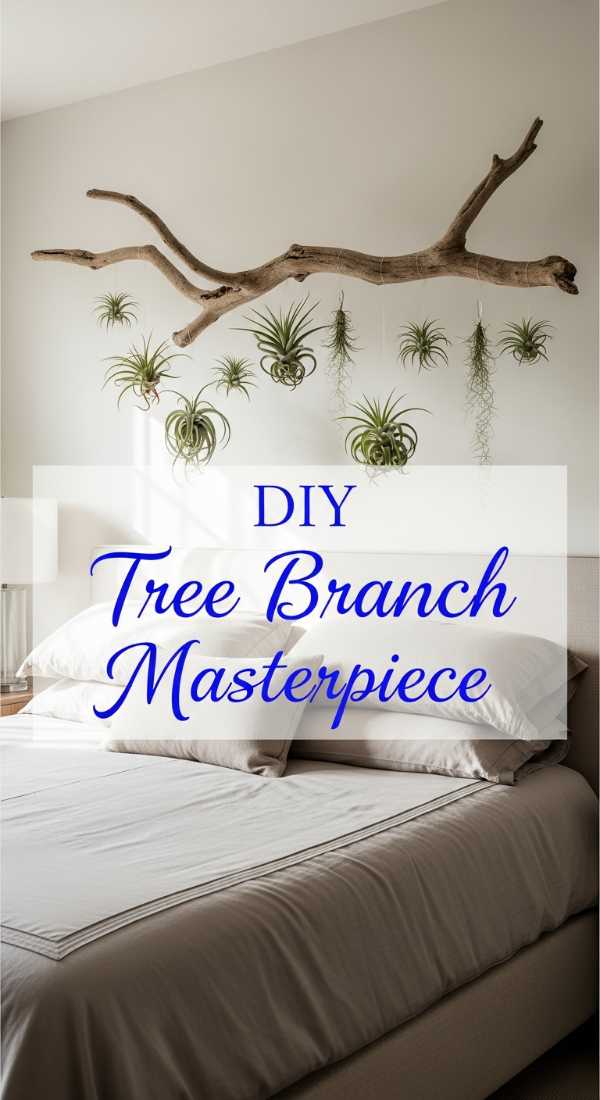
3 Steps to Create Stunning Tree Branch Wall Decor for $0

Why we love this
Bringing a piece of nature inside is one of the most grounding things we can do for our home environments. This DIY project is a beautiful reminder that style doesn’t have to be expensive; sometimes the best decor is waiting for us in our own backyards. It adds an organic, sculptural element to your room that feels soft, rustic, and completely unique to you. It’s a wonderful way to celebrate the changing seasons and bring a bit of the wild woods into your cozy sanctuary.
Ingredients
- A large, interestingly shaped fallen branch
- Fine-grit sandpaper
- Clear matte sealant (optional)
- Natural jute twine or fishing line
- Wall hooks or sturdy nails
How to make it
- Forage for a branch that has unique twists or ‘arms’ and ensure it is completely dry and free of any loose bark or debris.
- Lightly sand the surface of the branch to remove sharp edges and apply a clear matte sealant to preserve the wood and prevent dusting.
- Determine the orientation that looks most artistic and secure two points of contact on the wall using heavy-duty hooks.
- Wrap jute twine around the ends of the branch and suspend it from the hooks, or mount it directly onto the wall for a floating look.
- Drape lightweight items like air plants, small photos, or even vintage lanterns from the branch’s smaller twigs to add layers of interest.
How to Get the Authentic Mexican Wall Decor Look in 15 Minutes

Why we love this
The vibrant colors and rich textures of Mexican-inspired decor bring such an incredible energy and warmth into any room. It’s a celebration of craftsmanship, culture, and ‘alegría’ (joy) that instantly makes a space feel more welcoming and lived-in. This look is perfect for those who want to move away from neutrals and embrace a bold, sun-drenched palette. It feels like a permanent vacation for your eyes, filled with history and hand-painted charm that tells a beautiful story.
Ingredients
- Hand-painted Talavera tiles
- Woven palm leaf hats or baskets
- Pressed tin (Hojalata) mirrors
- Woven textile wall hanging (Sarape)
- Heavy-duty mounting tape
How to make it
- Select a central ‘Hojalata’ tin mirror as your anchor piece, as its reflective surface and intricate patterns will draw the eye immediately.
- Arrange a cluster of hand-painted Talavera tiles around the mirror using heavy-duty mounting tape for a colorful, mosaic-like border.
- Flank the mirror with a few woven palm hats or baskets to add organic texture and a sense of traditional artisanal craft.
- Hang a vibrant, colorful Sarape or woven textile below the mirror to soften the look and introduce a variety of bold patterns.
- Ensure the lighting in the room is warm to accentuate the rich reds, blues, and yellows typical of this beautiful design style.
10 Easy Ways to Upgrade Your Wall Decorations Today
Why we love this
Sometimes our homes just need a little ‘pick-me-up’ without a full renovation or a massive shopping trip. These quick upgrades are all about working with what you have and adding small, thoughtful touches that make a huge impact. It’s the perfect way to refresh your space on a lazy Sunday afternoon and fall in love with your walls all over again. Small changes can shift the entire energy of a room, making it feel brand new, polished, and perfectly curated just for you.
Ingredients
- Washi tape in metallic or black
- Rub ‘n Buff metallic wax
- Battery-operated puck lights
- Command picture hanging strips
- Decorative cord covers
How to make it
- Create ‘instant frames’ around posters or flat art by using washi tape to create clean, geometric borders directly on the wall.
- Apply a tiny bit of metallic wax to your existing thrifted frames to give them a high-end, gilded look in under five minutes.
- Hidden puck lights placed behind large canvases or under shelves can create an expensive ‘wash’ of light that highlights your favorite pieces.
- Group small, disparate items together on a single tray or shelf to create a ‘collection’ rather than scattered clutter.
- Use decorative cord covers or paint your existing cords the same color as the wall to make them disappear and create a cleaner look.
- Rotate your artwork between rooms to give your eyes something new to look at without spending a single penny on new decor.
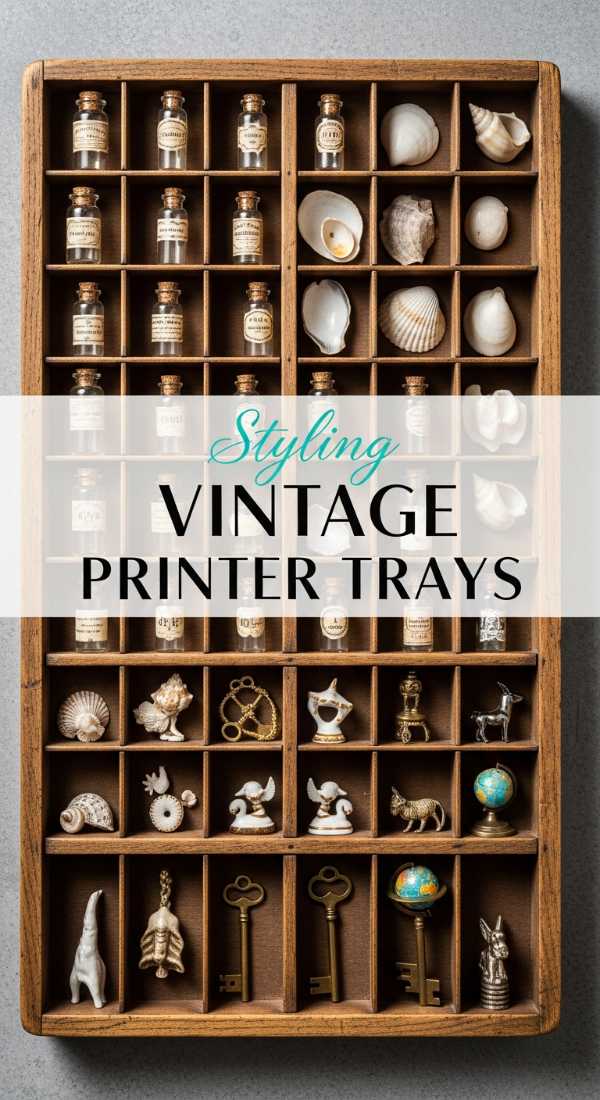
6 Steps to Create a Vintage Printer Tray Wall Decor Masterpiece
Why we love this
Vintage printer trays are like tiny treasure chests for your walls, offering a dozen little windows into your personality. I love how they encourage us to collect small, meaningful trinkets—beach glass, old keys, or tiny crystals—and give them a proper home. It’s a nostalgic and whimsical way to display miniatures that might otherwise get lost in a drawer. This piece becomes a conversation starter that guests will find themselves peering into for ages, discovering new details every time.
Ingredients
- Vintage wood printer tray (shadow box)
- Small collectibles (shells, figurines, etc.)
- Clear craft glue or museum wax
- Sturdy wall anchors
- Microfiber cloth
How to make it
- Clean the vintage tray thoroughly with a damp cloth and a bit of wood soap to remove decades of dust and restore the wood’s luster.
- Install heavy-duty wall anchors, as these trays can become quite heavy once filled with all your beautiful little treasures.
- Lay the tray flat on a table and experiment with the placement of your trinkets before securing anything permanently to the wood.
- Use a tiny dot of clear craft glue or museum wax to secure the more fragile items into their individual cubbies.
- Organize the items by color or theme to create a sense of harmony within the beautiful chaos of the varied compartments.
- Mount the tray at eye level in a hallway or nook where people can stand close enough to appreciate the tiny details you’ve curated.
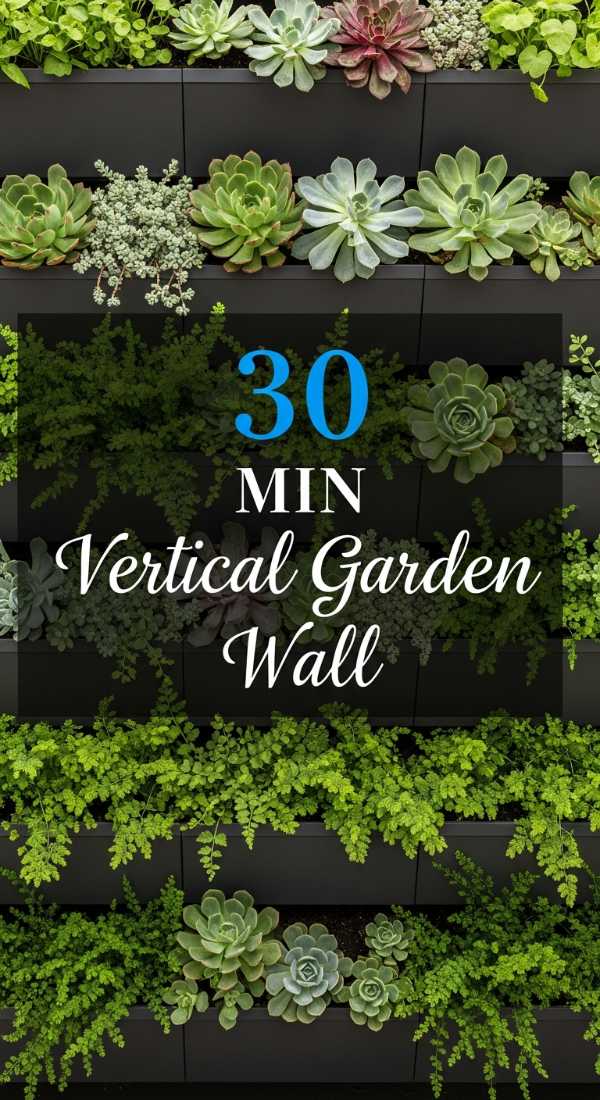
How to Get the Vertical Garden Outdoor Wall Decor Look in 30 Minutes
Why we love this
There is nothing quite as refreshing as a ‘living wall’ that breathes life into your outdoor sanctuary. It’s the ultimate way to bring lush greenery to small spaces like balconies or narrow side yards where floor space is at a premium. Watching your garden grow vertically feels like a miracle, and the scent of fresh herbs or flowers right at eye level is absolutely heavenly. It turns a boring wall into a vibrant, oxygen-rich tapestry that changes beautifully throughout the seasons.
Ingredients
- Vertical felt wall planter pockets
- Lightweight potting mix
- Assorted herbs or trailing succulents
- Power drill and masonry screws
- Watering can with a long neck
How to make it
- Mark the placement of your felt planter on the wall, ensuring it is at a height that is easy for you to reach for daily watering.
- Secure the planter tightly using masonry screws to ensure it can handle the weight of wet soil and growing plants.
- Fill each pocket about two-thirds full with a high-quality, lightweight potting mix designed for moisture retention.
- Carefully tuck your plants into the pockets, placing trailing varieties at the bottom and more upright herbs at the top.
- Firmly press the soil around the roots and add a little extra mix to ensure the plants are snug and secure in their new homes.
- Water each pocket slowly from the top down, allowing the moisture to wick through the felt and reach every single root system.
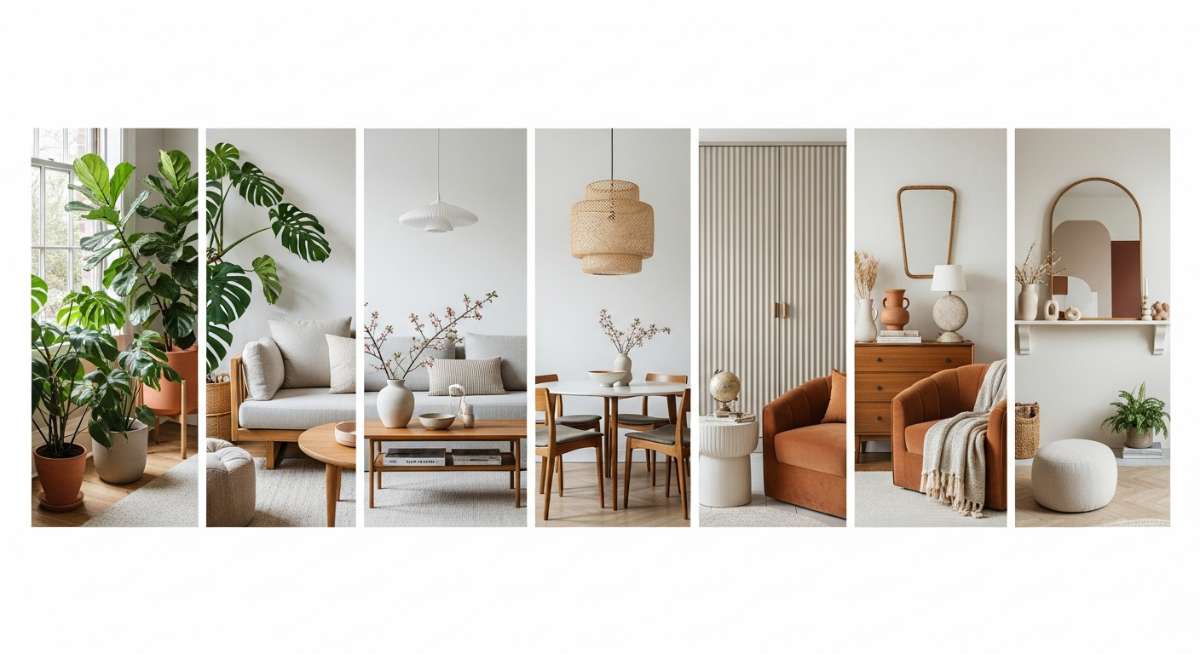
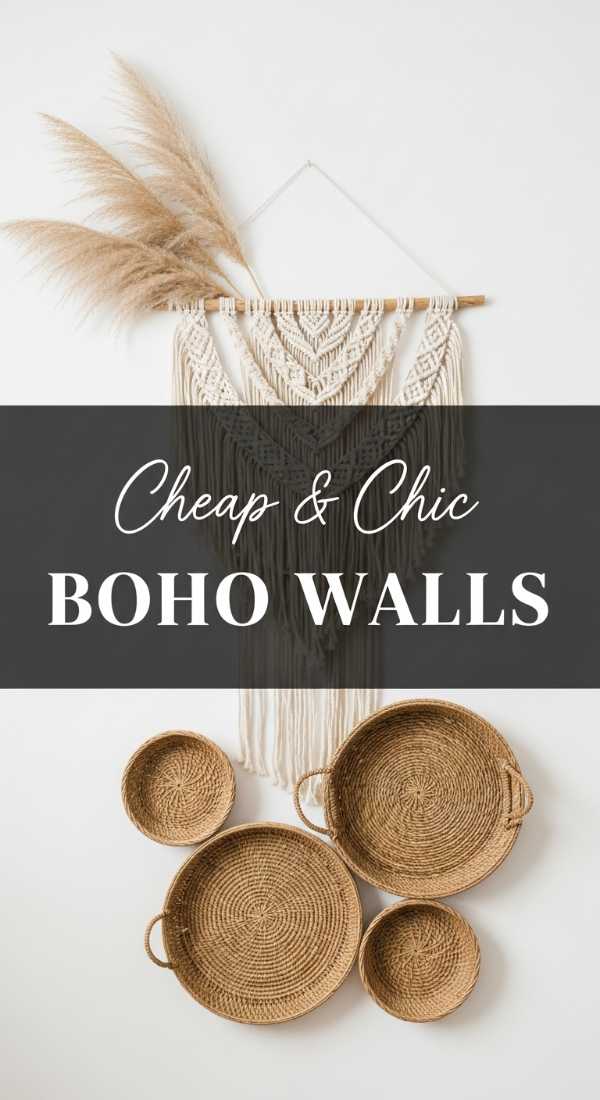
8 Easy Ways to Style Boho Wall Decorations on a Budget
[IMAGE_10]
Why we love this
Boho style is all about that effortless, free-spirited vibe that makes a house feel like a warm, cozy home. It’s a trend that embraces imperfections, natural materials, and layers upon layers of soft textures. I love it because it’s so forgiving and allows you to mix and match items you’ve collected over time. It’s the ultimate way to create a ‘cloud-soft’ environment that feels relaxed, artistic, and deeply personal without needing a huge budget to pull it off.
Ingredients
- Macrame wall hangings
- Dried eucalyptus or pampas grass
- Rattan fans or flat baskets
- Wooden beads and tassels
- Fairy lights
How to make it
- Start with a large macrame piece as your ‘soft’ anchor, hanging it centered above a bed or sofa to instantly add warmth.
- Layer in a few rattan fans or flat woven baskets around the macrame to introduce different shapes and natural woody tones.
- Tuck stems of dried eucalyptus or fluffy pampas grass behind the baskets to add height and a lovely, subtle botanical scent.
- Drape a string of wooden beads across a corner or over a mirror to add a touch of handcrafted, tactile interest.
- Interweave delicate fairy lights through your wall hangings to create a soft, magical glow when the evening arrives.
- Keep the arrangement asymmetrical and slightly ‘undone’ to capture that authentic, relaxed bohemian spirit we all love so much.
With Love and Light
Oh, my loves, I hope these ideas have sparked a little flame of creativity in your hearts today! Remember, your home is a reflection of your beautiful soul, and there are no rules—only what makes you feel peaceful and happy. Whether you’re hanging a simple branch or building a full gallery wall, do it with love. I can’t wait to see how you transform your spaces into the sanctuaries you deserve. Until next time, stay cozy!